Bruder Piggyback Forklift Build Part 11b
(continued from previous post)
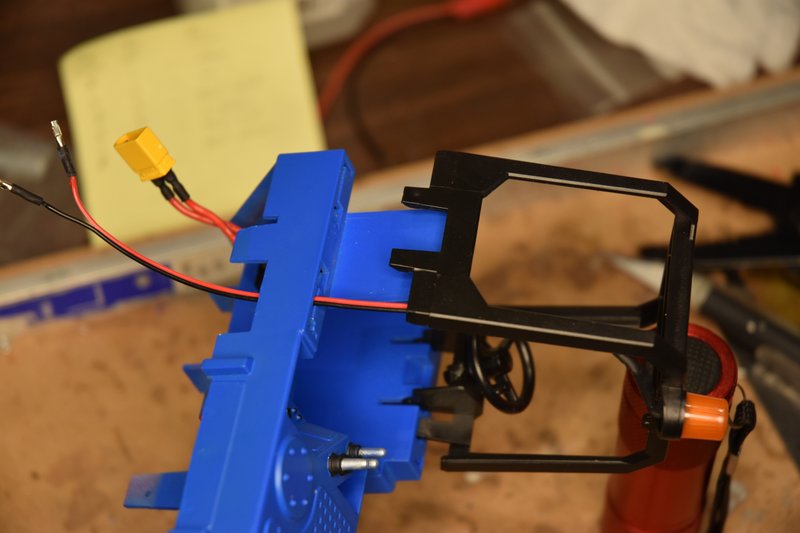
Ran the leads of the warning light on the ROPs through the notch cut earlier in the top part of the body and reinstall the ROPs.
[img]
[/img]
In this photo you can see how the leads to the warning light plug onto the positive and negative pins on the battery port of the receiver. This allows me to completely separate the top and bottom body parts if ever needed.
[img]
[/img]
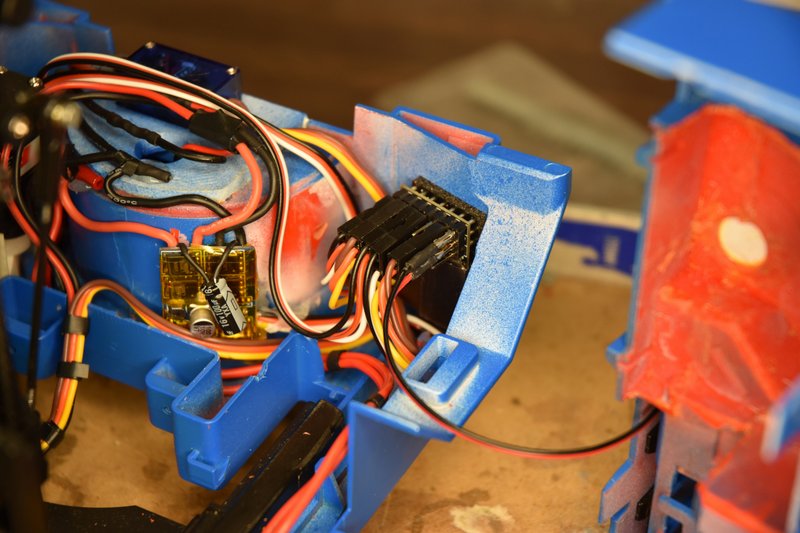
plug the switch leads back together.
[img]
[/img]
Install the battery and plug it in.
[img]
[/img]
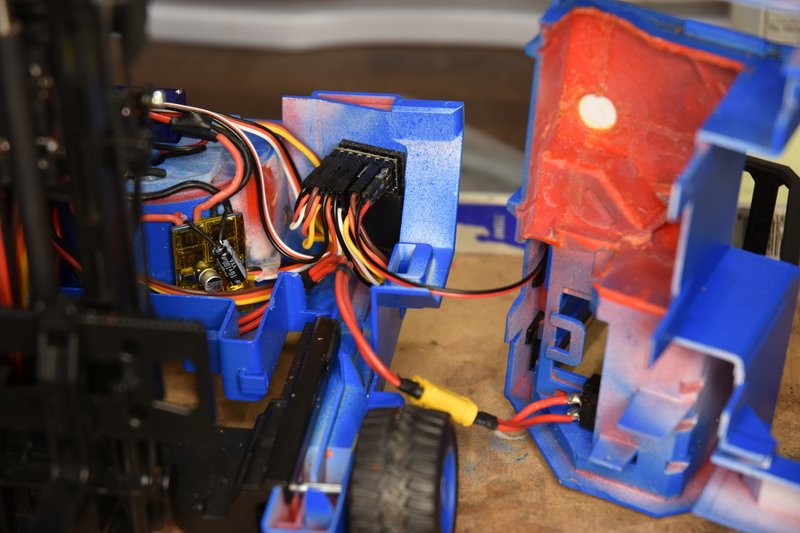
Turn on the transmitter and then flip the master switch and see if everything is going to function. Hooray, Success, let's button this thing up.
SNAG #2 - I started to put the top body section in place and ran into a problem. The right hand side would go together just fine but something was keeping the left hand side from closing, not even close. A quick look down the hole under the drivers seat showed what the problem was. When I checked the clearance between the back of the switch and the receiver earlier the servo leads were not connected. I thought I had enough clearance but because of the size of the XT30 connector I was binding on those servo leads. What to do after I was so close to being done? After a little thought the fix was simple. Pried the receiver off the double sided servo tape and scrapped the tape off the inside of the body. Man that stuff sticks! I then turned the receiver 90 degrees counter-clockwise, moved it over towards the wheel housing and pushed it downward as much as it would go. plenty of clearance. And sorry, but I didn't think to take a photo at this time showing this but if you look at the photo above showing the receiver with everything plugged in and visualize it turned on it's side you'll get the idea. plenty of clearance for the switch connector now.
Alright, put the top back in place, line it up and push it home and , wait, what??? Everything fits except the very back end won't quite go together. Oh for the love of....
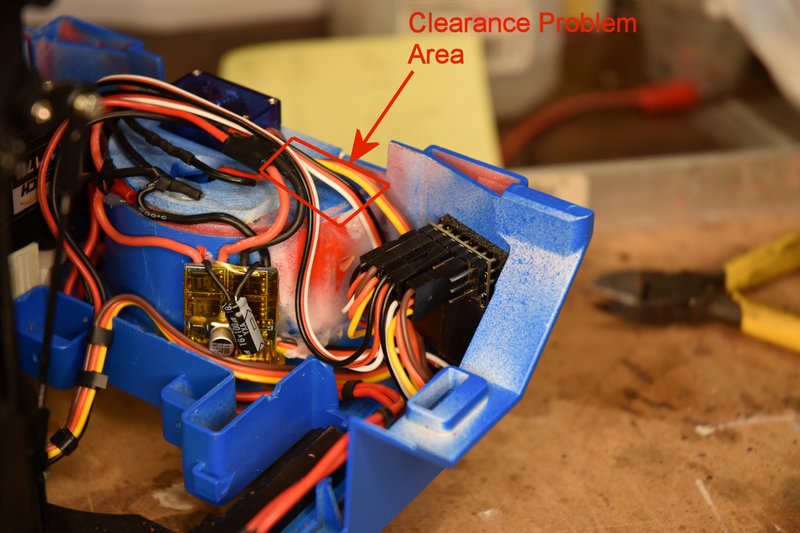
SNAG #3 - Remember the clearance problem I talked about above that forced me to relocate one of the ESCs? Well turns out there's even less room between the top and bottom parts than I thought. I have 3 servo cables lying across that area and they are each only about 1.25mm thick. Apparently there is not even that much room as the cables were keeping the top slightly raised. I could have just squeezed the top and bottom together but I didn't want to put the wires under that kind of pressure. I could have rerun them around the front of the wheel housing but was concerned about generating noise by running more wires that close to an ESC. The fix is simple but frustrating. Very carefully thin the top and bottom body parts in the area where the clearance issue exists.
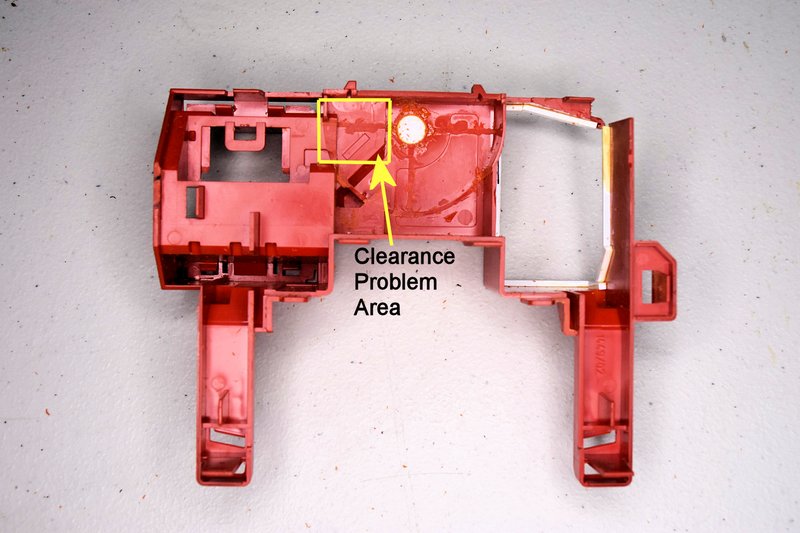
The next two photos show the areas that are the problem and need to be thinned.
[img]
[/img]
[img]
[/img]
Pulling the servo cables off the receiver and moving them out of the way I started thinning by first using a motor-tool on the steering mount to bring the thickness on the left of the steering servo down to match the original body. This can be on a taper. Be careful not to grind the back edge of the part as that will show on the outside. Then using a flat riffler and sanding sticks I slowly thinned the top and bottom bodies in the areas shown above. Taking a little bit off, try the fit, take a little more, etc. until the top and bottom came together. I then rounded the sharp edges where the servo cables ran to minimize stress on them. Fortunately There was plenty of plastic left So I don't feel there is a breaking or cracking hazard. But be careful if using a motor-tool so you don't cut through the body.
You only need about 1.5mm clearance in this area. If you build one of these fork lifts following my process, I would remove the material in this area back when I cut away all the other plastic that has to be removed. An easy way to measure the clearance would be to put a small ball of clay or similar material between the two halves before putting them together and then measuring the height of the squished ball.
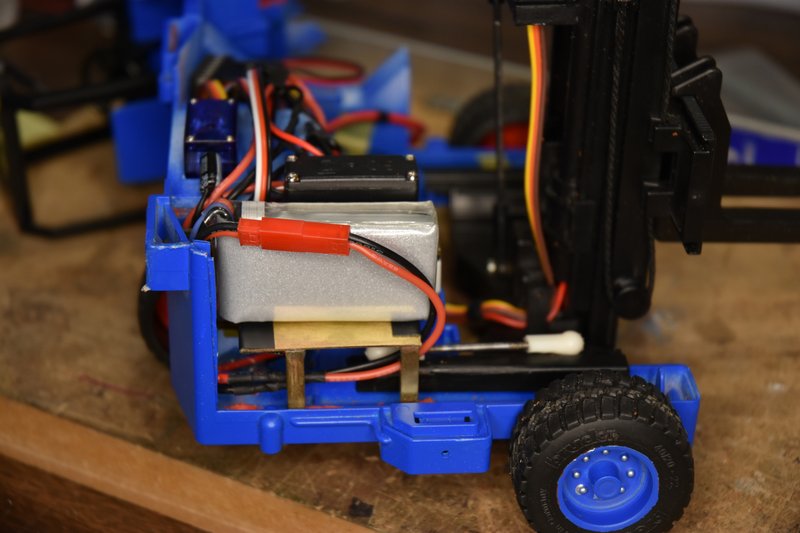
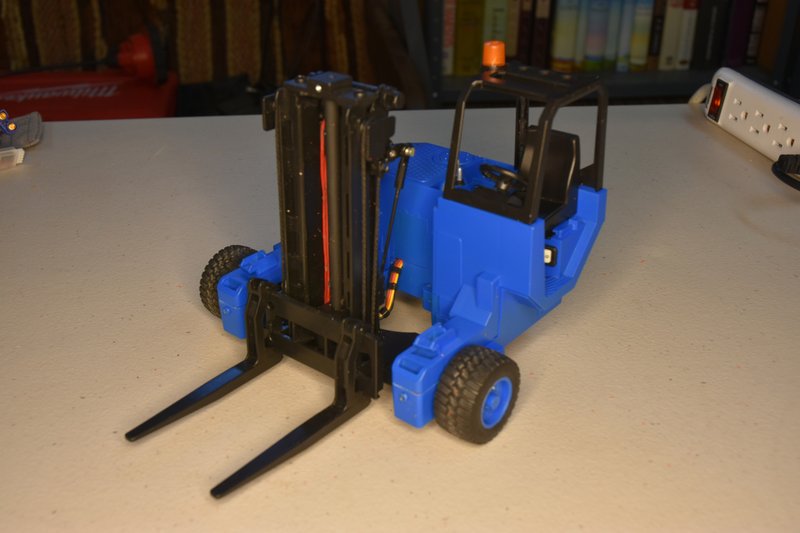
So, did it finally go together? Yes, hallelujah, success at last! One final step, install the operator's seat.
[img]
[/img]
This was an incredibly fun conversion and I am very pleased with how it turned out. Took some experimenting, some designing, some fabrication and a lot of just looking and thinking. Everything I love about this hobby.
If you decide you want to do one of these conversions please post up your results, especially if you do something different. Feel free to add it to this thread if you want. More than one way to skin a cat. Speaking of which, have you noticed how many different ways people have come up with to convert the Bruder D5? Now I've got to figure out how to modify the back of my flatbed trailer so I can haul this thing down the road.