The other issue I wanted to try to address with this build was how to raise and lower the blade by remote control. My research showed several different methods being used, all of which involved cutting holes in the front or sides of the cab. Then there would be a servo horn and linkage, or a lever or other hardware sticking out. I wanted to come up with something that wouldn't be as visually noticable but couldn't figure out what. Then one day I was paging through an online parts catalog and I came across a photo of a LESU bowden cable. And the light bulb came on!
A bowden cable is a very flexible tube made of coiled wire through which a wire slides. The outside can be bent around obsatcles and the inner wire pushed or pulled to operate a mechanism at the other end. Think of a bicycle brake cable. LESu sells theirs primarily to operate the differential locks on their axles with a remote servo. But it is very small in diameter and I figured would be very flexible and able to be bent aound a pretty small radius. Would it be able to lift the blade on the Bruder D5? It's only plastic and doesn't weigh very much. Decided to try and what follows is the method I came up with after a lot of trial and error.
The first step was to figure out how to attach the cable at it's ends. The servo end would be easy as Du-Bro and probably others make connectors especially for connecting these cables to a servo horn. The other end that would operate the lift cylinders was trickier. The hooks that attach the outer cylinder to the pivot pin is as big as the diameter of the cylinder and because of it's shape it wasn't going to be possible to just drill a hole through the back of the cylinder. The 'bottom' of the cylinder is open though and the rod is exposed so I decided to try and embed the operating cable into the bottom of the cylinder.
Started by cutting some grooves in the bottom ends of both cylinder and rod. The operating wire would sit in these grooves and should be pretty well hidden from sight. Here is one cylinder/rod set with grooves cut compared to unmodified set.
[img]
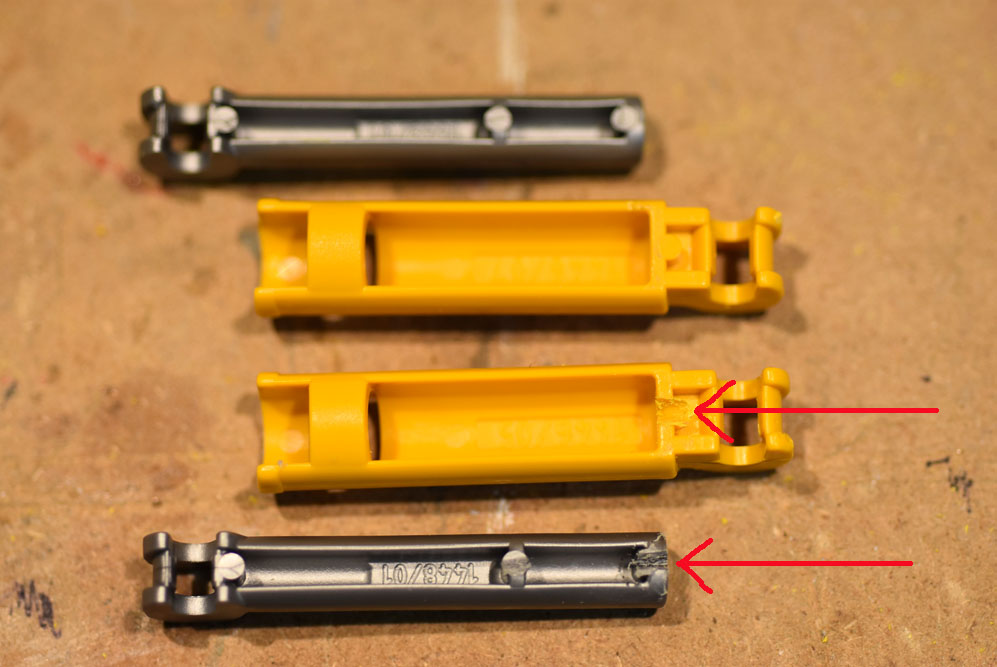
[/img]
The end of the operating cable was bent as shown...
[img]
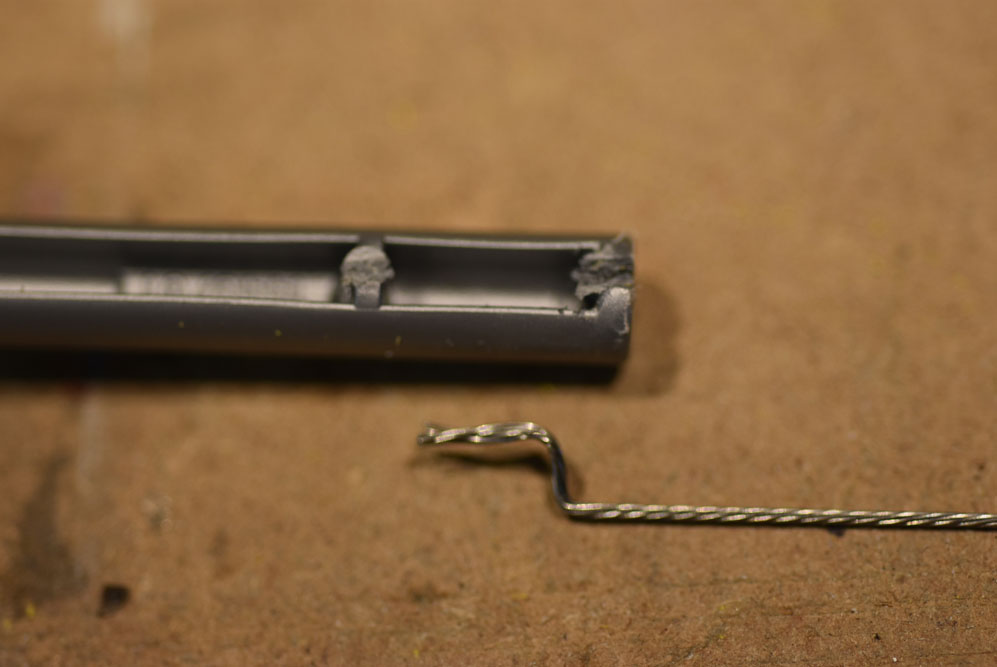
[/img]
...and epoxied into end of rod. I completley filled the end of the rod hoping to give the cable as much support as possible to minimize flexing.
[img]
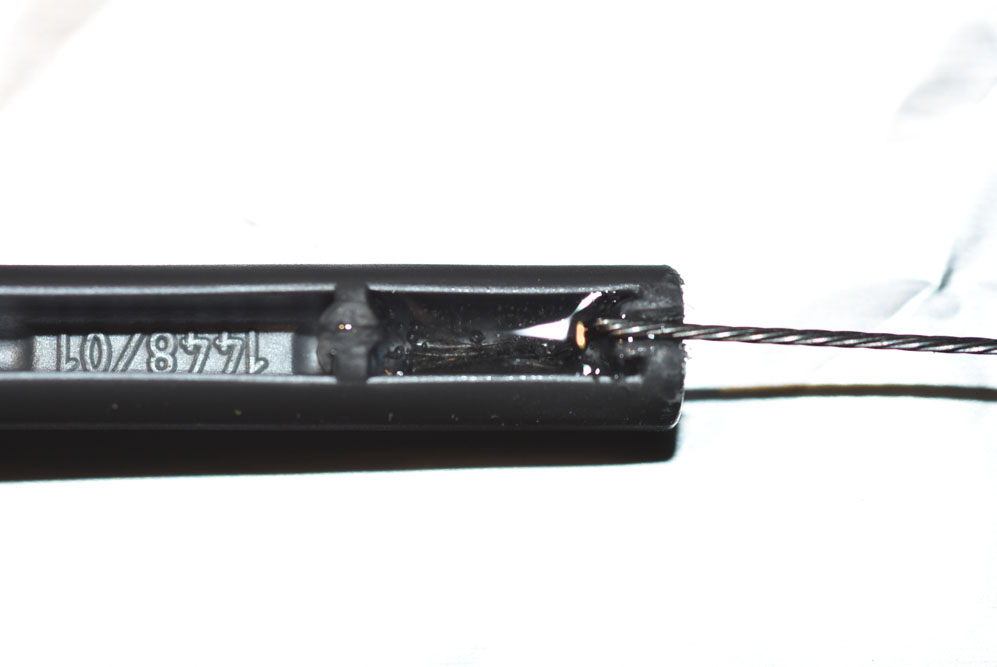
[/img]
Next was to drill a small hole through the cab wall directly behind and just slightly below the centerline of the cylinder pivot. This has to be done from back side. This was done to both sides. This is where the operating cable will come through.
[img]
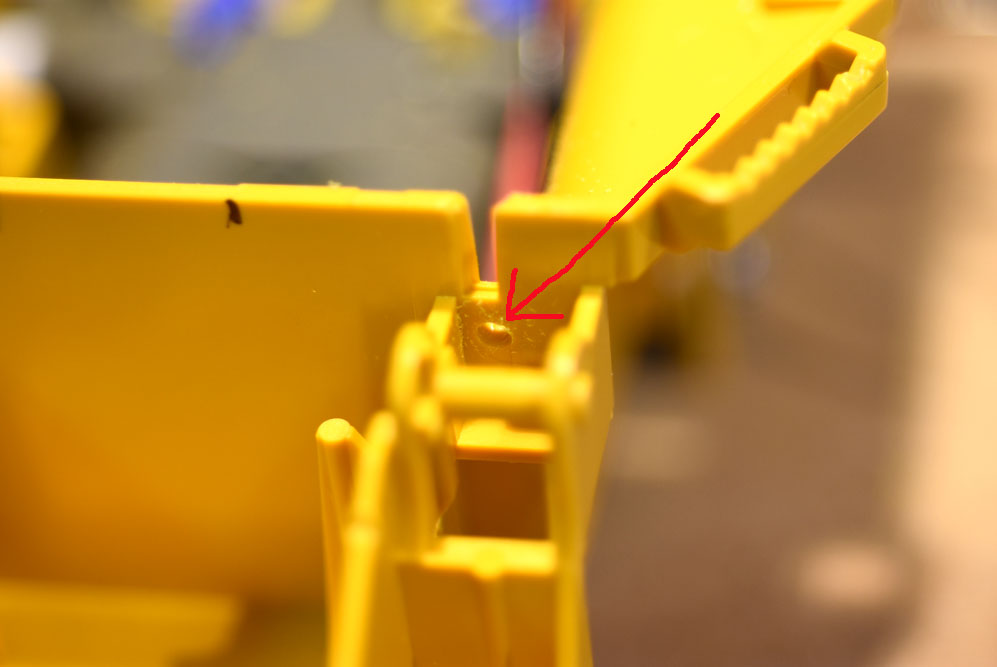
[/img]
Needed to figure out how to clamp or hold the bowden cable in position at the ends and keep it from flexing too much so that all the movement of the inner wire would be straight back and forth. The LESU cable is very small, only about 2mm in diameter, and very flexible which is good and bad. Good because I was actually using two, one for each side, and they needed to be bent into a very tight raidius, half the width of the D5 body. Bad becasue they were so flexible I felt they needed to be supported through their entire length.
What I came up with is the bracket shown below. It is 3d printed and has grooves that the cables just fits into and are fully supported. It goes against the back side of the bulkhead in the center of the D5 bottom and is held in place with two self-tapping screws.
[img]
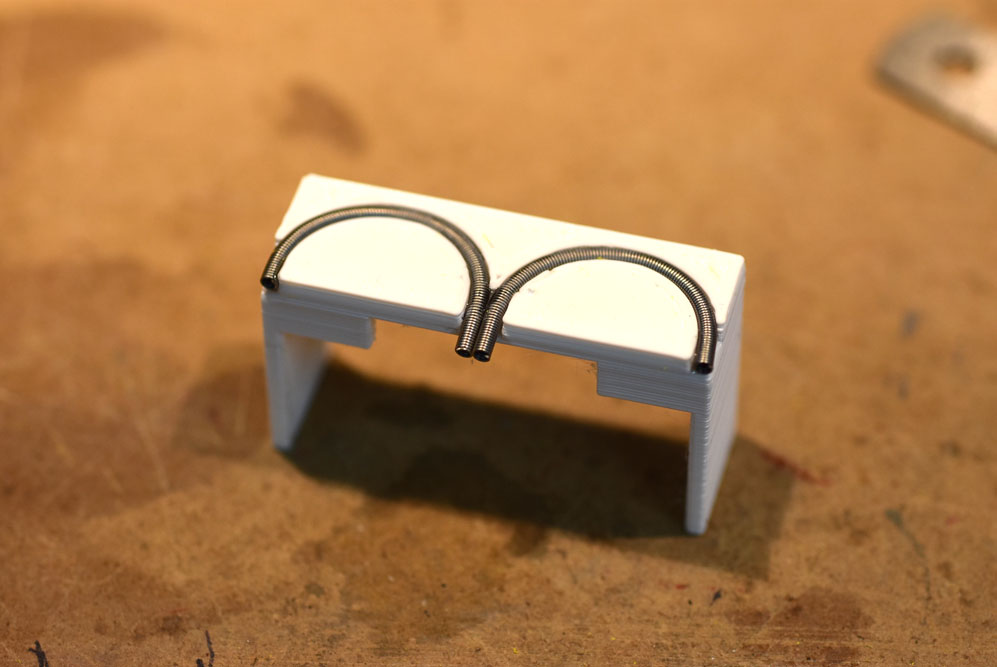
[/img]
The outer tube of the cable is glued in place with some CA and allowed to dry overnight before attempting to put the inner wires back in place. Didn't want to accidently glue the inner wire into the tube.
The rods were then placed back into their cylinders being careful not to kink the wire. The wires were then run through the holes behind the pivot pins and the cylinders snapped back into place.
[img]
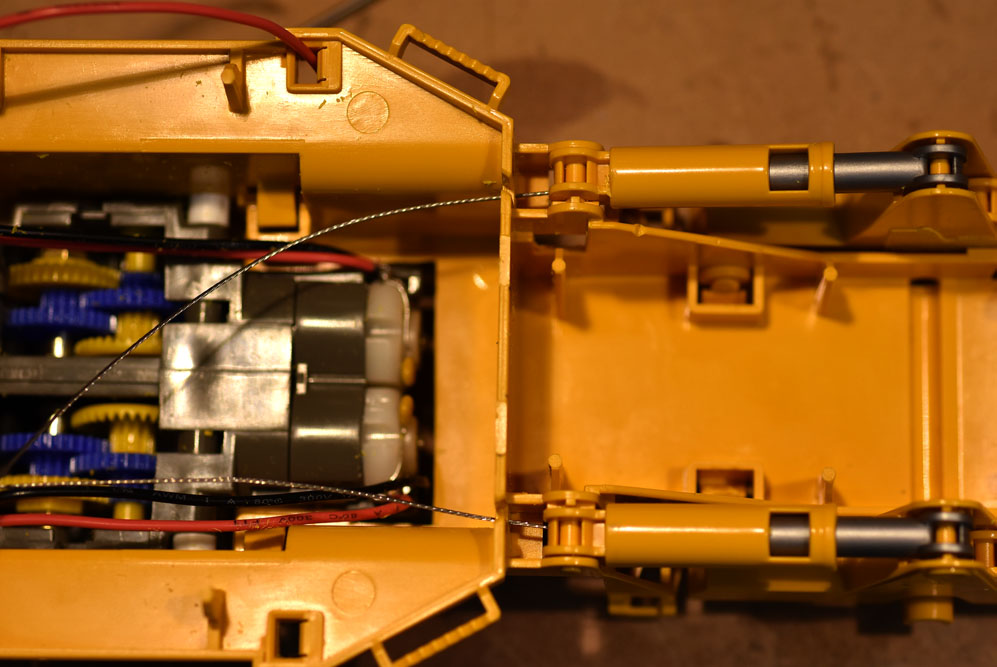
[/img]
Then the wires were carefully pushed through the tubes while the mounting bracket was put into place. Holes were then drilled through the front of the bulkhead and the mounting tabs below the tube platform and screws installed to hold everything in place.
[img]

[/img]
At this time I grasped the two wires and pushed and pulled on them and found to my great relief that they would operate the lift cylinders and raise and lower the blade without a lot of effort. I had planned on squirting a little graphite powder into the cable to lubricate the wire but then promptly forgot to do it. Now would have been a good time to do that. Made a heck of a mess inside the body of the D5 when trying to squirt graphite in the cables later on after everything else was installed.
I noted above that the blade assembly of the D5 didn't weigh very much. Turned out that there was just enough resistance of the operating wire through the tight radius of the tube that gravity would not pull the blade back down. Ideally you always want to keep the wire of a bowden cable under tension. They work great for pulling not so good for pushing. And this tiny little cable really flexed when pushing even this light weight blade down. One soulution might have been to make the outer tube longer towards the servo attachment thus keeping the inner wire from being able to flex as much. Much easier to just add a little weight to the blade.
A little no 8 shot and some casting resin poured into a pocket on the underside of the front of the blade mount cured this issue. Didn't take much, only about a third of an ounce. Now the blade comes down on it's own when the cable is slacked.
[img]
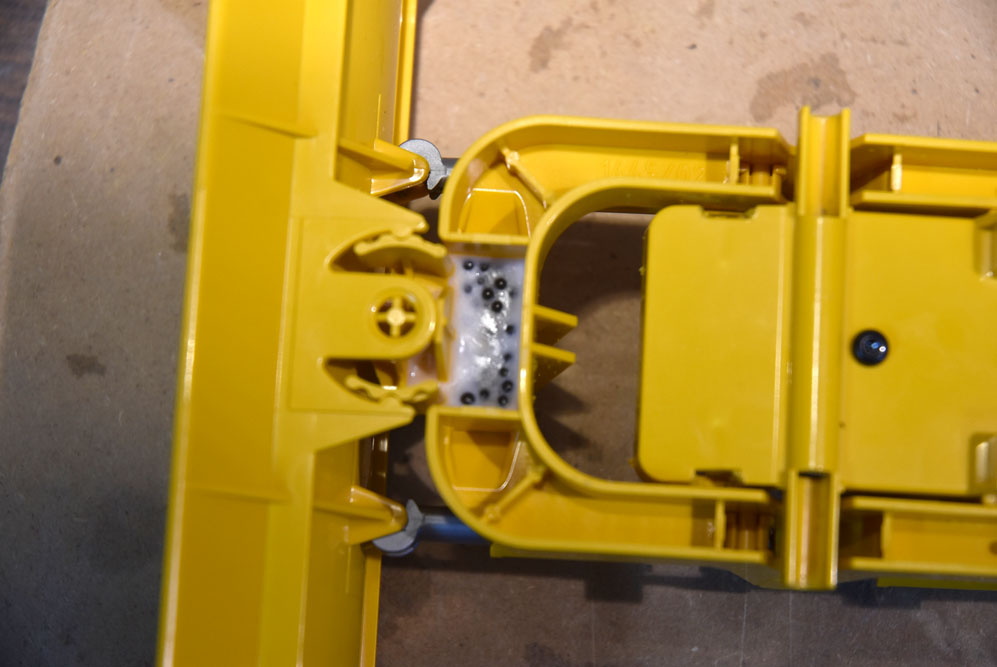
[/img]
Only thing left to do now was to install the servo and test the system. Photo shows the complete installation, servo, receiver and mounting bracket in final position. Photo shows blade in full up position.
[img]
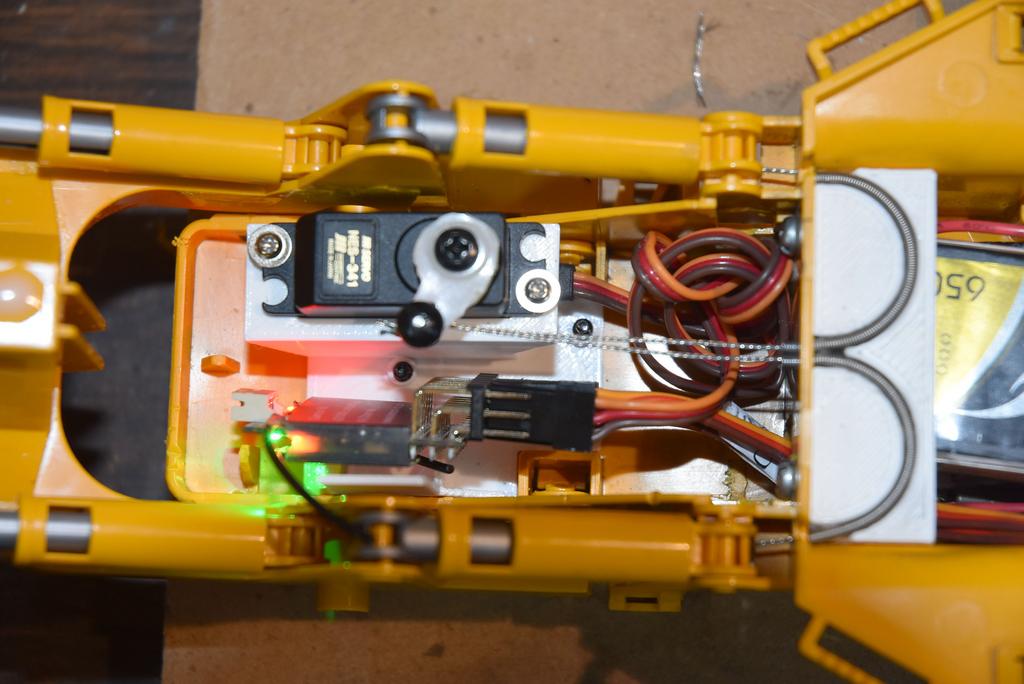
[/img]
Was very pleased to see that the cable worked as I hoped. The bowden cable easily lifts and holds the blade at whatever position I want.
The use of the bowden cable let me mechanize the operation of the blade of the D5 while keeping the exterior changes to the appearance at an absolute minimum. When looking at the completed conversion now, with the exception of a strobe light I added to the roof and an operator figure I put in the cab, it looks exactly like the original toy.
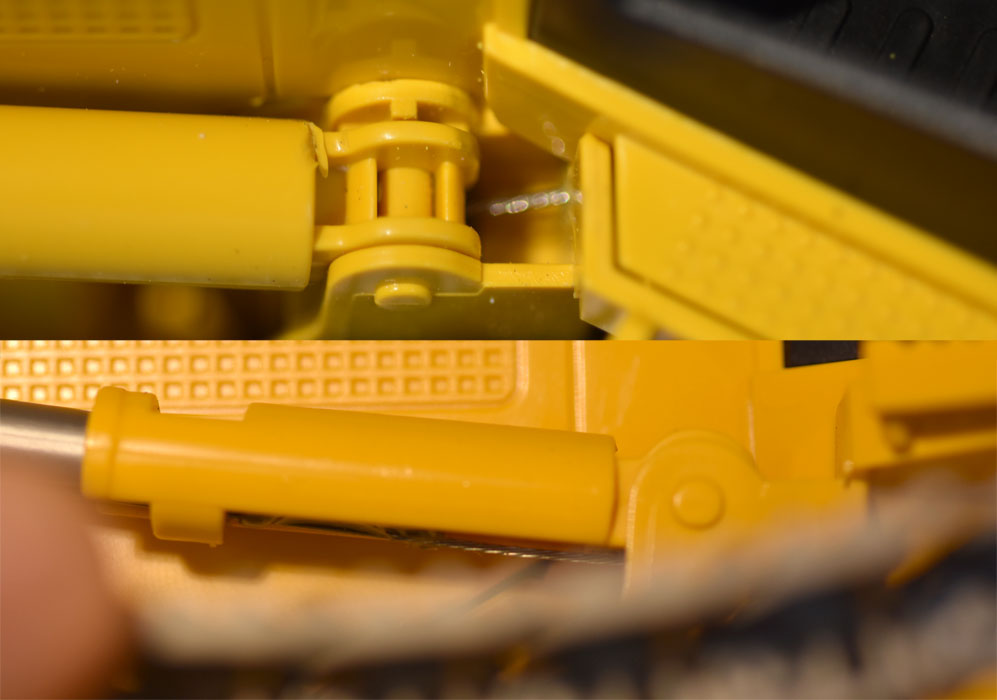
The only sign of the bowden cable is in the very small gap between the cab and the back of the lift cylinders. Of if you manually lift up on the blade the cable along the bottom of the lift cylinders will flex downward enough to be seen.
[img]
[/img]
There is one major negative to this method I used. Because the bowden cable has to line up with the bottom of the lift cylinders, the cable mouning bracket sits low. There is only a little over 1/2 inch of clearance under the platform to the floor. This really limits the size of the battery you can stuff into the back of the cab. If you are willing to eliminate the cab interior you will have all sorts of room for a battery but I wanted to keep the interior. That was the whole point of this exercise. After spending hours researching battery sizes, the largest Lipo battery pack I could find that would fit was a 2S with a 650Mah capacity. Not much, but fortunatley this D5 doesn't need much. Two small 6V motors, a servo and a flashing LED. Initial running and testing have shown I can get a bit over an hour of non-stop running before recharging is necessary. I am good with that as I probably can't stay focused on running for that long anyway.
So just a quick explanation of a couple of different methods of making RC conversions of "toys". I hope that this article will inspire others into making these conversions and expanding the hobby and coming up even more and different solutions. Please share your conversions or new methods with the group.