|
|||||||
| Highway Trucks and Trailers On road trucks and trailers single and twin axle trucks. |
 |
|
|
Thread Tools | Display Modes |
|
#1
 05-03-2018, 06:37 PM
|
|||
|
|||
|
I was very intrigued by the 3D printed lowboy conversions postings by bigdogrod. I thought that there was a lot of potential there and seemed like a way to really make use of a 3D printer in the hobby. So I decided that I would make one also. Following is a brief explanation of the process I used showing the main differences between my version and the earlier ones.
I decided to use the original version 1 files from EFICKER that are available on thingiverse. After looking over the .stls I decided that I really wasn't keen on all the joints. There were 3 individual parts needed for the rear end and 5 individual parts for the front. Plus 2 crossbeams from a truck model were also needed. After checking dimensions I determined that I could combine all the respective parts into complete front and rear sections with no joints that would fit on my printer bed. I also added a few changes. To the rear end I built in the crossbeams and modified the front bulkhead of the front to accommodate the truck/trailer electrical connection setup I use. Here are the rear and front sections straight off the printer with all the support material still attached. [img] 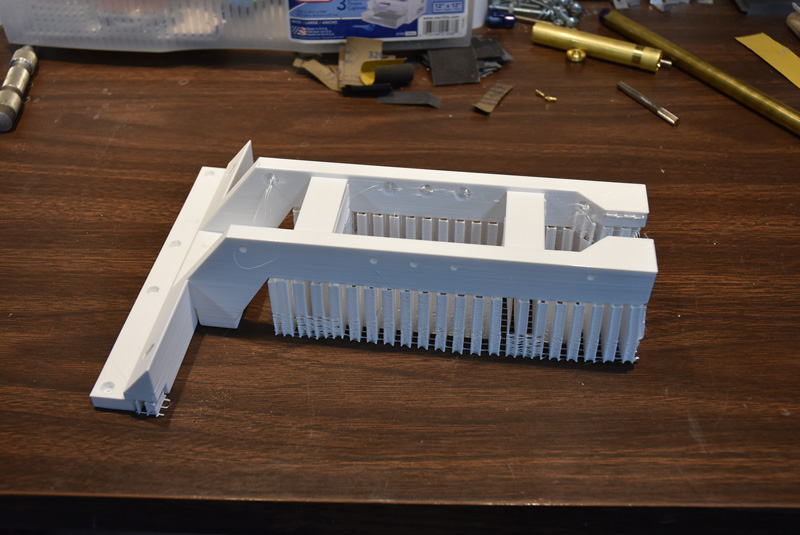 [/img] [/img][img] 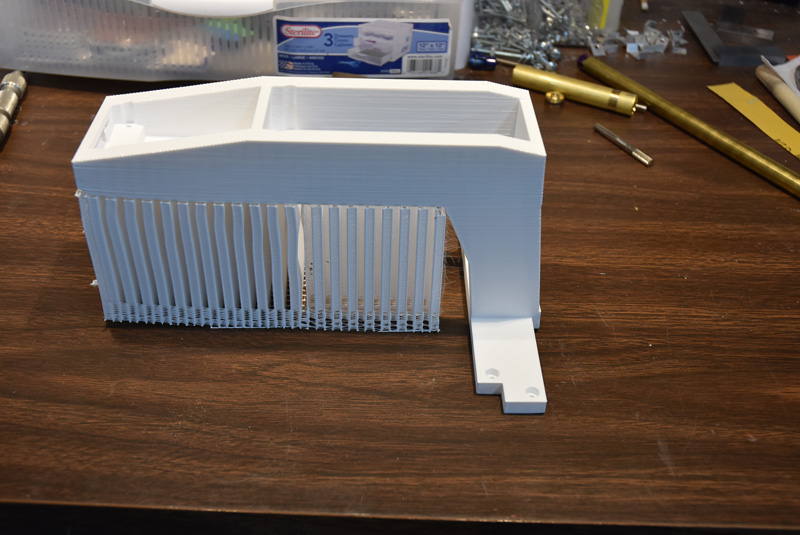 [/img] [/img]Took a bit over 36 hours to print both pieces. 3D printing isn't fast but it is slow. After a little bit of cleanup I next mounted the ends to the flatbed portion of the Tamiya kit. All the holes lined right up, EFICKER did a good job modeling the parts. [img] 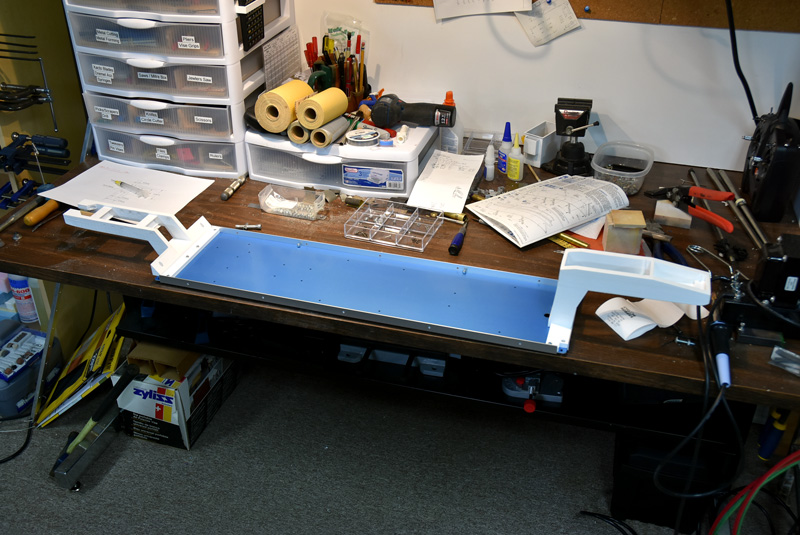 [/img] [/img]One of the problems with this conversion noted by bigdogrod was that there is not a lot of strength in the bed. When built as a flatbed trailer as Tamiya intended there is of course a substantial angle frame running the length of the bed to provide stiffness. As a lowboy there is no room for a stiffening frame underneath so the only strength comes from the angle aluminum sides, which aren't very substantial. I had some 1/4in aluminum bar stock on hand so cut some up to make a pair of beams to fit on top of the bed. They were sized so that the top of the beams would be even with the top of the wood deck when it was installed. They run then entire length of the low bed and are bolted in from the underneath with M3 socket Head screws. [img] 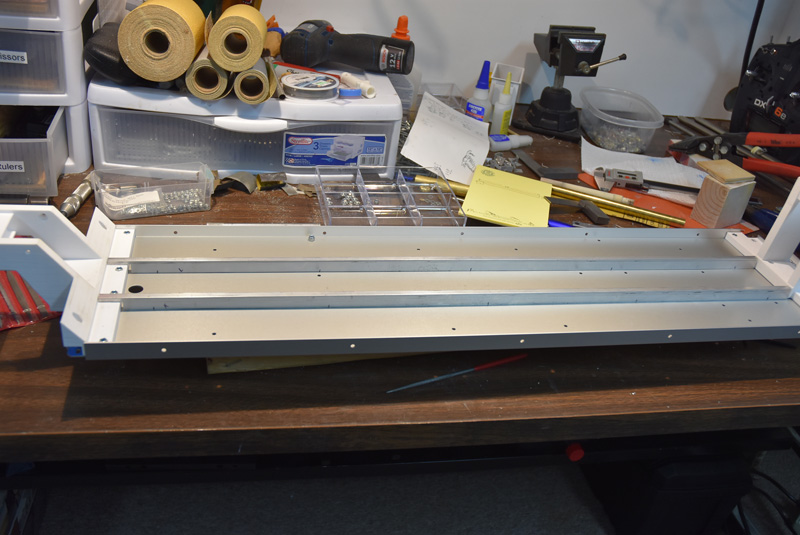 [/img] [/img]I then cut up and installed the cross members that Tamiya uses to support the wood deck. Here is a picture of the trailer nearly roughed together with the completed suspension attached. [img] 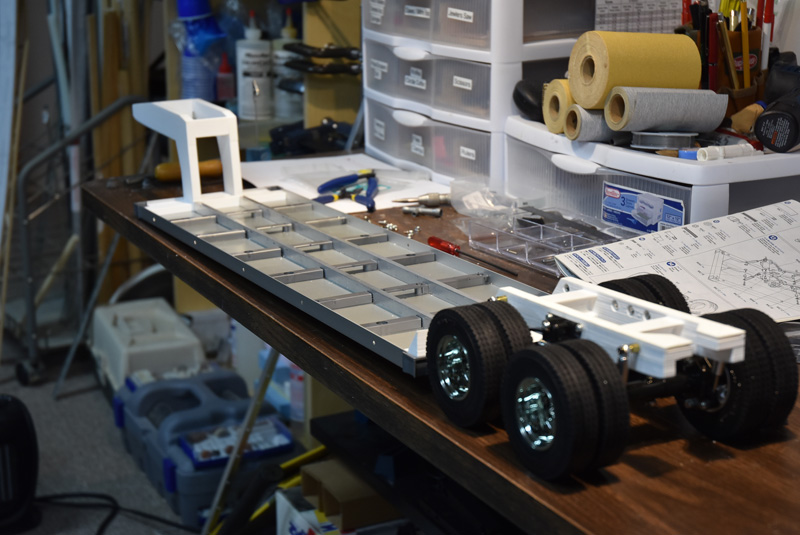 [/img] [/img]Of course the big question is, will those longitudinal beams make the trailer strong enough to carry some real weight? The short answer is, not really. Here is a photo of the trailer hooked up to a tractor with no load on it. Nice and straight and level. I put a machinists square on top of one of the beams right behind the gooseneck so I could see if there was any deflection occurring in it. Notice the amount of gap between the gooseneck and the top of the square. [img] 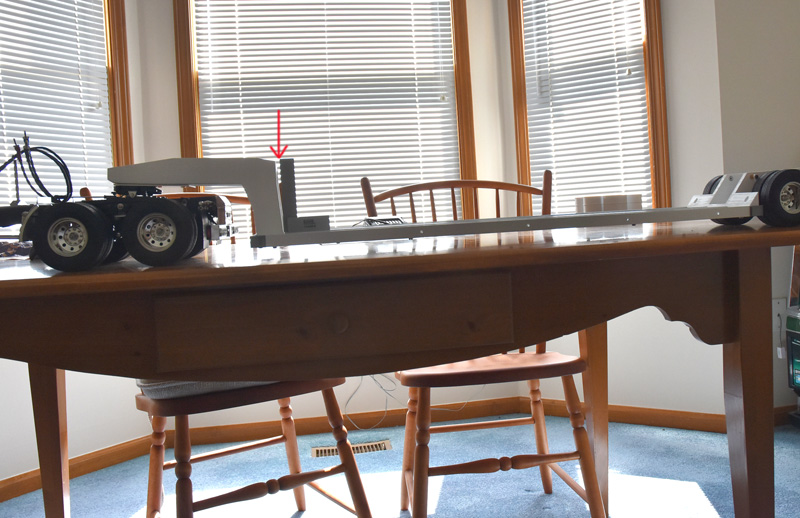 [/img] [/img]I then placed a set of hand weights totaling 20 pounds on the bed of the trailer. The beams I made defiantly made the bed a lot stiffer. Under this load the bed has only a small amount of bend in it and the bottom of the trailer is still clear of the table top. But look at the back of the gooseneck. It is now touching the top of the square. The printed plastic gooseneck simply flexes too much to support much load. [img] 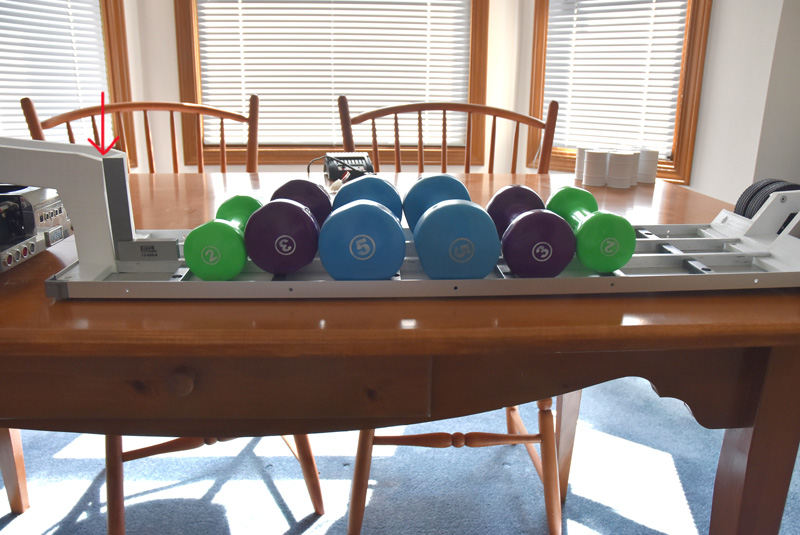 [/img] [/img]Because of the length needed for the neck I don't think it will be possible to make a 3D printed neck that will carry a real heavy load like a metal D11 unless it is made so large and oversize that it would look silly. Well not really a problem for me cause I don't have any large heavy machines to carry around, I just wanted a lowboy cause I like the looks. So on to finishing. About this time I came across the article with the thingiverse link to trilex style wheels (sorry, at the moment I can't remember where that link is). After looking at those files I knew I had to have them for this trailer. They are really neat looking. Photos of all the parts right after coming out of the paint booth and a close up of the complete installation on the trailer. [img] 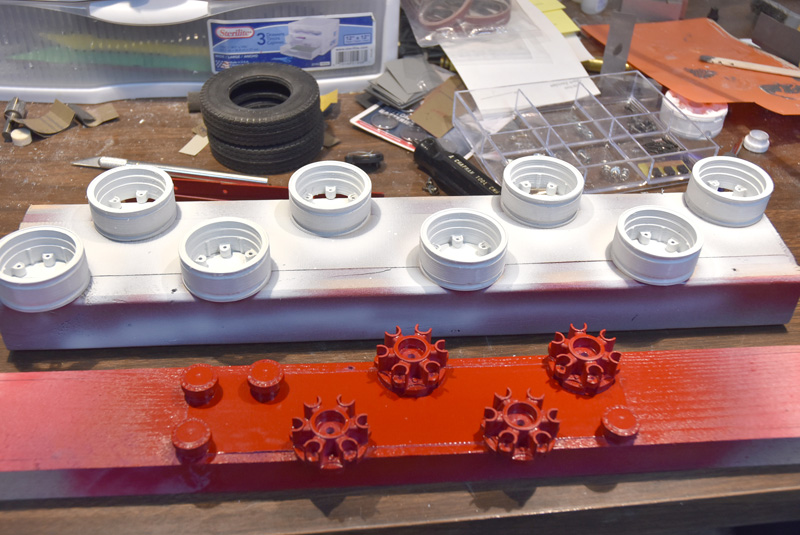 [/img] [/img][img] 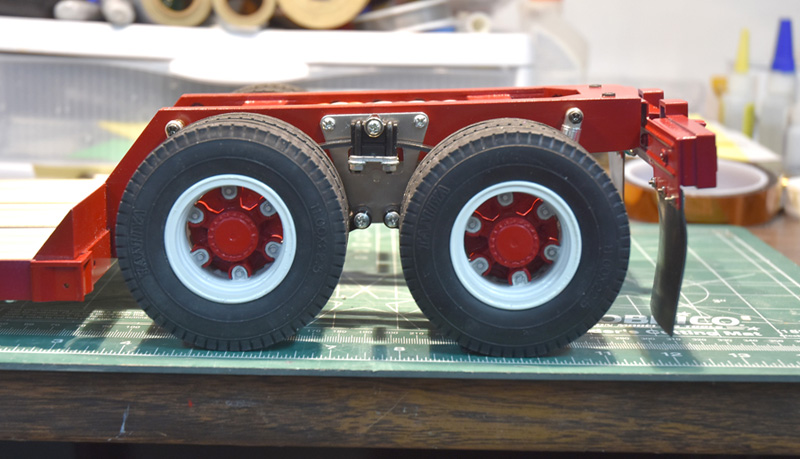 [/img] [/img]Of course if you are going to haul any kind of a load on a trailer you usually need some way to tie it down. That's a problem with the Tamiya trailer as the only thing it has are grossly over sized stake pockets that I hate. So I decided to fabricate some tie down rings and install along the length of both sides. [img] 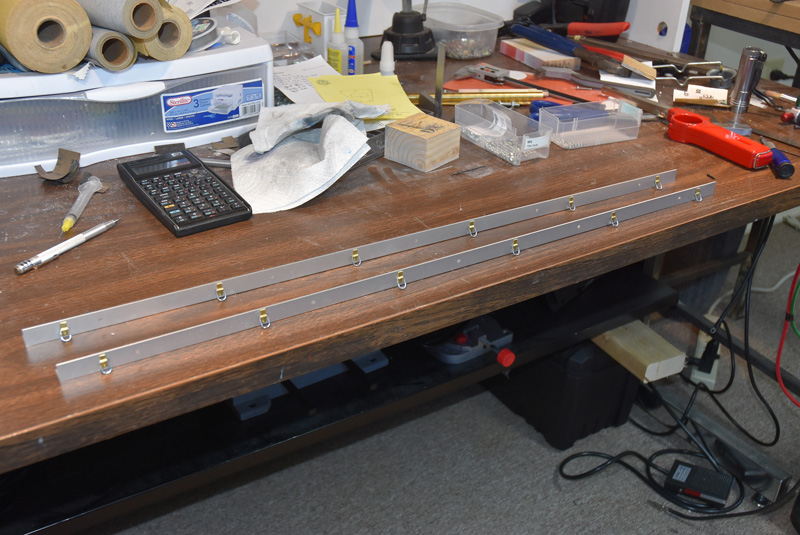 [/img] [/img]Then sanding, filling, sanding, filling, more sanding, etc., etc. Better be a patient person if you are going to work with 3D prints. Thought I would never get this thing into the paint booth. Once out it was time to install the wiring for the lights. Didn't want to spend the money for one of Tamiya's lighting kits since it isn't anything but 4 LEDs and some wire. Already had LEDs on hand so put my own set together. Works except that the taillights are not real bright. Anyone know what the specs are on the LEDs that Tamiya uses? I got that done when I decided that I really wanted to add marker lights to the sides as well. So had to take everything apart to drill out and install those LEDs as the corner ones are behind the printed front and rear. Fortunately, there was enough room in the front of the gooseneck to place a 2 cell batter pack and switch to control the lights. Put everything back together. [img] 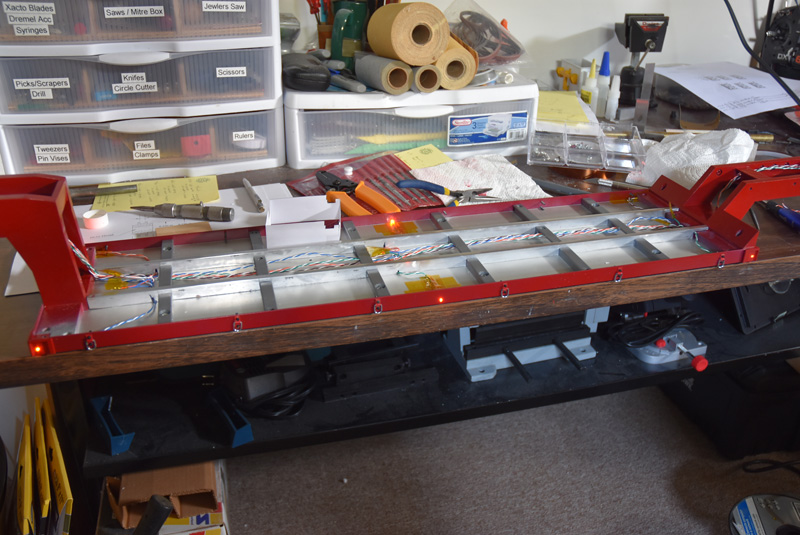 [/img] [/img]Polish the tops of the aluminum beams and install the wood decking. Because of the space taken by the beams it was necessary to rip down the width of Tamiya's wood strips slightly. [img] 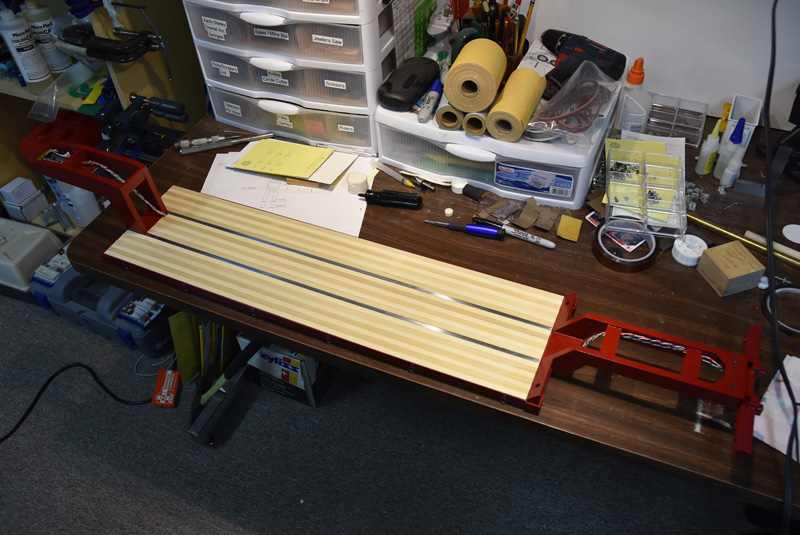 [/img] [/img]Last thing needed was to make something to cover up the wires, battery pack and switch in the front of the gooseneck. I thought a chromed tool box covering up that space would look pretty good. So in keeping with the theme of 3D printing, I designed and printed a box and cover. Used tiny super magnets to hold the cover in place. [img] 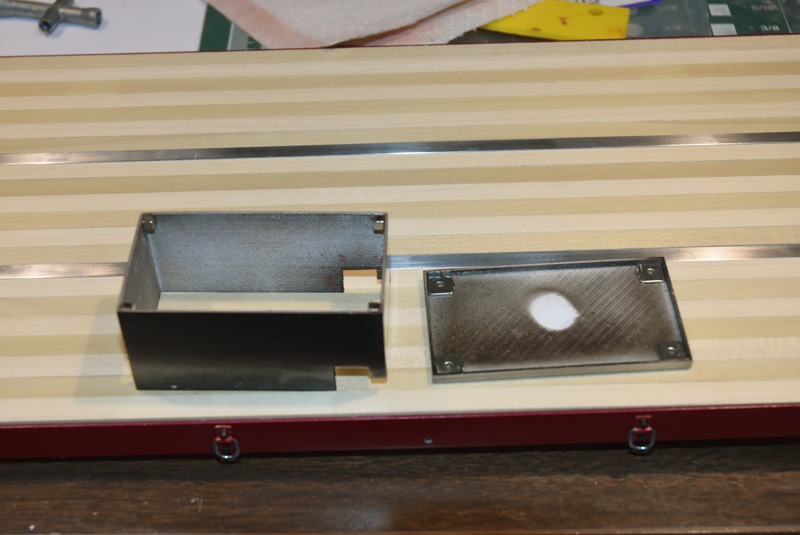 [/img] [/img]So all in all a very good time building this trailer. Learned alot. And, I think, it turned out looking pretty good. The 3D printing method really has a lot of potential for us in this hobby, But I think that it has some real limitations when it comes to parts that are going to have to support real heavy loads. The answer may be to fabricate a goose neck skeleton of steel or aluminum and then use 3D printing to make a dress up skin that can be adhered to the skeleton. May try that approach. Here's a couple of photos of the finished trailer. [img] 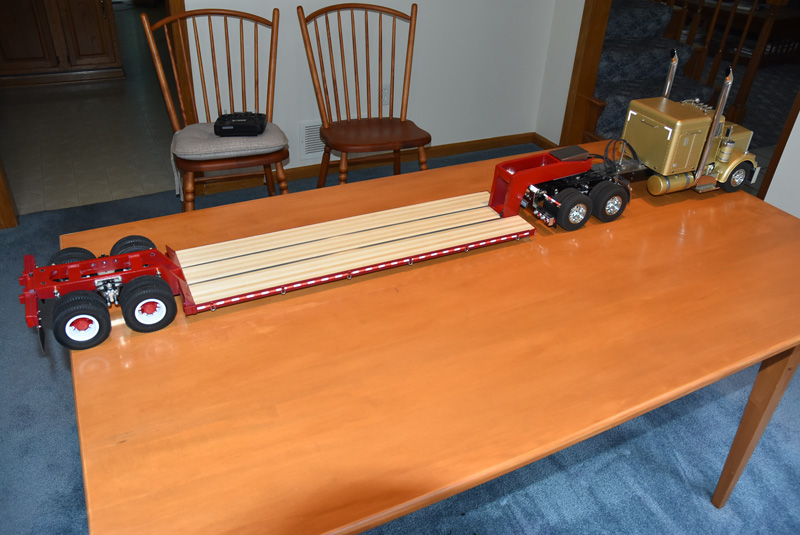 [/img] [/img][img] 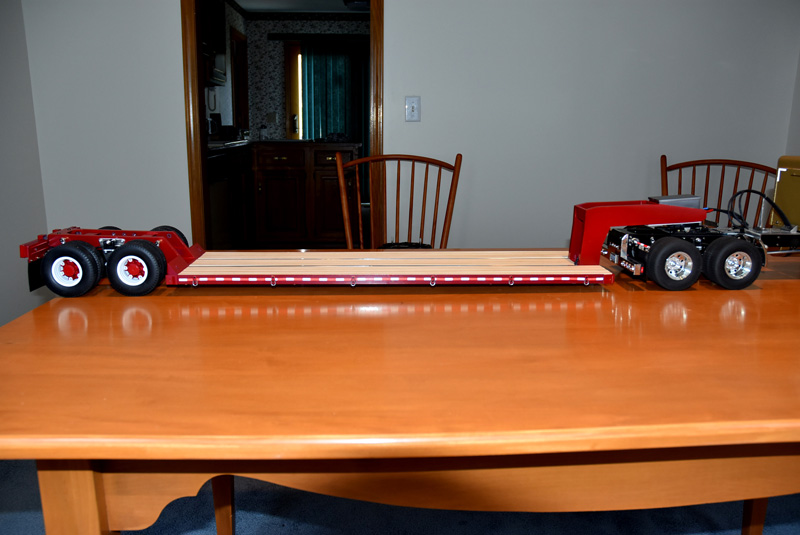 [/img] [/img]Thanks for reading. 
|
|
#3
05-04-2018, 07:26 AM
|
||||
|
||||
|
The trailer looks great.
__________________
Doug Member of the East Coast Mini Truckers
|
|
#4
05-04-2018, 06:55 PM
|
|||
|
|||
|
Quote:
I sliced the parts with Lulzbots edition of CURA. The gooseneck and rear end were sliced at 0.3mm layer heights using a 20% infill. I chose those values based primarily on printing time. The gooseneck took about 19.5 hours and the rear end took a bit over 17 hours to print. I played around with different setting in CURA and was amazed at some of the printing times it was estimating. If I had printed at 100% infill the print time for the gooseneck alone would have been over 57 hours! It would have also used up over half of a spool of plastic. I realize that using only 20% infill may be part of the reason the neck is flexing as much as I noted in my original post. But based on my experience with nGen I was pretty confident that 20% would provide enough strength for my purposes. But while more infill might have made the parts a bit stiffer, you get diminishing returns with adding more plastic. I did do additional testing on the gooseneck besides the test shown and am very satisfied as to it's strength for my purposes. And I do believe that without a major increase in the overall size of the parts, which would really detract from their appearance, that even at 100% infill you won't be able to build a lowboy trailer like this that will handle the weight of say a full metal D11.
|
|
#6
05-06-2018, 09:32 PM
|
|||
|
|||
|
Could you print a layer of material with a lip around the edge as a locator, pause it and quickly slide in a piece of L-shaped alum (to match the gooseneck side profile) and then continue printing? To encapsulate the alum? What would the heat do, how much would it expand the alum, I wonder?
BTW - love those wheels!
|
|
#7
05-07-2018, 07:11 PM
|
|||
|
|||
|
Hmmm, interesting idea. In theory, depending on capability of your printer and slicer software, that might be possible. Redesign part with and internal pocket. Some slicers will allow pausing print to change color other wise would have to insert gcode to cause a pause and probably move up some in Z to get come clearance room and then a resume print function. Would have to make sure that your "pocket" will be deep enough so that when metal part is inserted it is at or slightly below the level of the last layer printed. If it is higher then there is risk of collision between metal and extruder nozzle which could damage the print or the printer. Not sure what would happen as to expansion/contraction of metal as it is heated and cooled.
Don't think it could be done the way I printed my gooseneck as it was printed in one large piece. The pockets would have to be very deep down each side and the metal reinforcing inserted vertically. If the gap between plastic and metal is too tight it would be very difficult to insert the metal. If too loose I don't think it would do any good. If printed as the parts were originally designed then shallow pockets could be made and metal bars laid in horizontally. I have no intention of printing out a whole new gooseneck at this time but I might try a small scale experiment to see if the idea has merit. If anyone else trys this let us know how it works.
|
|
#8
05-07-2018, 10:22 PM
|
||||
|
||||
|
Trailer looks great!! Good read so far on how you have been doing the printing.
__________________
Always wasting money, as the wife says. To view links or images in signatures your post count must be 10 or greater. You currently have 0 posts.
|
|
#9
05-08-2018, 12:44 PM
|
||||
|
||||
|
GREAT job!! It looks like you did your homework as you went along. This is one of the best 3D Lowboys that I have seen so far.
I also really like your wheels! I'd be interested in getting a few pairs if you decide to offer them for sale. Keep us posted on future developments as you go. I see you're a fellow Buckeye resident. I live up in NW Ohio, but I get down your way often, to the OC Plant in Newark, as an Engineer. Take care Terry
__________________
FabOne NW Ohio
|
|
#10
05-08-2018, 07:17 PM
|
|||
|
|||
|
Quote:
|
|
#11
05-08-2018, 07:34 PM
|
|||
|
|||
|
Quote:
I really don't want to get into manufacturing. I really like 3D printing but I only have one printer and the process takes a lot of time. If you want to make your own the .stl files are available at https://www.thingiverse.com/thing:1456650 Didn't we meet at last Indy show?
|
|
#14
05-25-2018, 06:47 PM
|
|||
|
|||
|
Yes, you are correct. I recently ran some tests on ways to increase strength, see article in 'Truck Building Tech'. One of the best ways on increasing strength turned out to be doubling thickness of shell or skin.
|
|
| Currently Active Users Viewing This Thread: 1 (0 members and 1 guests) | |
|
|


 Linear Mode

