|
|||||||
| Construction Equipment If it digs, pushes, hauls dirt "off road" post it here. |
 |
|
|
Thread Tools | Display Modes |
|
#1
 09-25-2012, 02:22 AM
|
|||
|
|||
|
Hi guys!
Just wanted to introduce myself, and say I have been lurking around this site for the last month and have been soaking up all the amazing information. I thought I would post up my Bruder Loader conversion.  So the parts required for this conversion are: Tamiya Semi axles Tamiya CR-01 transmission 1x Hitec Hi - torque mg servos Set of Tamiya Hummer rims Set of axial 1.9" tires 3x Linear servos or Linear actuators (I am using Ferigelli Linear servos for this build) A bucket load of Tamiya Hi-lift hardware Step 1: Dismantling 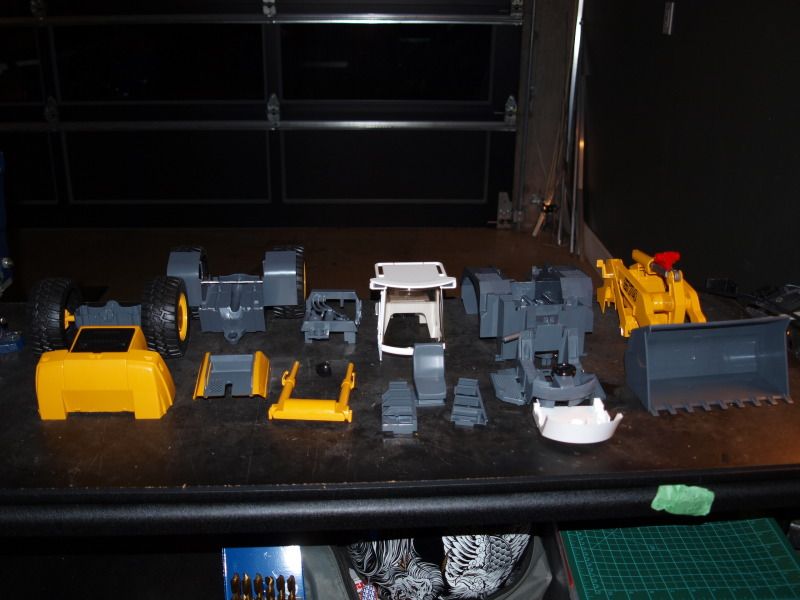

|
|
#2
09-25-2012, 02:31 AM
|
|||
|
|||
|
Step 2: Figure out how to connect the linear actuators to make the boom and bucket work properly. I started by cutting and drilling a hole at the bottom of the boom chassis.
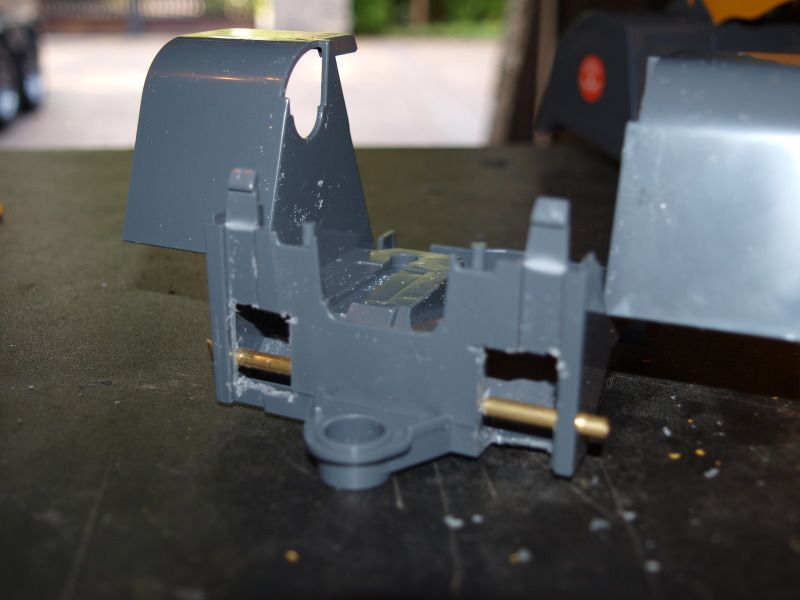 The cut was required to gain the proper clearance and the hole was drilled to push a brass rod through to connect one end of the actuators 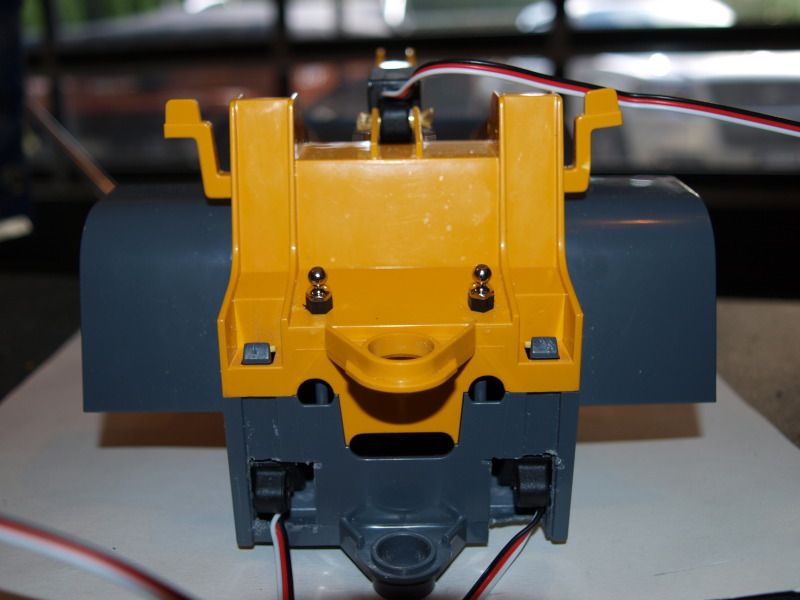 From there I drilled a hole through the booms to connect the other end of the actuators 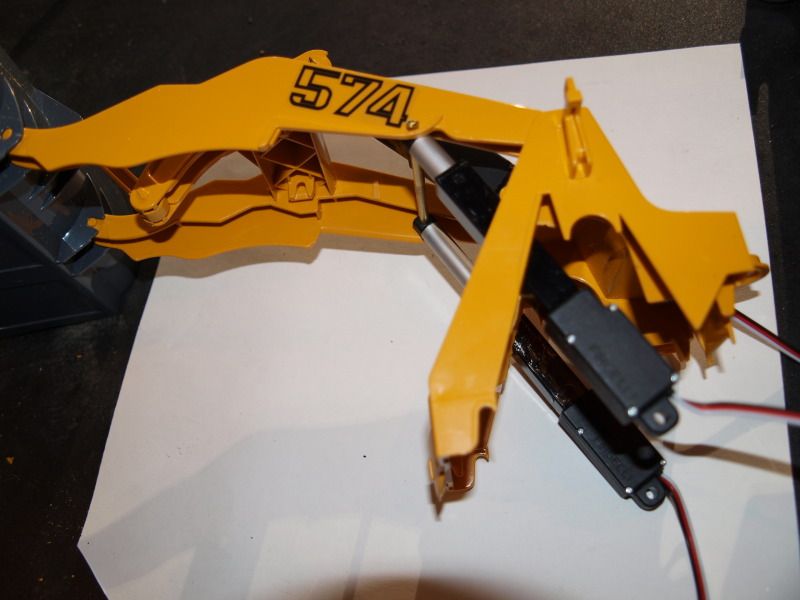 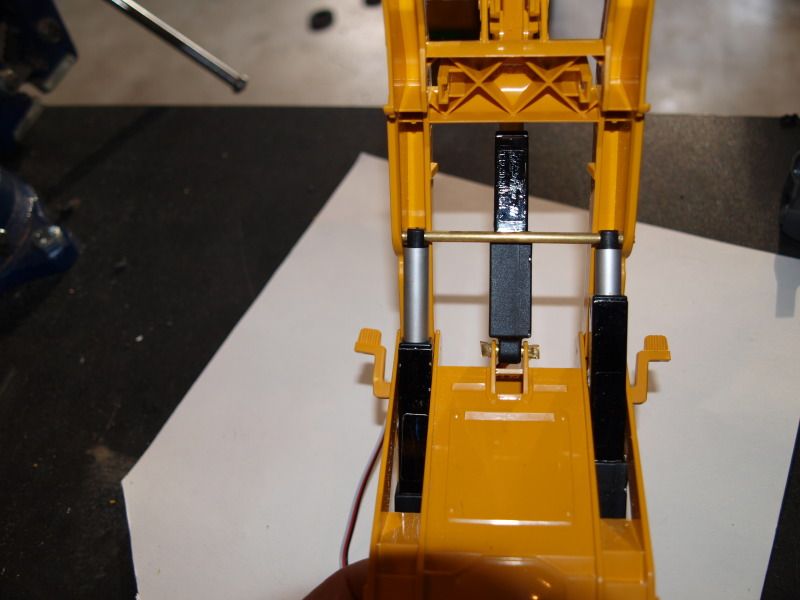 The bucket ram was easy to install, I just drilled a hole through the existing mounts 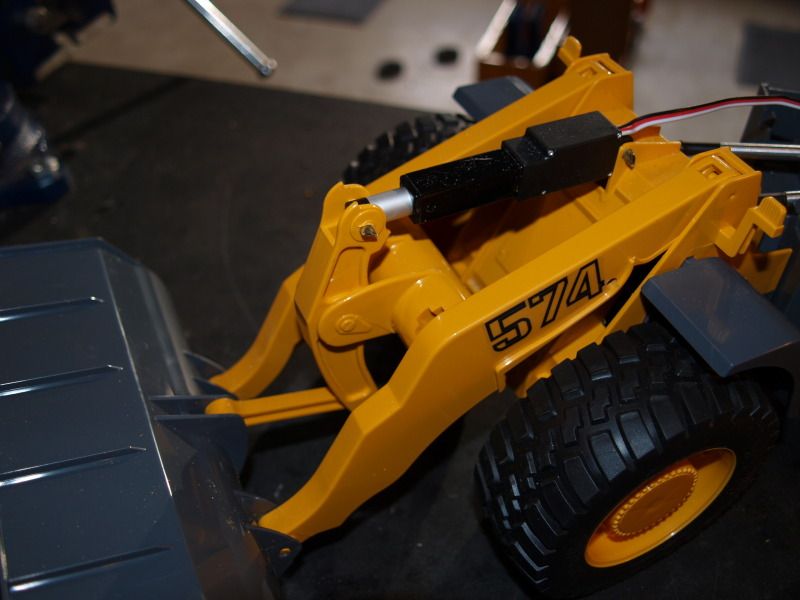
|
|
#3
09-25-2012, 02:45 AM
|
|||
|
|||
|
The next step in the process was figuring out how to make the articulated portion of the loader work. As easy as the photos make it seem I actually spent a lot of time trying to figure out what would give me full travel and yet be out of the way and not require to much hacking of the body/chassis.
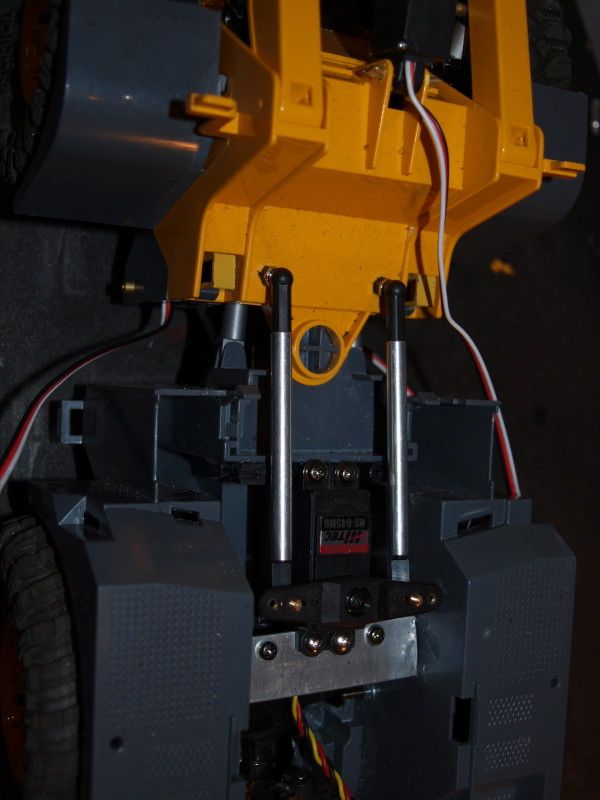 Now came the tricky part, how to get power to the wheels. I am using Tamiya semi axles as they are a exact match width wise as the original axles. This was a serious multi step process with a lot of swearing and head scratching. Step 1: Mask and cut clearances for axle, the point of no return! Before 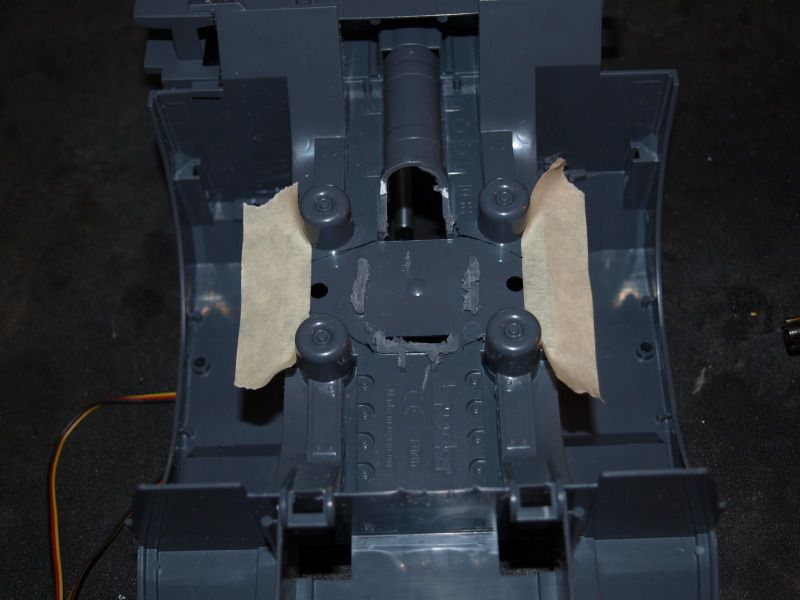 After 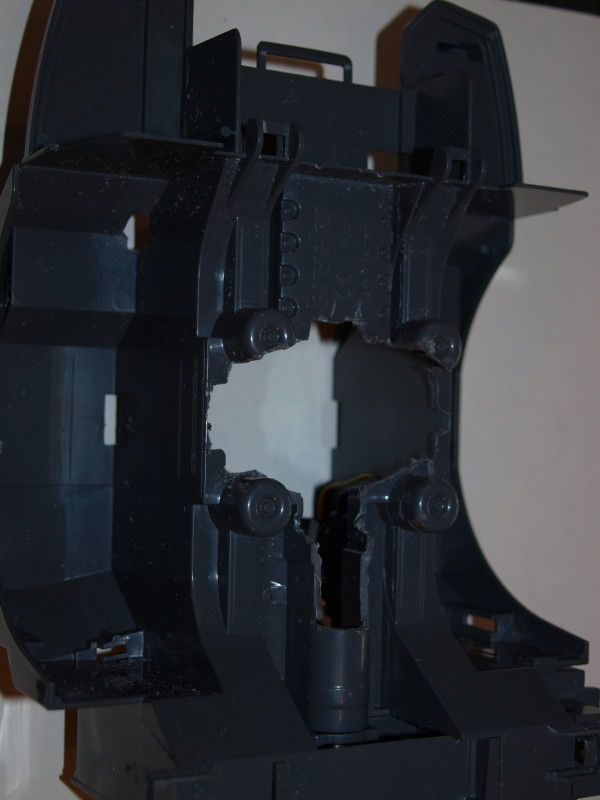 Step 2: Make brackets to hold the axles to the chassis 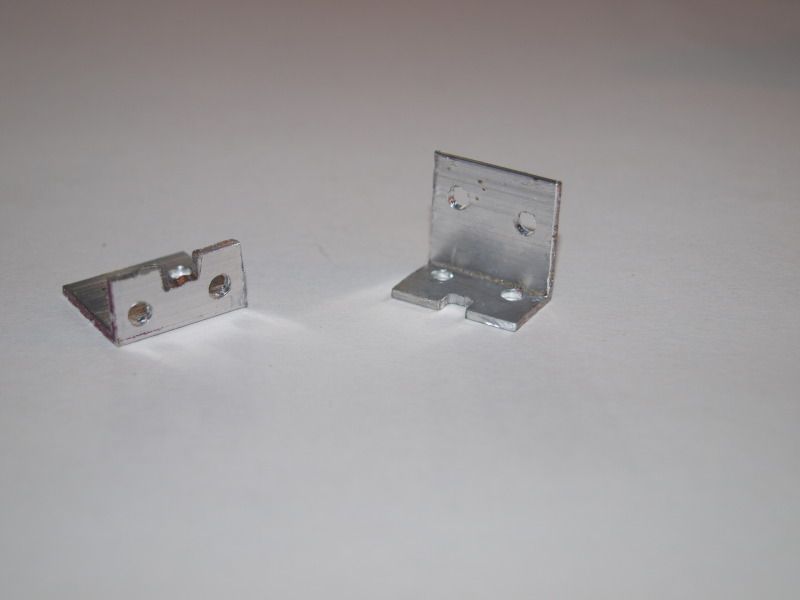 Step 3: Lock the diffs-a nifty little trick-insert a 4th bevel gear and viola she is locked 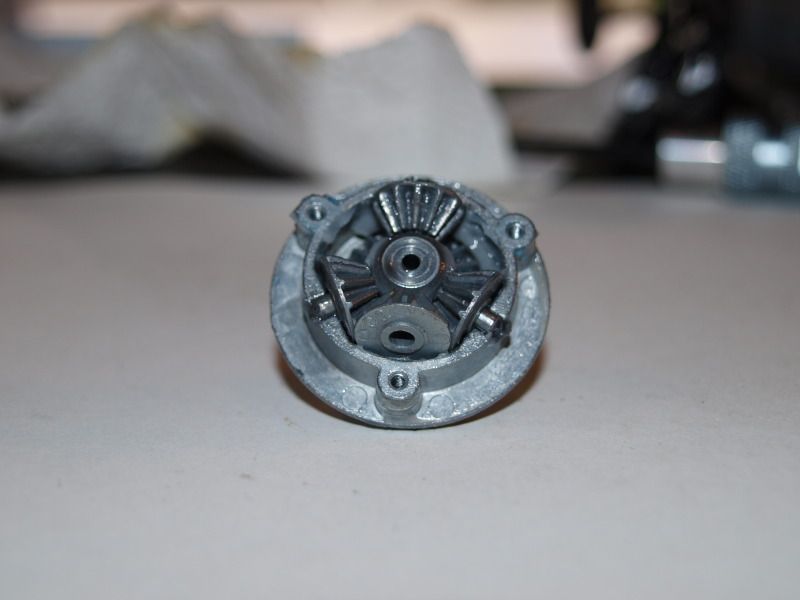 Step 4: Paint axles and brackets and assemble 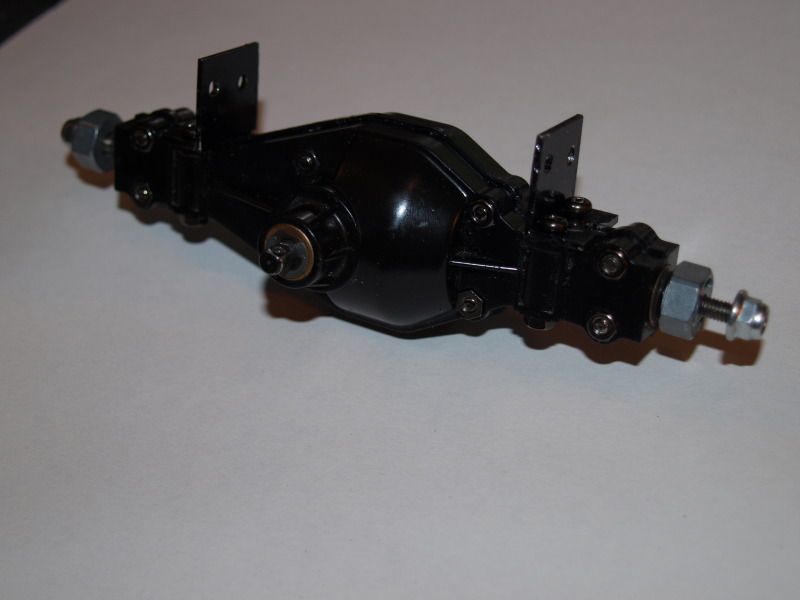 Step 5: Mount axle to chassis 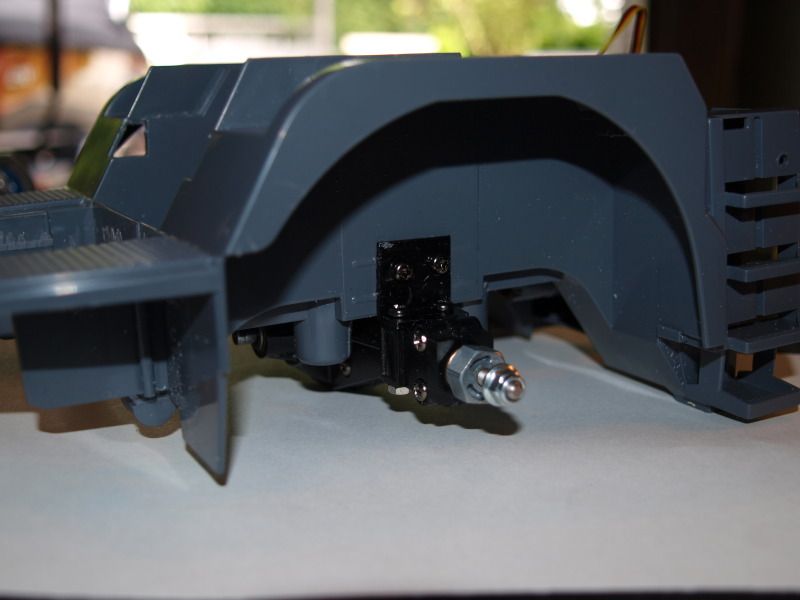 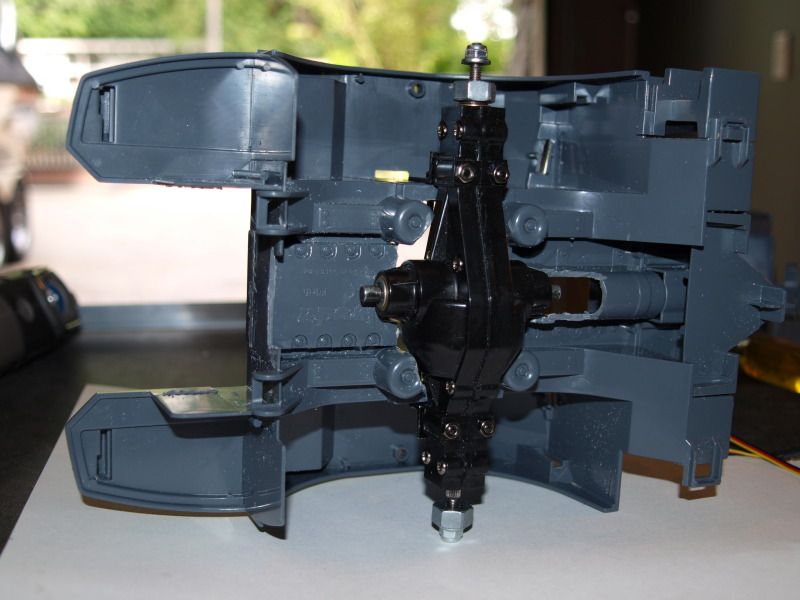
|
|
#4
09-25-2012, 02:53 AM
|
|||
|
|||
|
Once I got the rear axle in I worked on the motor and transmission. I made these aluminum motor mounts
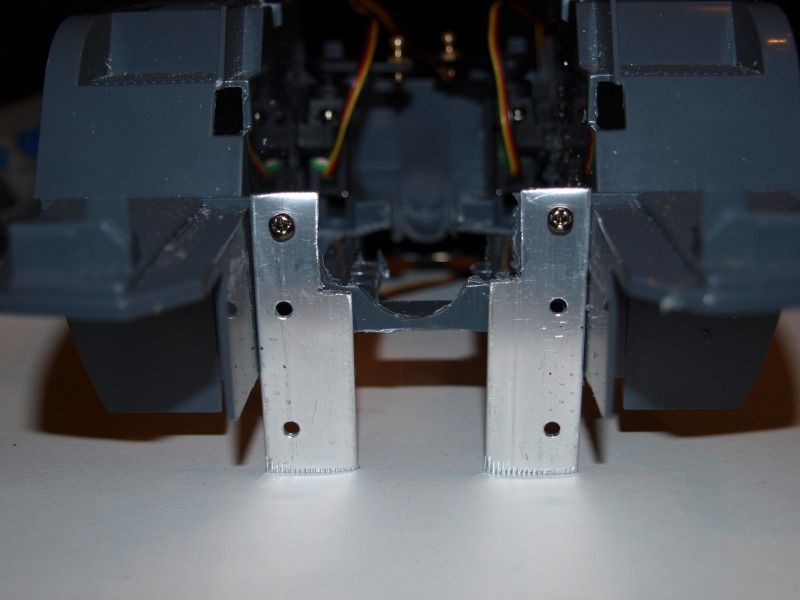 With motor mounted 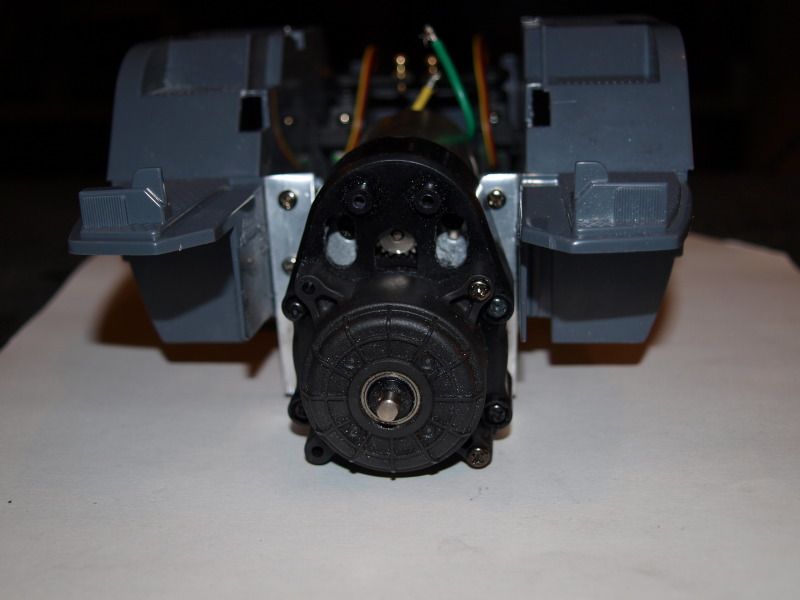 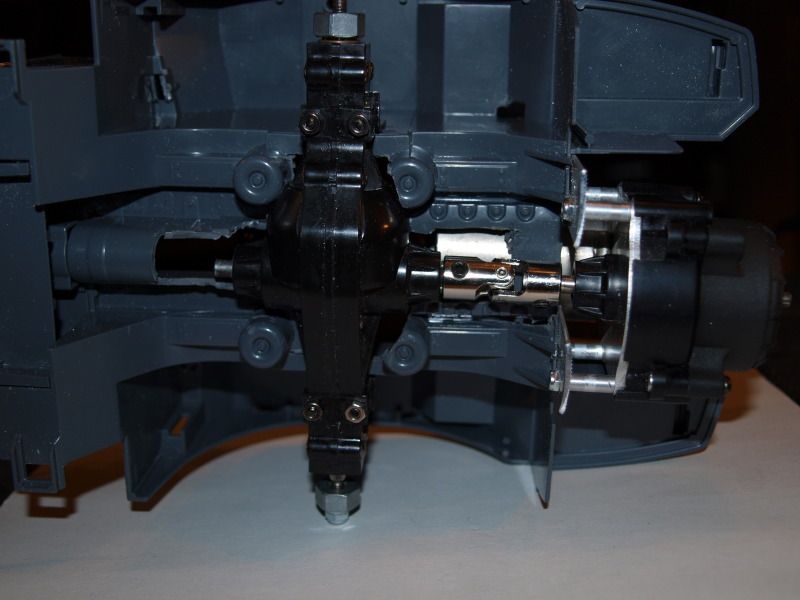 From there I moved to the front axle, I had to make alot of cuts to get it to fit but she did! 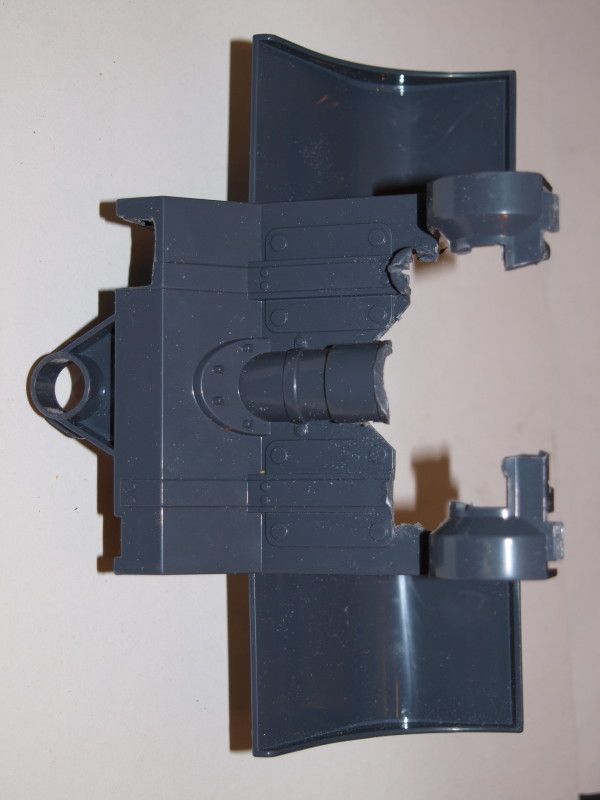 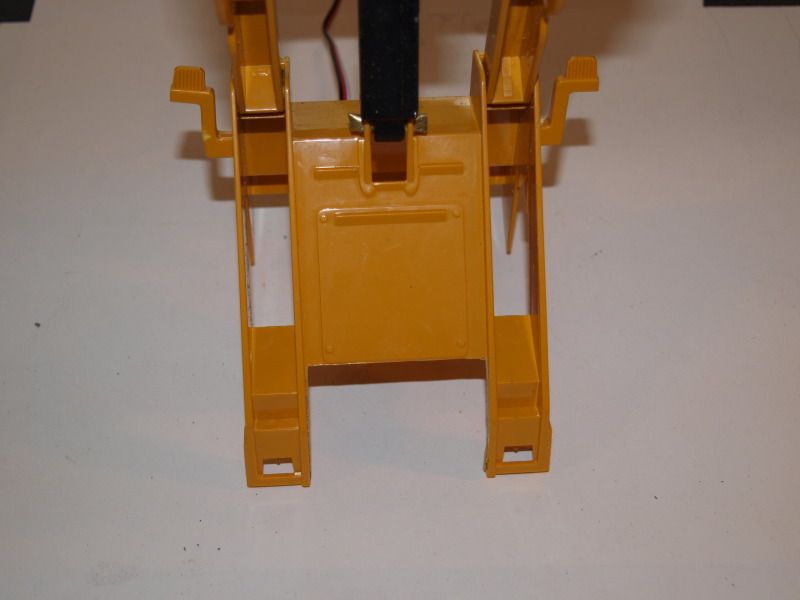 Made some mounts for the axle and installed them 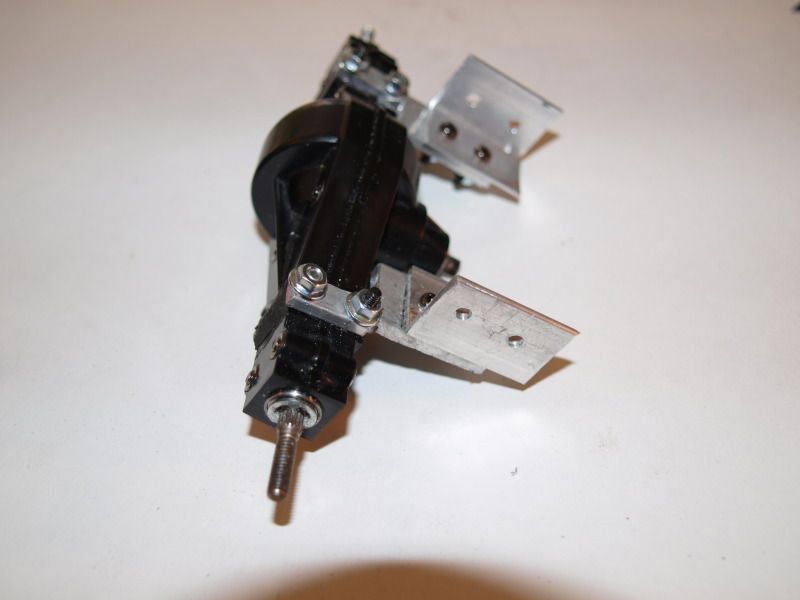 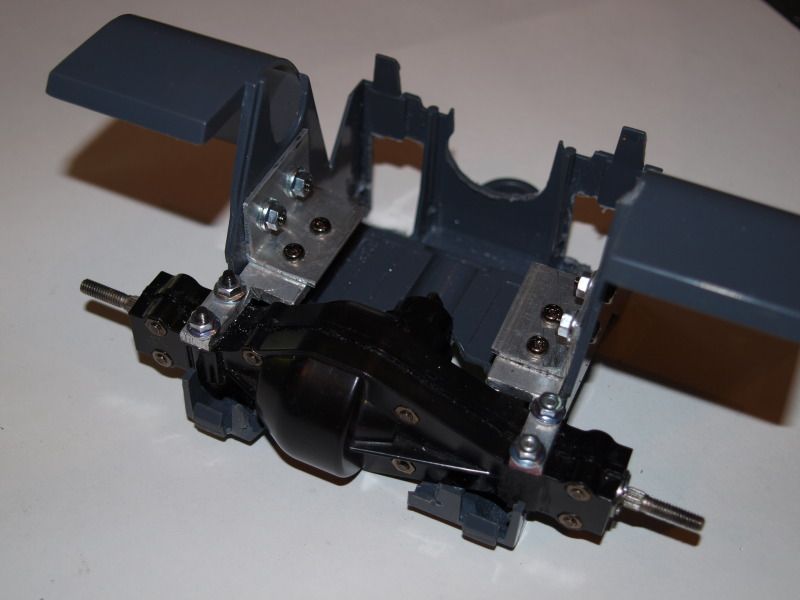 From there I made a custom drive shaft and connected it to the axles 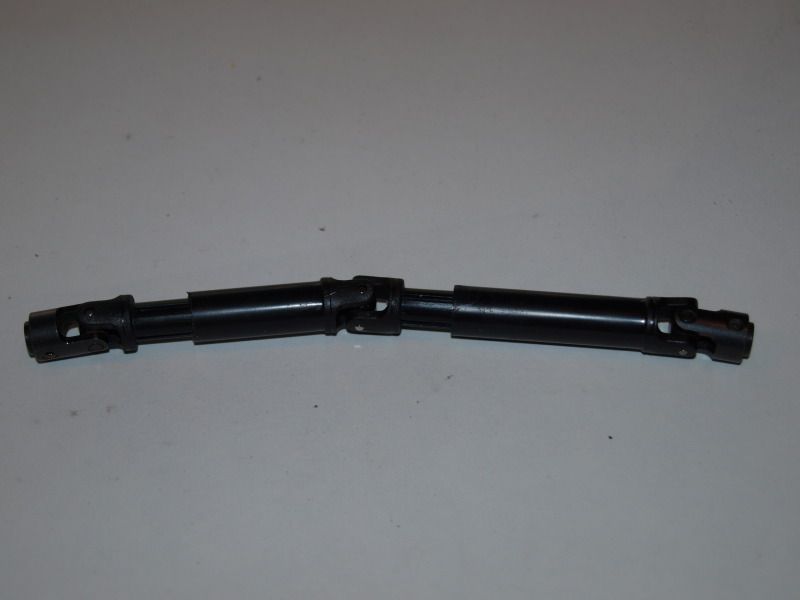  From there I put it all back together sans cab 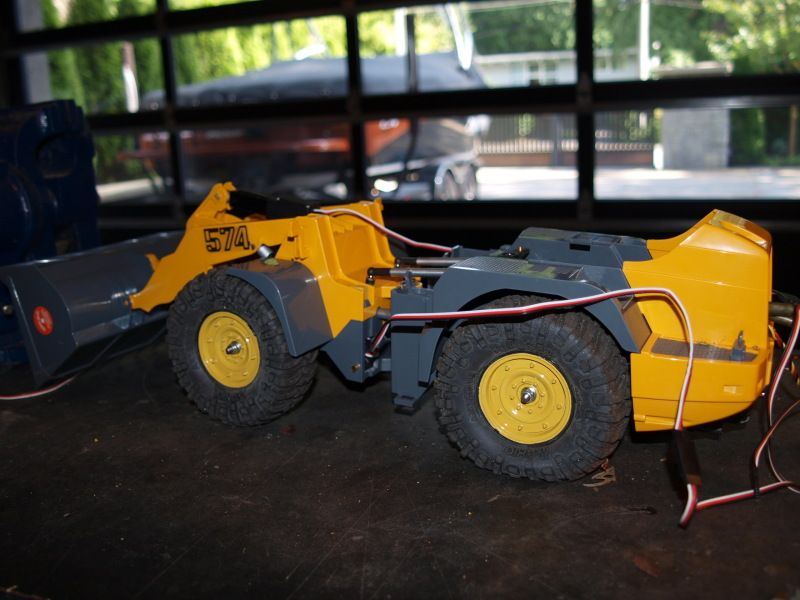
|
|
#5
09-25-2012, 02:57 AM
|
|||
|
|||
|
Here is a quick video of the test run...still need to get use to the controls and get a smoother speed controller...but she is powerful.
http://www.youtube.com/watch?feature...&v=famTtbUEBJ4
|
|
#7
09-25-2012, 09:24 AM
|
|||
|
|||
|
Oh, one of the best bruder conversions I've seen. You did very great job on hiding the servos making everything look scale!
Now take off all orange stickers, make better wheel hubs and finish the cabin and we have a very cool model! Keep it up!
|
|
#8
09-25-2012, 09:31 AM
|
|||
|
|||
|
Here are some final finished shots of the loader.
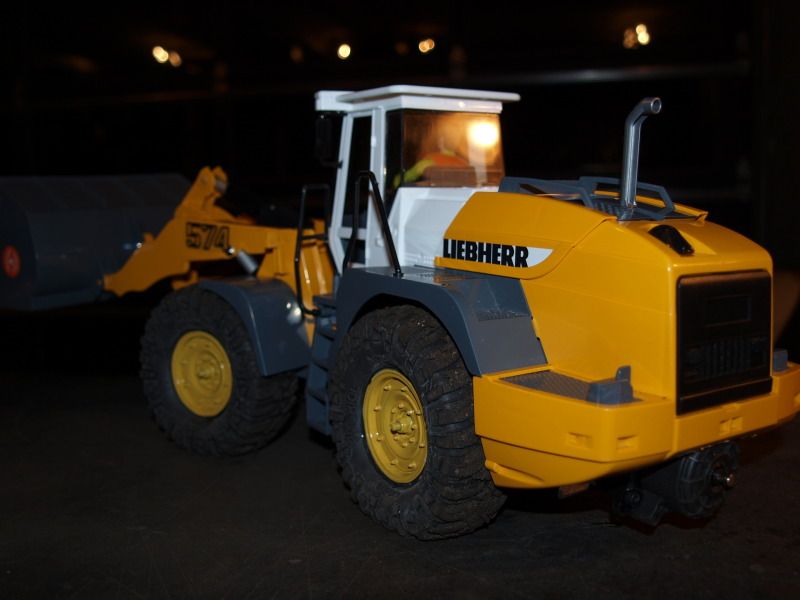  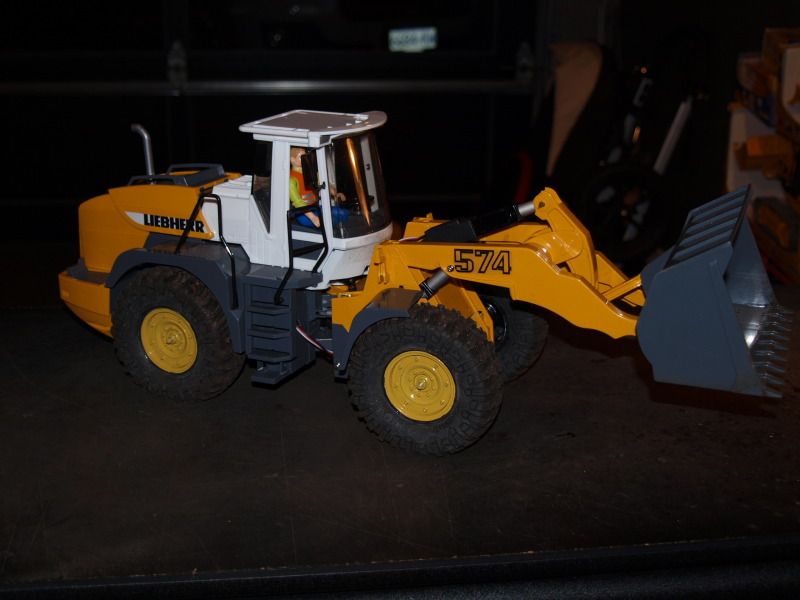 I will try to get some video of it in the next few days. I actually built a 1/16th scale short course track in my back yard with this, the excavator and dozer.
|
|
#9
09-25-2012, 08:15 PM
|
||||
|
||||
|
Very nice loader conversion ,looks like it works great ,look forward to some more vids

__________________
To view links or images in signatures your post count must be 10 or greater. You currently have 0 posts. To view links or images in signatures your post count must be 10 or greater. You currently have 0 posts.
|
|
#10
09-25-2012, 08:43 PM
|
||||
|
||||
|
Looks really good!! Looks like it works well. I love the conversions people do. One of these days ill start mine.
__________________
Hi my name is Aaron.... And i'm a truckaholic!
|
|
#13
11-03-2012, 02:29 PM
|
|||
|
|||
|
great conversion! dying to see more pics and video's of it. I have one of these at home too, maybe I should also convert it.
|
|
#16
11-04-2012, 10:07 AM
|
|||
|
|||
|
looking good you got it done up nice all i ever did was get my 574 taken apart lol.
__________________
To view links or images in signatures your post count must be 10 or greater. You currently have 0 posts.
|
|
#18
04-23-2013, 12:20 PM
|
|||
|
|||
|
awesome! i have one coming in the mail and this thread is gonna help me out alot!
|
|
#19
04-26-2013, 04:58 PM
|
||||
|
||||
|
How are the Linear actuators working out for you on the loader ..
__________________
To view links or images in signatures your post count must be 10 or greater. You currently have 0 posts. To view links or images in signatures your post count must be 10 or greater. You currently have 0 posts.
|
|
| Tags |
| bruder, conversion, dirt, liebherr, loader |
| Currently Active Users Viewing This Thread: 1 (0 members and 1 guests) | |
|
|


 Linear Mode

