|
|||||||
| Electronics tech Anything to do with the electronics in a model. Lights, Radio, ESC, Servo, Basic electrical. |
 |
|
|
Thread Tools | Display Modes |
|
#1
 09-05-2010, 06:18 PM
|
|||
|
|||
|
Can anyone help with converting a 4YF radio from rachet to a spring throttle?
I have the swing arm and spring that futaba sent me, but clueless about how to swap. Thanks for your help in advance. 
|
|
#2
09-05-2010, 07:02 PM
|
||||
|
||||
|
Hi Shawn. I did a similar swap on my Futaba 12FGH radio. I have some pictures saved from the process, and while my radio is not the same as your's, it will be similar and should be able to help you figure things out. The basic principals of the conversion can be applied to just about any radio, Futaba or any other. I did a write up for another RC site, and this how it breaks down.
You don't need much for tools or parts. In my case, a smaller phillips head screw driver was needed, as well as a 1mm metric wrench. Then of course you'll need the parts for the conversion, and your radio. 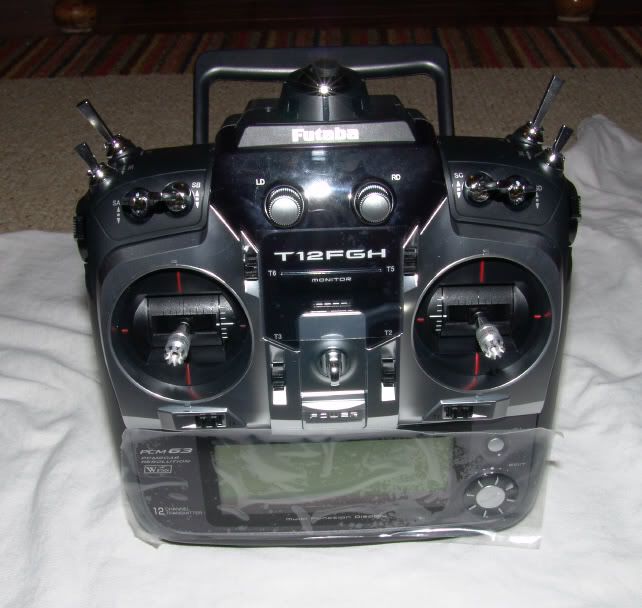 Fresh out of the box! Don't be afraid to dig into that brand new radio. Just take your time and think things through. The work goes quickly and easily. 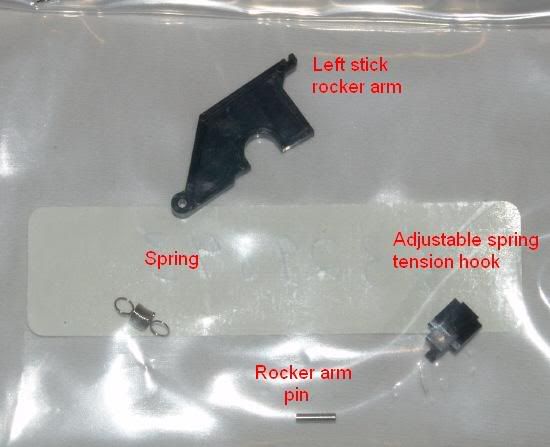 For the actual parts, you will probably recieve a spring, a pin, spring hook, and the largest of the parts, a rocking arm for the gimbal (stick). 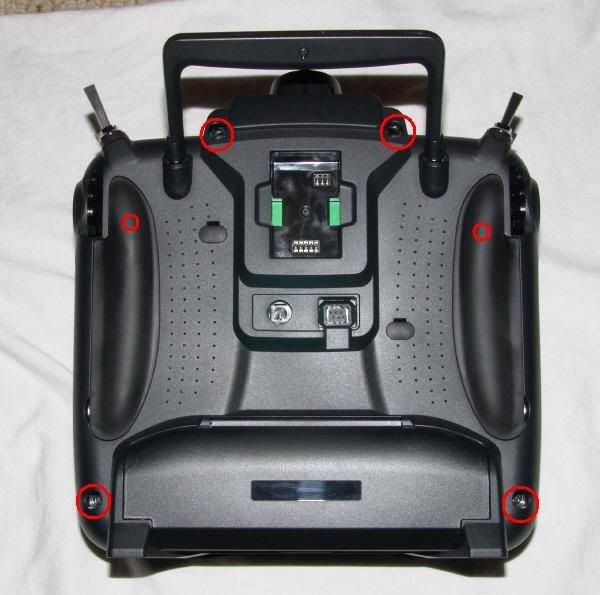 The first thing to do is carefully study your radio. Find all the screws and take note of the ones that look like they are holding the case halves together. For me, they were all on the back side. Two smaller screws were hidden underneath the rubber palm grips, which were easily removed, as they allow acess to the spring tension adjustment screws. 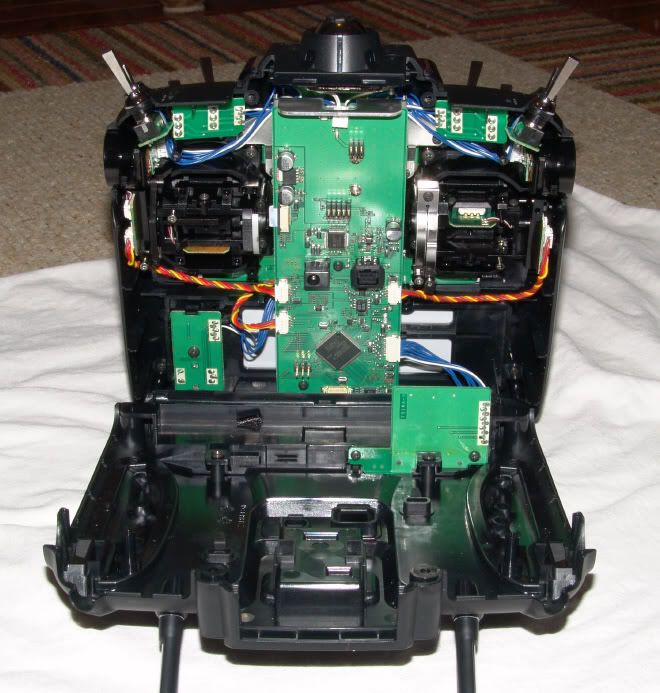 Carefully open the transmitter, and make sure you've got every screw out before you separate the halves. It should come apart really easy. 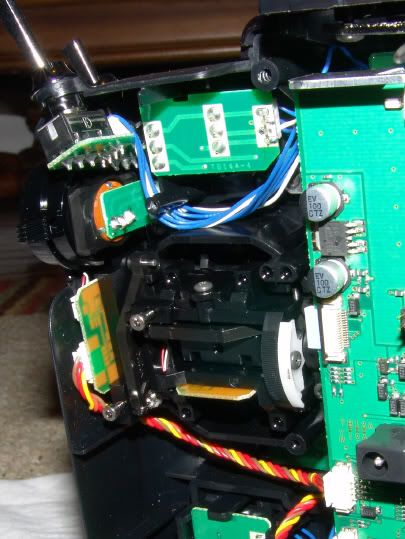 I carefully looked at the right stick to see how it was assembled. Move the stick around to get a better view of how the whole arrangement works. It should become readily apparent, what needs to be done. 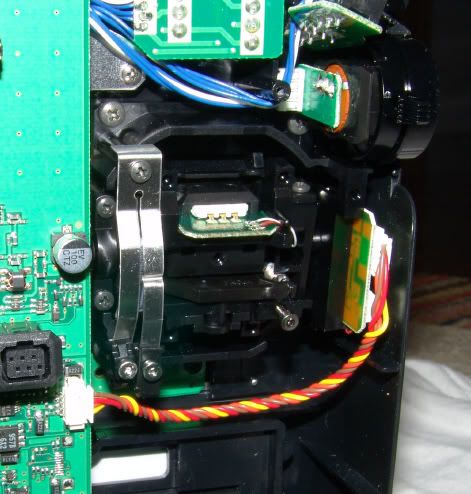 The left stick is bound to have a racheting mechanism installed on it, which is nothing more then a metal tab that engages the notches on the stick, as it moves. 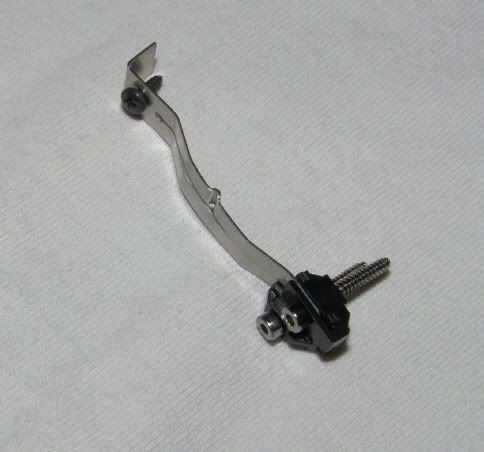 You'll want to remove this metal tab and keep it in a safe place. If you ever want to convert back to a rachet throttle, you will be able to. 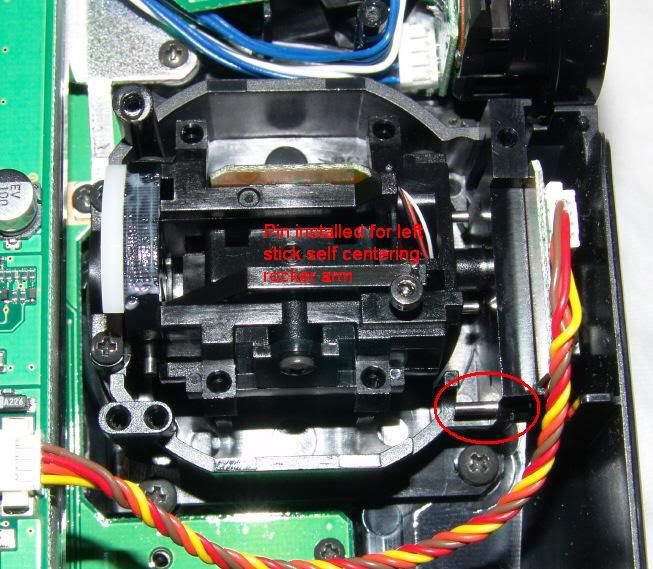 The next thing I did was install the pin that the rocker arm hinges off of. Study your radio's right stick if you aren't sure where the pin needs to go. On Futaba radios, the sticks are mirrored images of one another, but they are upside down. I'll show this in a picture, later. 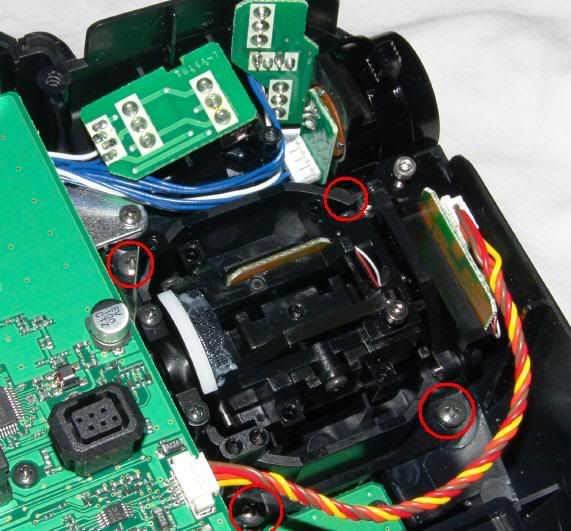 About this time, I found out that the best way to work on the left stick was to remove it from the radio. I needed to do this so I could install the spring hook, which could only be accessed from the end of the stick assembly. The assembly gets screwed to the radio faceplate. No big deal. Just 4 screws hold it in place. You may or may not need to disassemble the complete assembly. 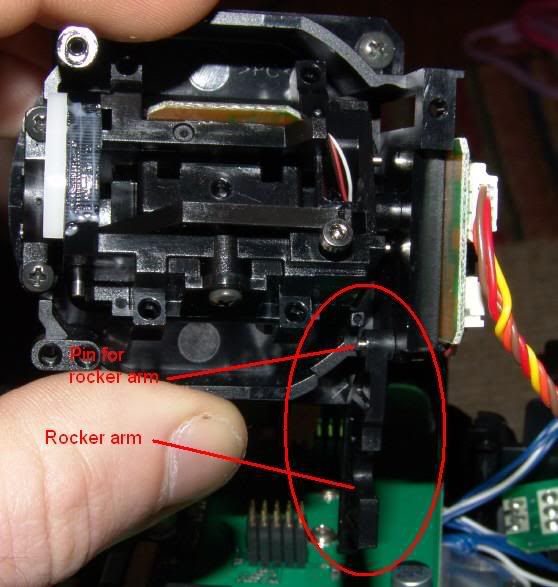 With the whole stick assembly in my hands, it became much easier to work on. I hung the rocker arm, which is really what centers the stick, on the hinge pin I installed eariler. 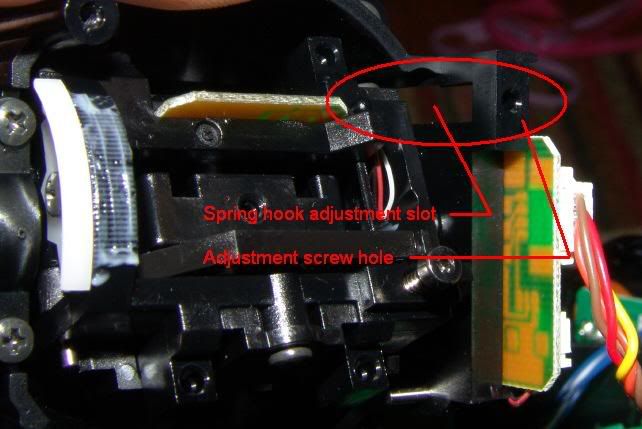 I found the slot for the adjustable spring hook to slide into. Basically what you have here is a plastic hook that is captured inside the open slot, and the hole you see, in the photo, is for the tensioning adjustment screw. When the screw is cranked in, it pushes the hook further away from the rocking arm, increasing the spring's strength. I'm not sure all radios have this feature, but it's a nice one to have. 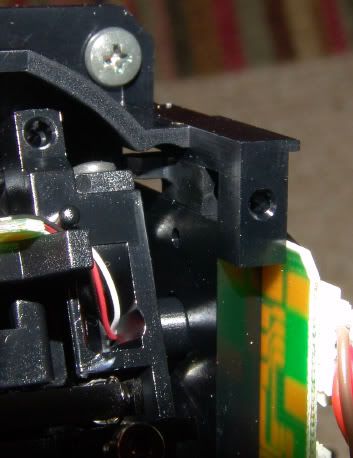 It might be hard to see, but the above photo shows the spring hook in the slot. 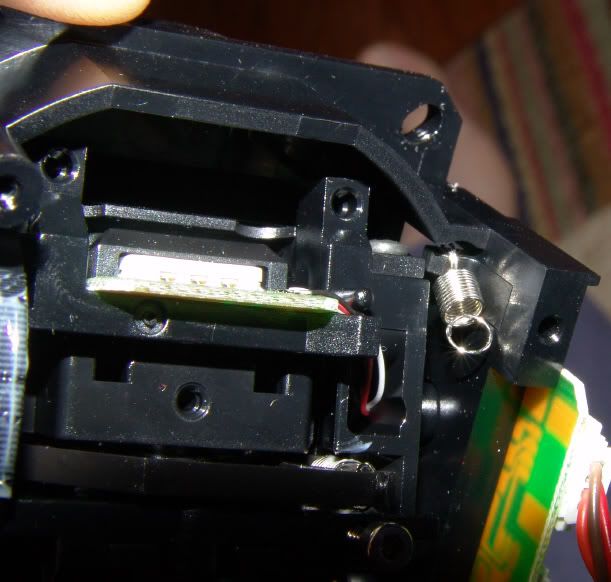 Next, I hung the centering spring on the hook and swung the plastic rocker arm up into position. It was easier then I thought it might be, to hook the spring onto the rocker arm. I used a very small precision screw driver to do this. Once the spring is on, you don't have to worry about loosing parts anymore. The spring tension holds it all together. 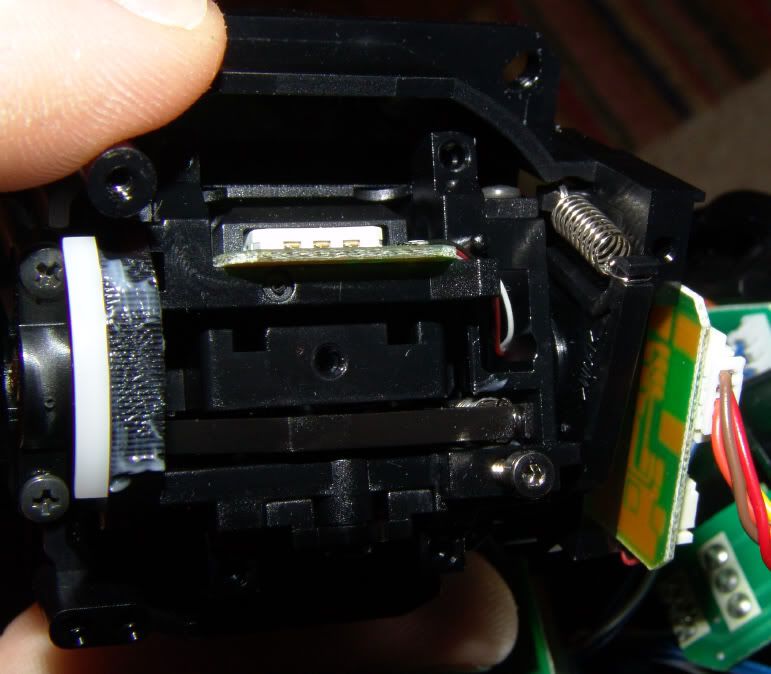 In the above photo, you can see how it all goes together. I'm pushing the stick down so you can get a better viewing angle.  The one part I didn't receive was the small screw used to adjust the spring tension. It's basically a jack bolt that pushes the spring hook away from the rocking arm and increases the tension on the spring. Lucky for me, I had had a spare 2mm screw in my hardware collection that worked perfect. 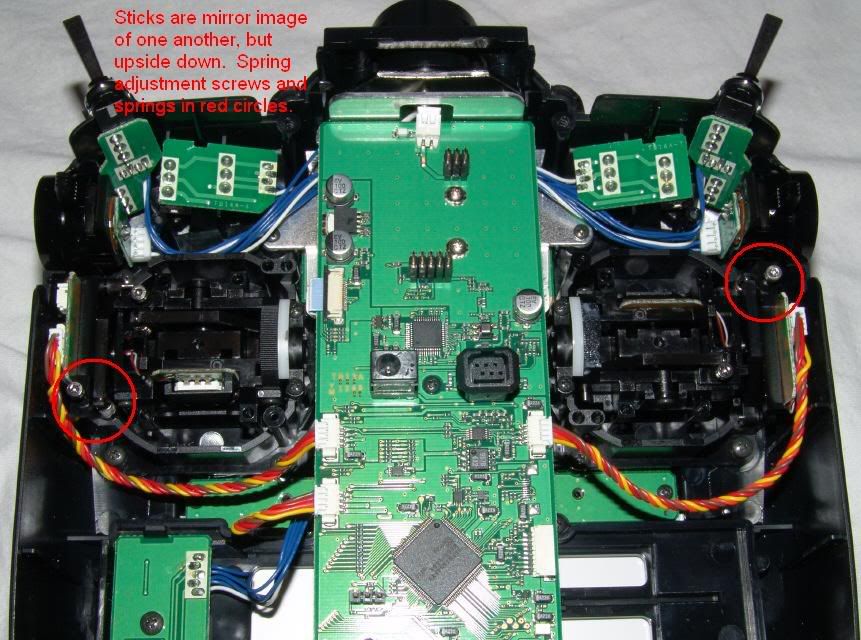 Move the stick around a bit to be sure it works properly. Then reinstall everything you took apart. The above photo shows the completed installion and the difference between the right and left sticks. All that is left to do at this point is to put the case of the transmitter back together, adjust the spring tension to your liking (if you have that feature) and enjoy!
__________________
Nathan
|
|
#3
09-07-2010, 03:27 PM
|
|||
|
|||
|
Thanks Espeefan,
I also found a site showing for the 4YF. http://heatarmor.com/joomla/index.ph...d=74&Itemid=29
|
|
| Currently Active Users Viewing This Thread: 1 (0 members and 1 guests) | |
| Thread Tools | |
| Display Modes | |
|
|


 Linear Mode

