|
|||||||
| Construction Equipment If it digs, pushes, hauls dirt "off road" post it here. |
 |
|
|
Thread Tools | Display Modes |
|
#1
 11-23-2011, 01:30 AM
|
||||
|
||||
|
Well I am finally getting around to building my first piece of construction equipment, and even better; it is my shop class project for the year! I started designing it early May 2011 and after a few versions, screw ups, long nights and errors I have finally got the design finished! I roughly based it off a CAT 930H to get the general shape right:
 I did change some aspects of the design for RC convenience and if push comes to shove there will be no copy write infringement. But it is roughly 12:5 scale +/- 10mm. Each wheel will be independently driven by a planetary gearhead motor and all motors will be driven by a Sabertooth 12RC ESC rated at 25A Peak. The hydraulic system will be powered by a RC4WD 4200XL Pump, I will be making the cylinders and Bi-directional Spool valves and the hose will be from a place in Germany. It will be approx. 60cm long with the boom parallel to the ground , 20cm wide and weigh in at about 23-25lbs. For most of the construction I will be using 6061 Plate aluminium, Standard Carbon Steel, 7075 Aluminium for the boom, and a little bit of styrene here and there. The model will have approximately 350 parts, welded, brazed and bolted together/ I luckily will have full access to a Tormach PCNC 1100 that our school just bought and luckily  I am the only one who currently knows how to run it I am the only one who currently knows how to run it  so my teacher has basically given me full access as long as i don't ruin the new machine. I hope to have the model some what perfect but with it being my first construction model i'll try to keep my hopes a little lower. I think I've got most things figured out but I'm sure I am going to learn lots. One question I have is how big of hydraulic fluid reservoir should I have? Anyways here's a few renders of my design: so my teacher has basically given me full access as long as i don't ruin the new machine. I hope to have the model some what perfect but with it being my first construction model i'll try to keep my hopes a little lower. I think I've got most things figured out but I'm sure I am going to learn lots. One question I have is how big of hydraulic fluid reservoir should I have? Anyways here's a few renders of my design:Version 2: 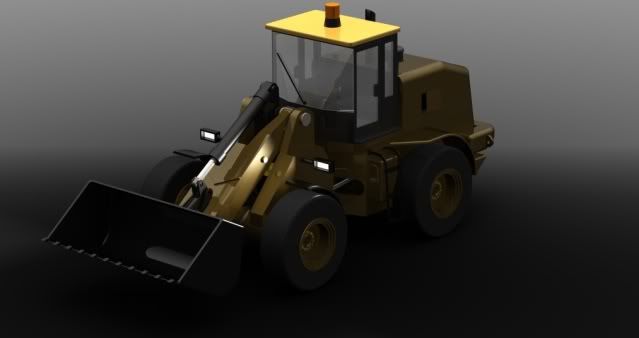 I liked it but it was WAY to wide (30cm!!!) and to short (50cm) to be scale. Version 3: 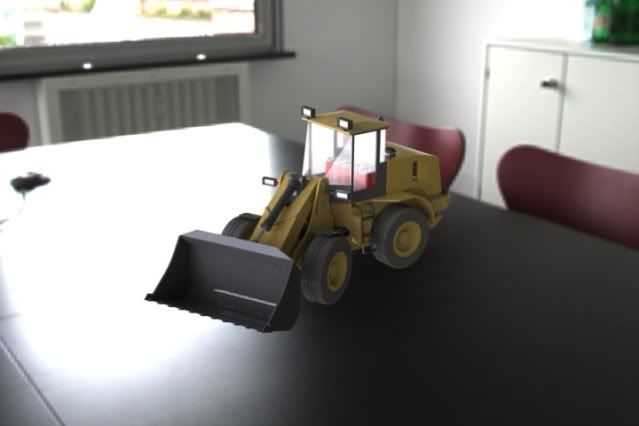 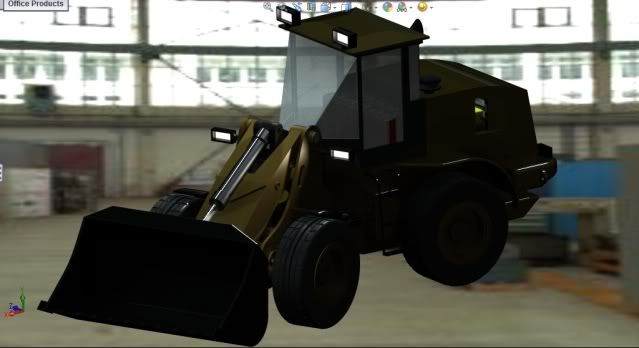 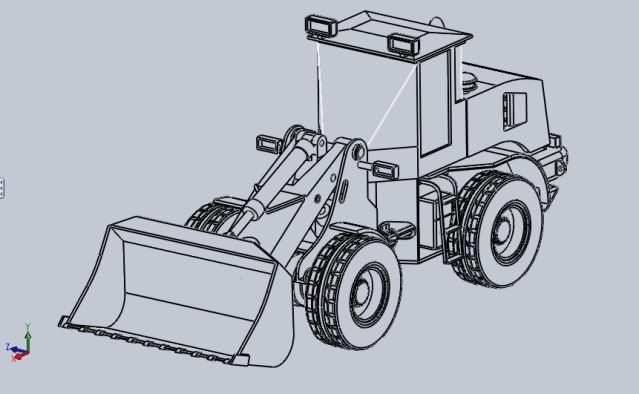 Bi-directional Spool Valve - Servo Operated: 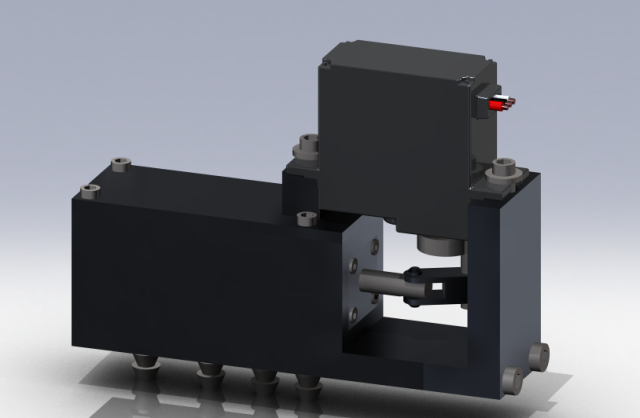 -Chris Last edited by Trucker47; 12-14-2011 at 06:28 PM. 
|
|
#2
11-23-2011, 11:54 PM
|
|||
|
|||
|
Looks good, is the underhood area big enough for the pump and motor and valves?
|
|
#3
11-24-2011, 02:01 AM
|
||||
|
||||
|
Thanks, yea the area under the hood was designed to have pretty of room for a 540 sized pump motor, 2/3 spool valves, dual esc's reciever and room for lights modules, PMW switches, and much more. Heres a picture of it:
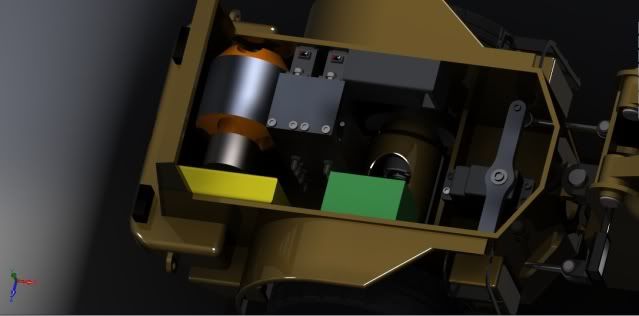 All the parts in there are the exact size from there dimensions sheet. And i added some mirrors, grab handles, fire extinguishers and reworked the bucket linkage and quick release bucket. 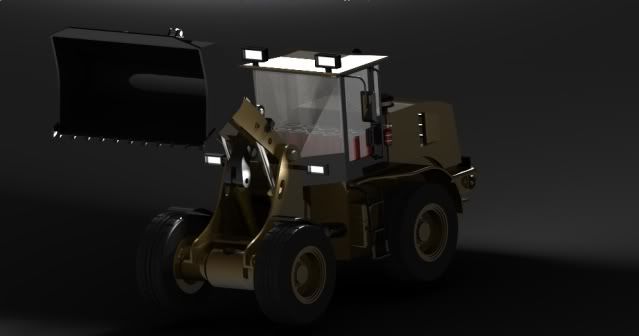 Chris
|
|
#4
11-24-2011, 07:10 AM
|
||||
|
||||
|
looks good Chris
 I wish I had a shop like that when I went to school I wish I had a shop like that when I went to school  . I see 1 issue , how long is your servo arm for the steering ? IDK what your using for a servo , but you loose torque the farther away from the servo you go . . I see 1 issue , how long is your servo arm for the steering ? IDK what your using for a servo , but you loose torque the farther away from the servo you go .
__________________
RIP FreddyGearDrive 2-12-59/12-19-11 To view links or images in signatures your post count must be 10 or greater. You currently have 0 posts.
|
|
#6
11-25-2011, 02:11 AM
|
||||
|
||||
|
Thanks everybody!
ihbuilder - Yes having a shop like this is nice but there is a big downfall it it all. About 2/3 years ago the school district thought they had a surplus in funding so all the schools in my district spent lots of money. Then when the spending was done they readlized that they never had the money to begin with so now our district is in $11.2million debt  So we got a nice mill out of it but we got stuck with terrible lathes Thanks for letting me know about the torque issue i never really thought about it. Ill go back in the design and see what i can do. So we got a nice mill out of it but we got stuck with terrible lathes Thanks for letting me know about the torque issue i never really thought about it. Ill go back in the design and see what i can do.Izzy - I'm using Solidworks 2010 with the in-software rendering software Chris
|
|
#7
11-25-2011, 02:21 AM
|
||||
|
||||
|
Well I was able to get in the shop for 3hr's between a math test and physics test
 and i started on a hydraulic cylinder for the bucket tilt. I have only done the roughing passes and have not honed the cylinder or cleaned up the outside. Heres some pics of today's work. and i started on a hydraulic cylinder for the bucket tilt. I have only done the roughing passes and have not honed the cylinder or cleaned up the outside. Heres some pics of today's work.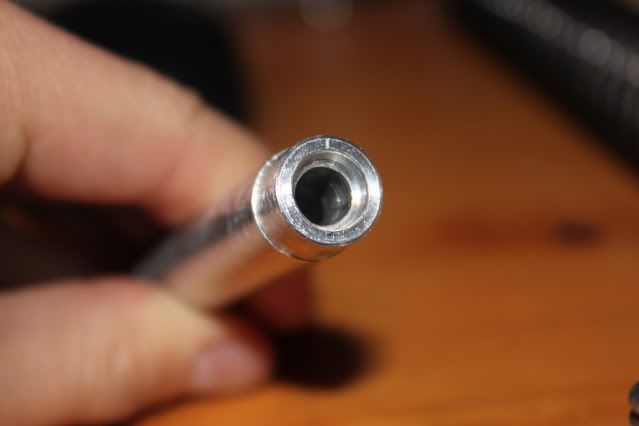 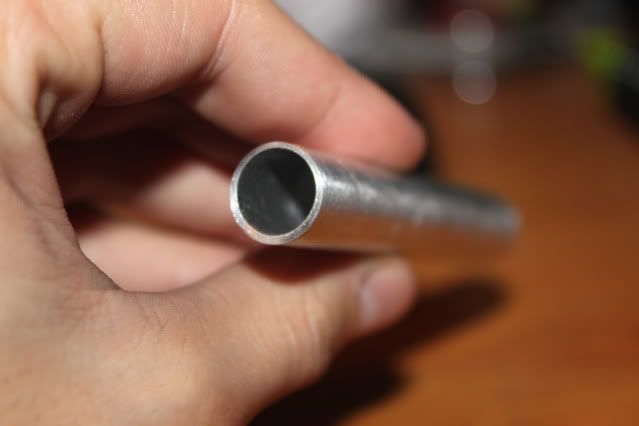 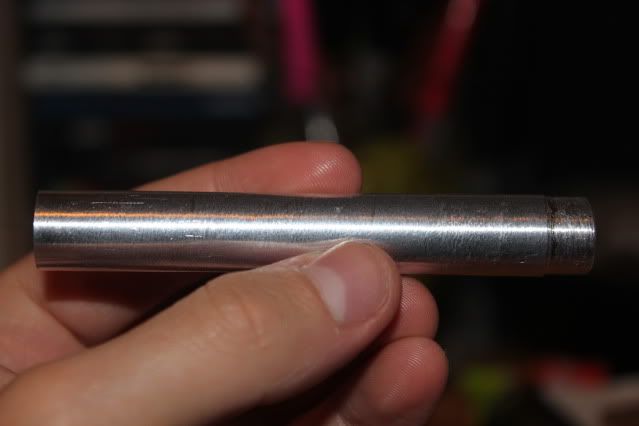 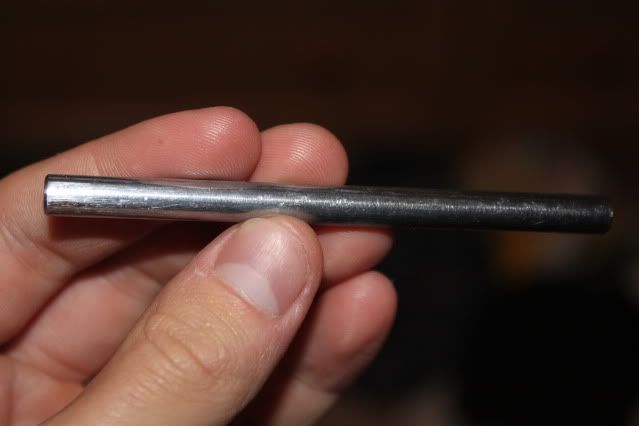 *still needs to be parted off stock 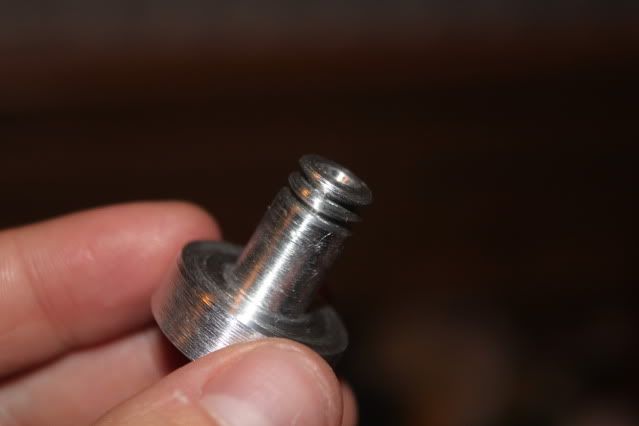 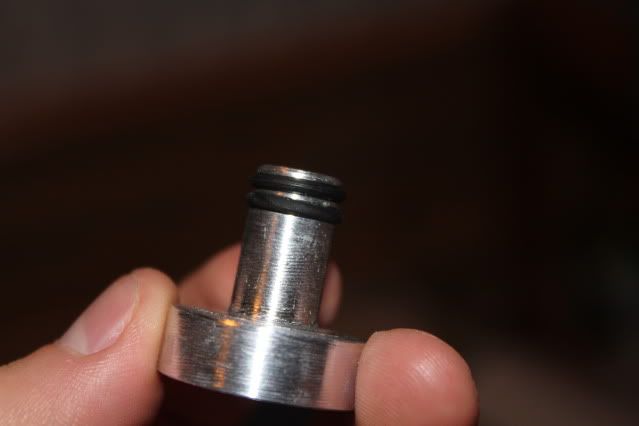 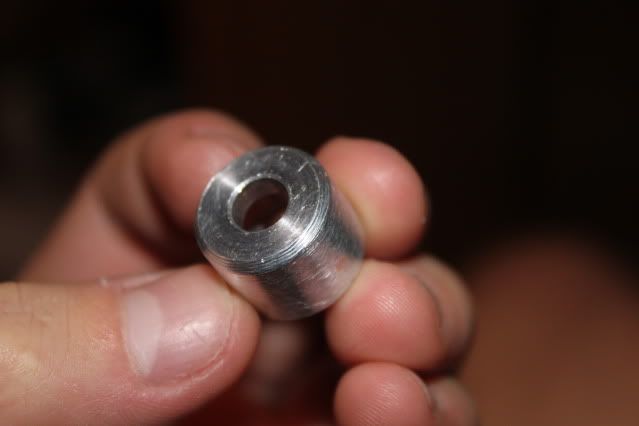 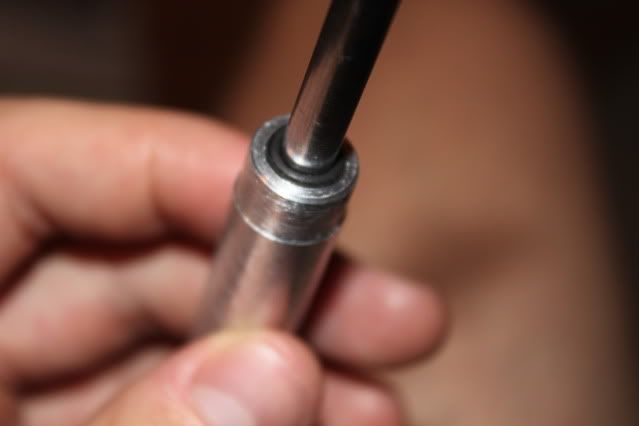 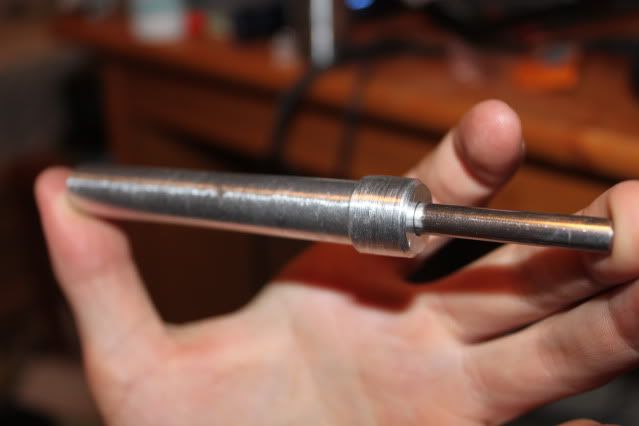 Any comments would be greatly appreciated as i only kinda know what i'm doing with the hydraulics. Chris
|
|
#8
11-25-2011, 07:15 AM
|
||||
|
||||
|
Chris , you can use 2 servos , 1 on each side y'd together . But , you have to mount 1 reverse of the other . solidworks looks nice , I'll have to try it sometime
I did try Autocad2012 but my cam dosen't support it ( to new  ) and runs 5-6000.00 usd ) and runs 5-6000.00 usd
__________________
RIP FreddyGearDrive 2-12-59/12-19-11 To view links or images in signatures your post count must be 10 or greater. You currently have 0 posts.
|
|
#9
11-25-2011, 01:57 PM
|
||||
|
||||
|
You're installing hyds anyway, why wouldn't you make the steering hyd too?
And with a motor at each wheel, that's almost like two locked axles, it'll take alot of power to steer. Hyds is way smoother action & stronger. 9mm bore with 2mm plumbing, it'll steer plenty quick & save you alot space. Make your cyl housings from brass, then you can solder most of it together & bolt the rod cap on to change seals when a leak develops. Are your pushrods stainless steel? 12mm bores for loader/bucket & 9mm for steering, 2mm plumbing throughout & belt drive with reduction between your pump & motor... should be quite a hardy working loader.
|
|
#10
11-26-2011, 03:38 AM
|
||||
|
||||
|
ihbuilder - thanks for the idea! I think im gonna bo with Lil Giants idea and run another valve and some cylinders versus a servo. I think from what you guys have told me it will be better off. Yea solidworks is awesome and the student discount is even better!! $150
. What CAM software are you using? Is there a plug-in available for it? When i first got my cam program i was having all sorts of problems even to where i couldn't import a part then i got the Solidworks Plugin and i have not had a problem yet Lil Giants - I originally didn't run hydro's because i didn't know how easy or hard the valves where gonna be to machine but for one reason or another i never really thought about the torque needed to turn this machine (brain fart ) Okay i'll if i can get some brass tomorrow when i head to out local metal shop. Right now they are 1/4in carbon steel as that is all i had. When i get near completion i think i will get some stainless but for now ill settle with this steel so if i ruin a shaft by accident i can just go grab another piece. Any recommendation on a reduction rate? I am planning on running the same hydro pump as the RC4WD 4200xl Earth digger and the same motor it has. Thanks for the advice I really appreciate it as I don't exactly know how to make these hydraulics work perfectly  Just one more question though how much friction should there be for the shaft to move up and down? My piston seals seam to be very tight and im just wondering how tight is to tight? Just one more question though how much friction should there be for the shaft to move up and down? My piston seals seam to be very tight and im just wondering how tight is to tight?Thanks! Chris
|
|
#11
11-26-2011, 02:22 PM
|
||||
|
||||
|
I was gonna try 2.5:1 belt reduction for my rc4wd motor/pump, I think that's what's in the 850. You fashion up the mounting plates with bearings on the pump shaft, get two sets of pulleys & belts to send me one.
(ofcourse I'll pay you for your work, as well as parts)Did you lubricate your seals before putting the cyl together? Lithium white grease is what I use, the grease will help to prevent any nicks to the seals during assembly. Should be a reasonable amount of resistance there, you want tight seal.
|
|
#12
11-26-2011, 07:18 PM
|
||||
|
||||
|
Okay I think I might try that out once I get my pump and motor using these http://www.robotmarketplace.com/prod...ingertech.html
Yea if I can get some spare time and if it works out ill let you know. I used some motor oil that we had in the shop but that's about it. But I got some brass today so ill start on some new cylinders. On my existing cylinder there is quite a bit or resistance but i guess ill just need the pump to test and see if it is to little or to much resistance. Thanks! Chris
|
|
#13
11-26-2011, 08:15 PM
|
||||
|
||||
|
motor oil works too . there should be some resistance but you should not have to work up a sweat to move the ram in or out with a vise grip locking pliers . there's a formula or chart for figuring your o-ring grooves I'll have to look it up . I think it's in the machinery hand book . do you have 1 or access to 1 ?
__________________
RIP FreddyGearDrive 2-12-59/12-19-11 To view links or images in signatures your post count must be 10 or greater. You currently have 0 posts.
|
|
#14
11-26-2011, 09:40 PM
|
||||
|
||||
|
Steve are these the chart's you where thinking of ? http://www.marcorubber.com/gd-directory.htm
Later, Neil.
|
|
#15
11-26-2011, 10:07 PM
|
||||
|
||||
|
Quote:
__________________
RIP FreddyGearDrive 2-12-59/12-19-11 To view links or images in signatures your post count must be 10 or greater. You currently have 0 posts.
|
|
#16
11-26-2011, 11:47 PM
|
||||
|
||||
|
One example of a motor/pump mounting hardware.
http://www.vario-earthmovers.com/bau...70-teil-8.html
|
|
#17
11-29-2011, 02:37 AM
|
||||
|
||||
|
Thanks for the charts guys! those will come in lots of handy, as i'll have to admit i didn't really know what i was doing in the beginning.
Lil Giants - Thanks for the picture I should be getting my pump within a few weeks so I will keep you updated. Just a little update, I got some 2.5" aluminium stock for some wheels and ordered some tires, some 2" aluminium stock for some axle cases and some 3/4" brass round stock for some hydraulics. As well as ordered some tires and taps so I can get back to work now that i've got an idea of what to do -Chris
|
|
#19
12-01-2011, 01:53 AM
|
||||
|
||||
|
Got a cylinder 90% done just need to attach the caps, drill mounting hole and attach the hydraulic lines.
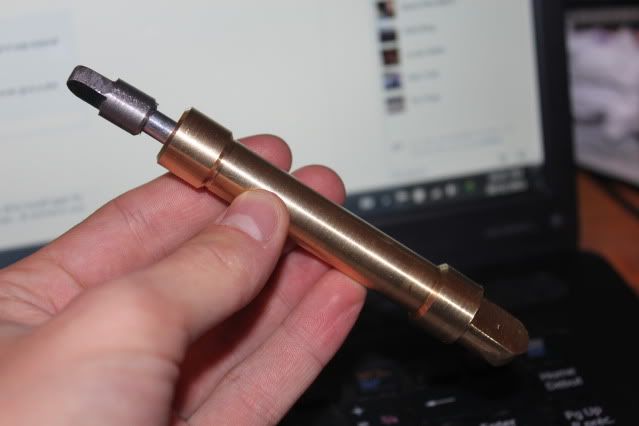  Chris Who can tell the radio in the back that i'll be using? 
Last edited by Trucker47; 12-01-2011 at 02:13 AM. Reason: got some pictures! :)
|
|
#20
12-12-2011, 10:28 PM
|
||||
|
||||
|
Update!
Well I was able to get some time on our bigger engine lathes and got some hubs made. They are now ready for the CNC to drill out the final mounting holes. They have a finished OD of 25mm, ID of 4mm and length of 15mm. 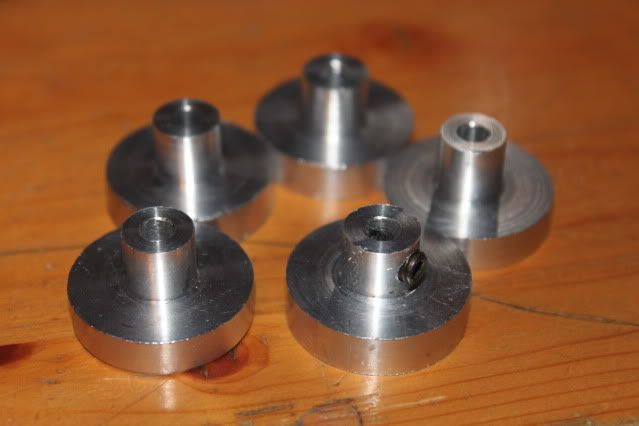 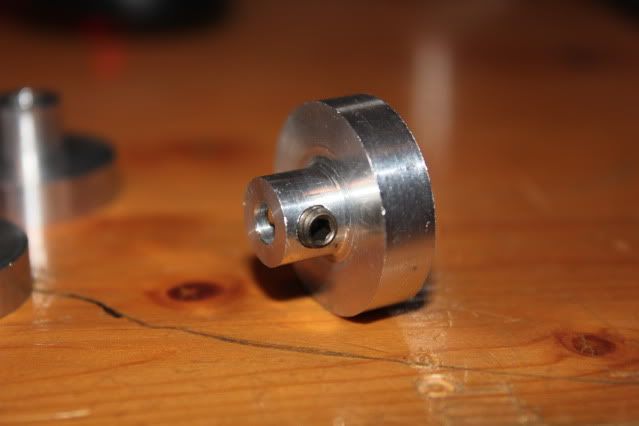  I was also able to test out turning steel Jeez is that ever harder than Brass or Aluminium (no pun intended) I started by making the rotator ring that the model will rivot/rotate upon. 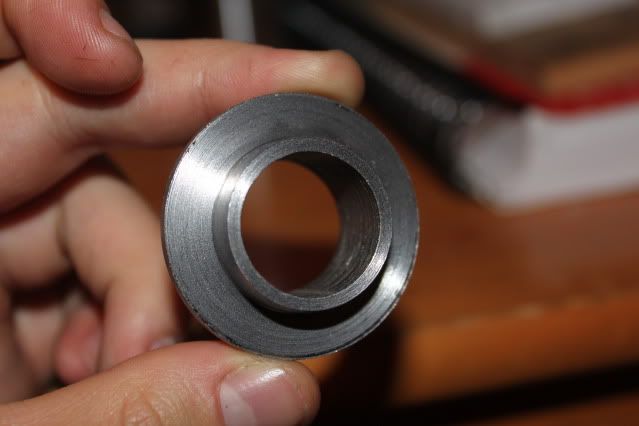 Then I tried to make the spool for a valve. And thats where it all went bad, first i accidentally ran my tool into the chuck and snapped my carbide insert (luckily it was only the insert). Then our very high end lathes (1950's engine lathes that cannot even cut straight) slipped while grooving a slot for some o-ring and bent the spool  . . So I said screw it and made one out of aluminium    I am not really happy with it so I may remake it out of brass. Anyways I should be getting a pump soon so I should be starting to make something move by end of January!! Also I just picked up some 16GA Hot Rolled sheet steel and will be running it through the mill to construct the rear of the chassis. Here's an exploded view so you can get an idea of how many plates are just on the back: 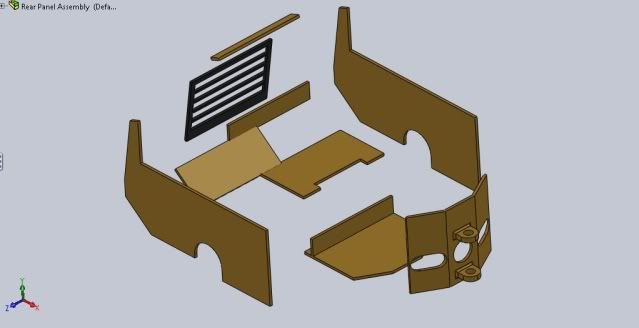 -Chris
|
|
| Currently Active Users Viewing This Thread: 1 (0 members and 1 guests) | |
|
|


 Linear Mode

