I have started work on building a model of a truck I used to operate many years ago. I am trying to make it as true to the original as I can. The original truck had painted wheels instead of fancy chrome wheels. The company, a utility, wasn't about to spend any money on flashy chrome. So knowing they were going to be painted I got a set of standard white plastic Tamiya wheels. These are the standard wheels that come in every Tamiya truck kit but haven't been chromed. These wheels also have the advantage of being very cheap. The original truck I am modeling had Budd style 2 hole rims. Looking at the 9 hole Tamiya wheels, I wondered if I couldn't modify them to look like the originals. This is the process I came up with.
The easiest way I figured would be to glue plastic plugs into the existing holes, sand them flat with the surface of the wheels and then drill new holes. Upon measuring the hole size I discovered they were just a bit smaller than a 4mm rod would fit into. So I had to turn down some rod and make plugs to fit into all the holes. 10 wheels x 9 holes per wheel = 90 plugs to make! Can you say tedious? Actually made about a hundred to allow for goofs.
These two photos show front and back of a wheel with the plugs glued in place.
[img]
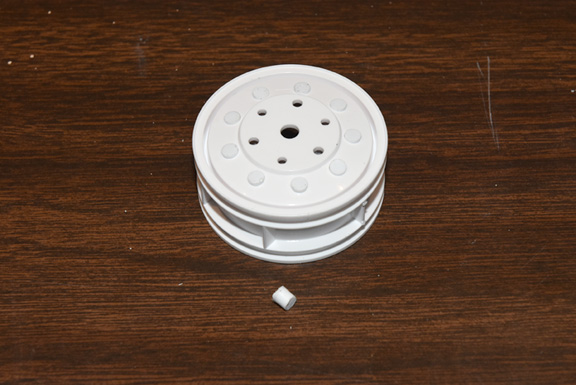
[/img]
[img]
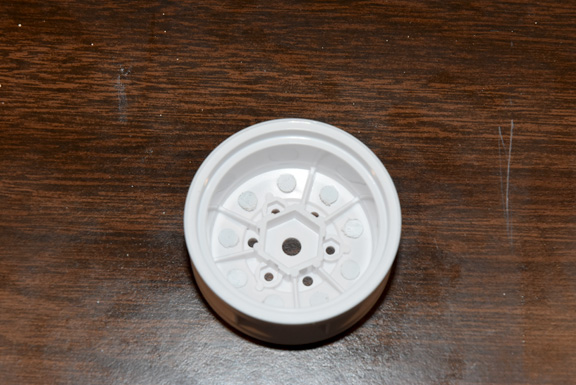
[/img]
I learned that you can't rely on capillary action to pull the cement into the joint. Maybe I made the fit a little too tight? I had a few plugs come loose during the course of machining and sanding and had to redo those wheels. I used Plastruct Bondene as the cement. Make sure to apply to the sides of the plugs before inserting them into the holes.
Next step was to get the ends of the plugs even with the surface of the wheels. The tricky part here is that the surface of the wheel is slanted where the holes are and the new plugs would have to match that slant. I thought the easiest way would be to chuck the wheels up in the lathe and turn the plugs down using the compound rest to match the angle of the slope. I estimated that the angle was about 12 degrees. There is not a lot of room inside the wheels, and I didn't want to damage the cast in place lug nuts, so a small tool would have to used. I first used a 1/4” threading bit. This fit in the area ok but was difficult to get a smooth cut as the next photo shows.
[img]
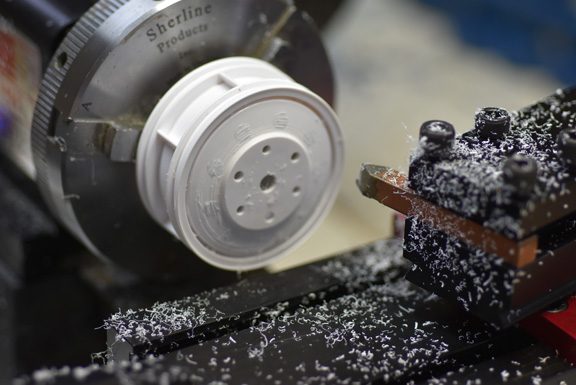
[/img]
I then tried a narrow parting tool and that worked very well, making for a pretty smooth surface on the soft plastic. You may note that the tool bit in the above photo is upside down and cutting on the back side of the wheel. This is an idiosyncrasy of the Sherline lathe. Works well once you get used to working like this.
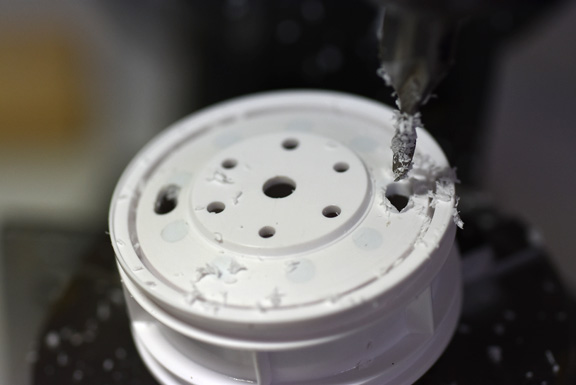
After flattening the plugs, the next step was to cut the new holes. I used my mill for this step but a drill press would have worked as well. While a rotary table is really helpful here, careful measuring and spotting without one could also be done. My mill does have CNC capability but I used it only to control the positioning of the rotary table. Didn't think it was worth the effort to write a program for this work. The next two photos show the milling of the new slots.
[img]
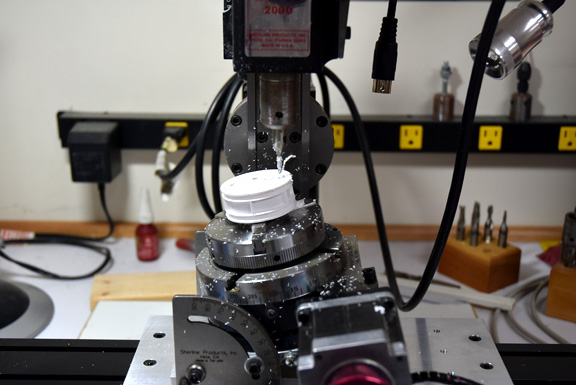
[/img]
[img]
[/img]
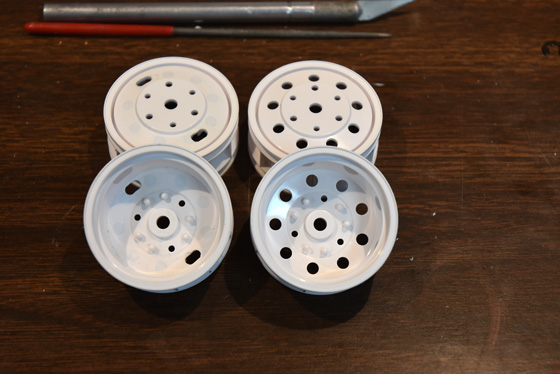
After all the wheels had their new slots cut they were all put back on the lathe and then sanded. I used angled sanding sticks through 600 grit to get the surfaces completely smooth and ready for priming and painting. Next photo shows one pair of the newly revised wheels next to a pair of the originals.
[img]
[/img]
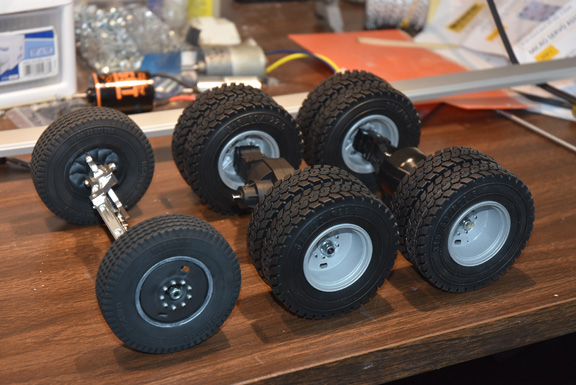
After the sanding it was off to the paint booth with them for priming, painting and detailing. Next photo shows the completed wheels with tires installed.
[img]
[/img]
Why the original truck had silver rear wheels and black front wheels I don't know, just the way it was. All in all I am very happy with how they turned out and thought that others might want to see this method as a way to inexpensively modify wheels for their truck projects.
Oh, one last note. When cutting the slots in the front wheels it was necessary to cut completely through one of the support ribs on the back side of the wheel otherwise it would show in the slot. Since there are 9 holes in the wheels they are asymmetrically spaced. In other words you can't cut two holes 180 degrees apart in these wheels without hitting one of these ribs. No more weight than will be placed on the front axle of this truck I don't think this will be a problem. If you are going to build up a heavy hauler then you might want to take this into consideration.