
 |
|
|||||||
| Euro Style Trucks and Trailers A place for the Euro style trucks single and twin axle trucks and trailers... |
 |
|
|
Thread Tools | Display Modes |
|
#161
|
||||
|
||||
|
Quote:
Good idea about the right angle plug for the charger! Meanwhile succeeded in charging battery by using some crocodile clips - bit iffy but went OK. Battery does get very hot though. Quote:
 When I tried to turn change the programming on the SMX, nothing much happened ... supposed to get the air brake sound, but nada ... Thanks again for giving it some thought! Really appreciate that! Stephan
__________________
Cheers, Stephan (Rakthi is the one in the avatar) |
|
#162
|
||||
|
||||
|
So this morning the non working servo controlling the valve of the hook arm was up for checking. Easier said than done, had to take all the wiring back apart ... Good thing I did remember to move the mechanism in the up position beforehand because you can't move it now that it is filled with oil. Luckily I could pull the wires without having to take off the bottom plate.
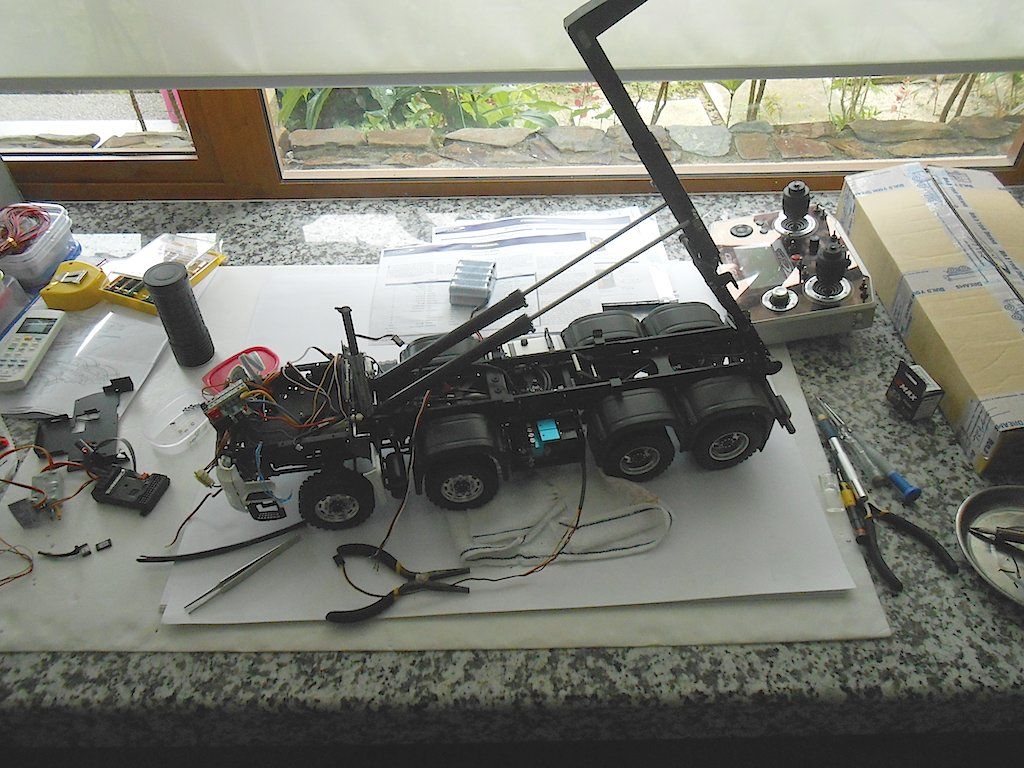 Had to pull wires of both servos because they both run through the same piece of shrink tubing. Didn't see any breaks in my soldering but just to make sure added a new lead I got from the gear servo I busted. Put it on the tester and it worked. I figured one of het three wires must have an internal break. So sigh of relief. And then the struggle getting those wires back to the front. Took some convincing - and a bit of rope - but got it done. As truck stands now. Hydraulics in working order, all lights on truck working (except cabin) etc etc - Looking at pictures I notice I still have to put up the protection rings on the front wheels. 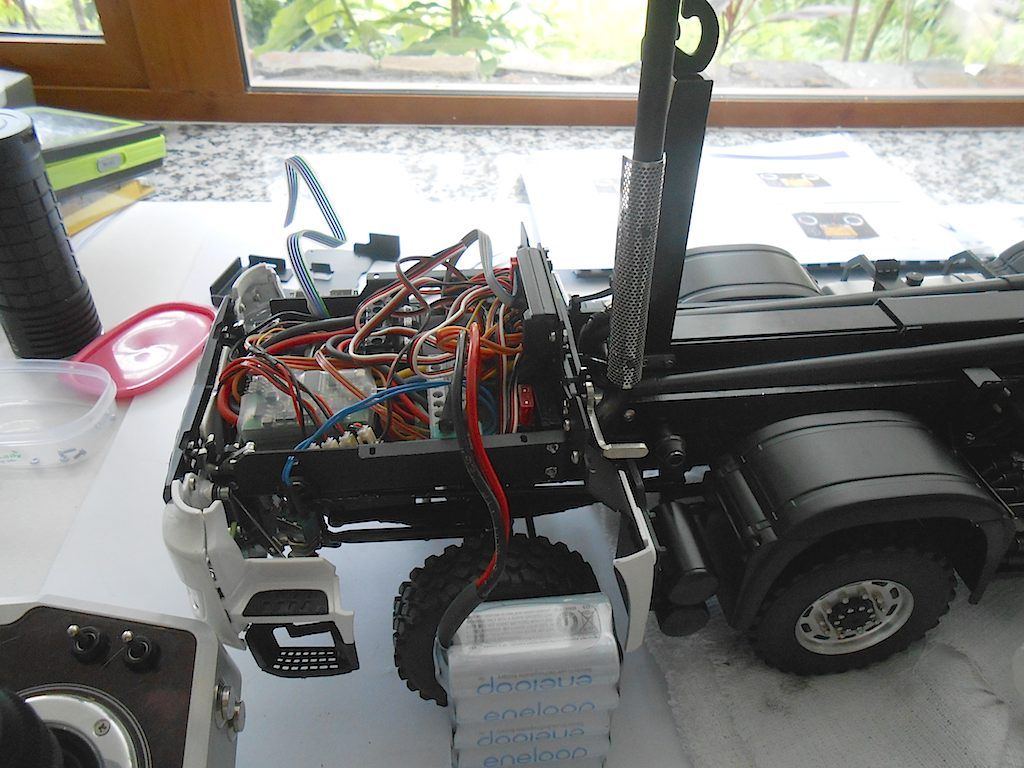 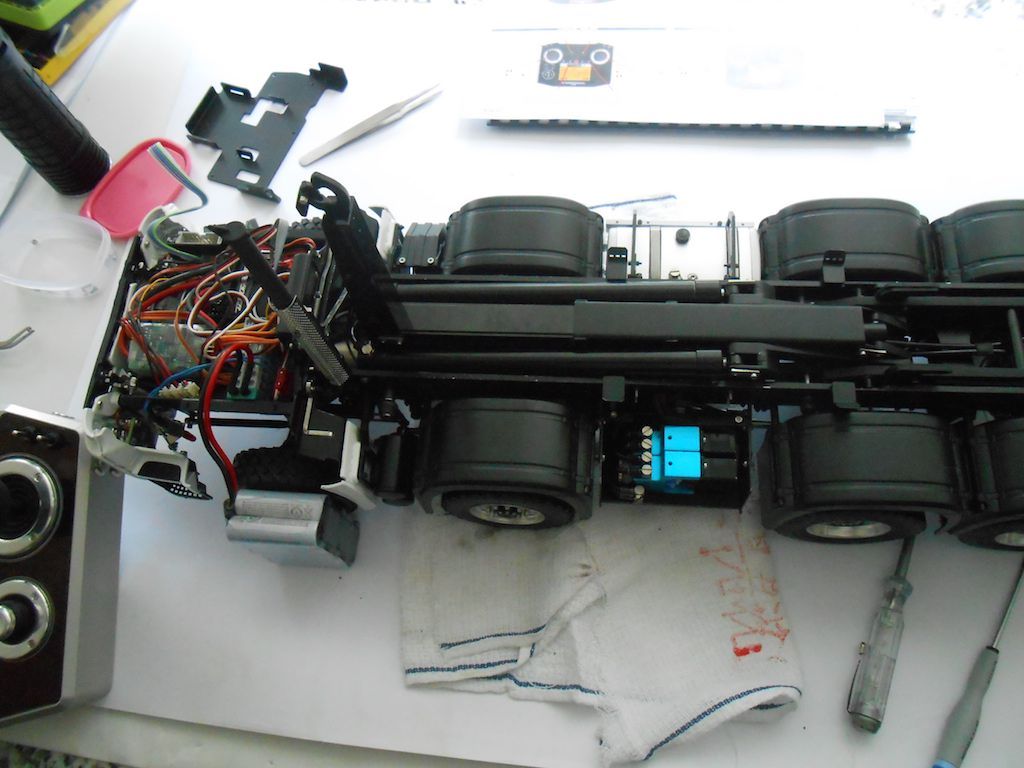 Tomorrow I will check on the wiring to the Universal Kingbus in the cabin and then connect it directly to the 4 way connector and bypassing the flat cable. See if that sorts the problem. And then ... I will start on the container ... been saving that one for last. A nice and simpel straightforward nuts and bolt job. 
__________________
Cheers, Stephan (Rakthi is the one in the avatar) |
|
#163
|
||||
|
||||
|
Hi Stephen,
I would say this a good update. I love it when problems are solved as I'm sure you do too. Thanks, Alan
__________________
To view links or images in signatures your post count must be 10 or greater. You currently have 0 posts. |
|
#164
|
||||
|
||||
|
Hi Alan, true always nice if problems get solved easy.
Did connect the Universal Bus in de cabin directly, switched polarity etc and no joy. So going to leave it for a bit. Got the tracking number of the crimping tool and parts for the servo, will look at it when I take it apart again to shorten the servo wires. An so today I finished the last assembly. No more package sitting around. This looks like fun! Part 1 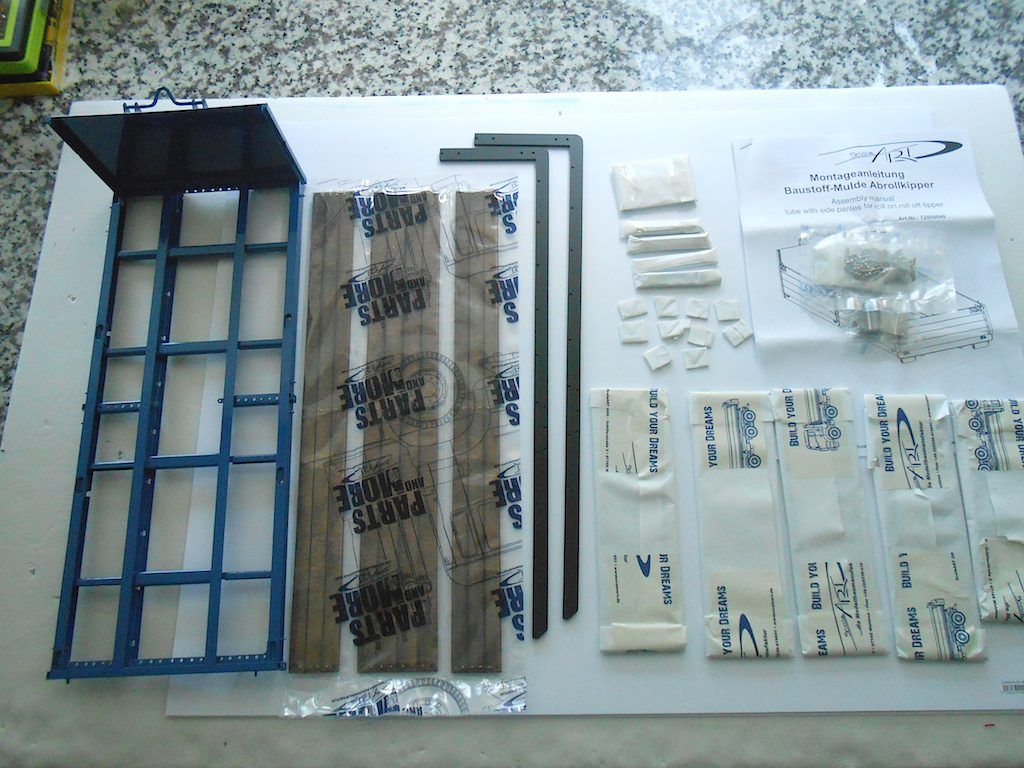 As usual a beautifully piece of metalwork. All brass under the paint. Paint is excellent too. 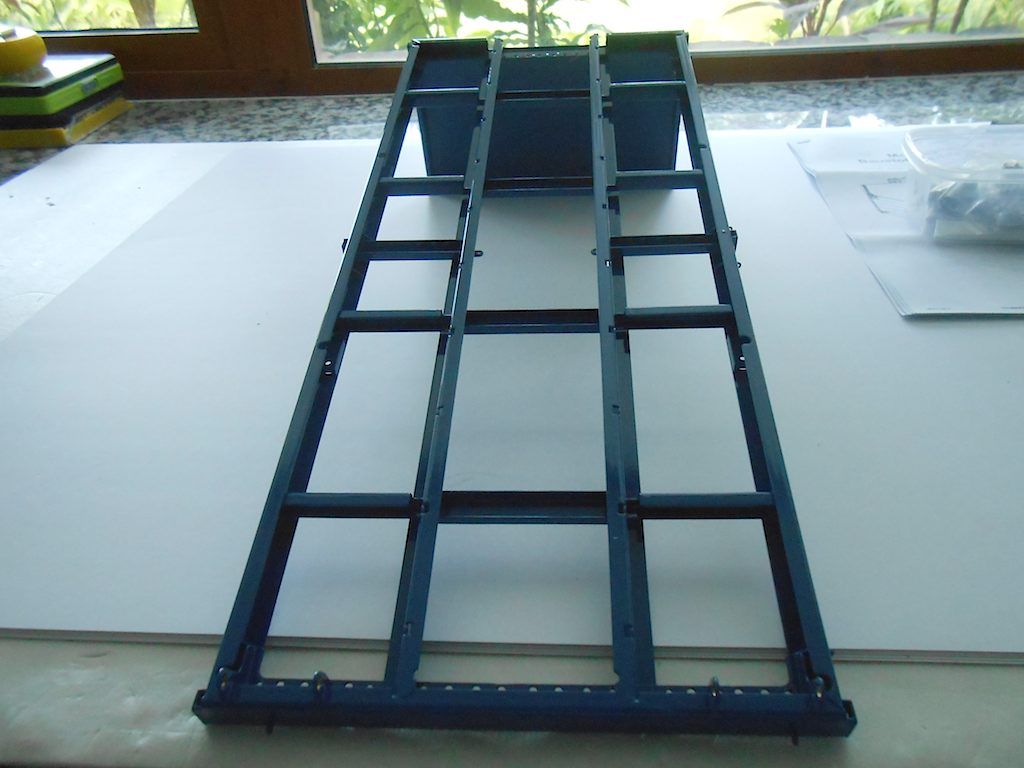 First the gliders go on. Very precise fit. Model nuts in front and regular philips screws at the bottom about every other hole. 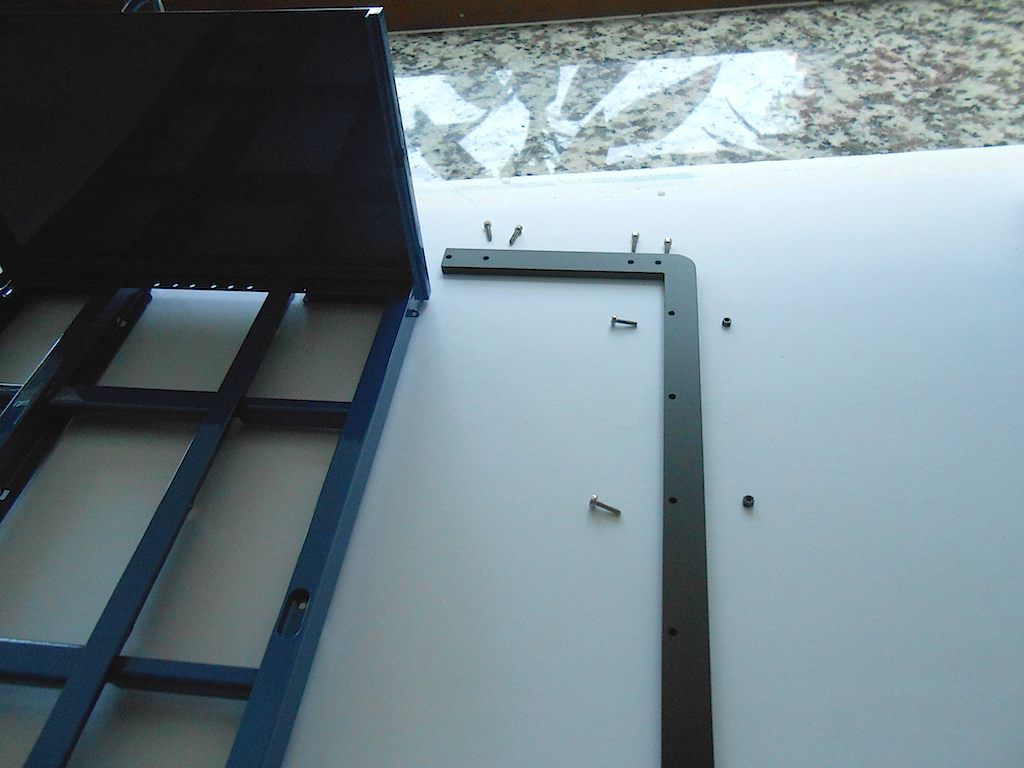 Front 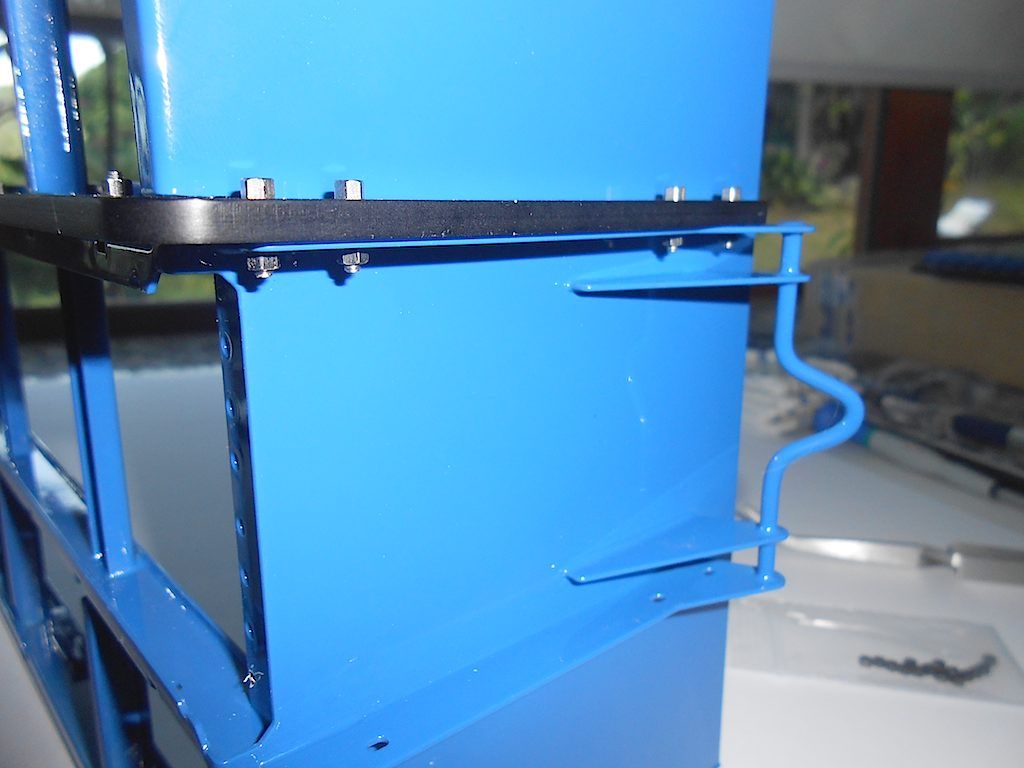 Bottom 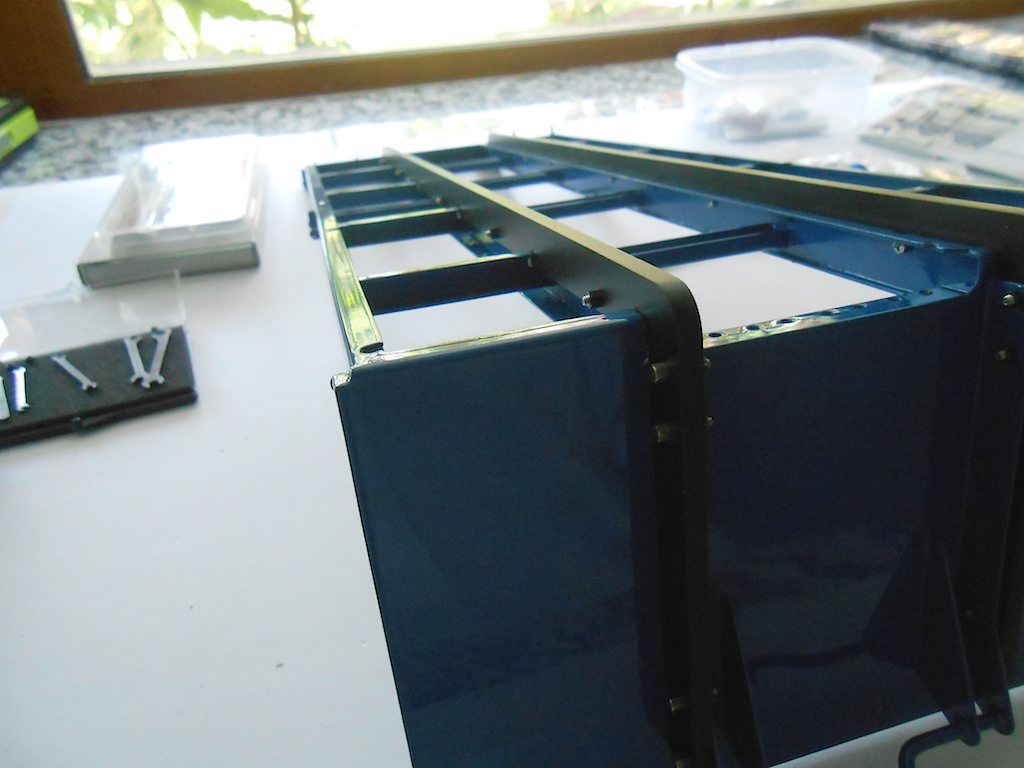 Next the cross piece the sliding hooks of the mechanism grab on too when kipping. Had to loosen the screws holding the glider bars. Very tight fit. 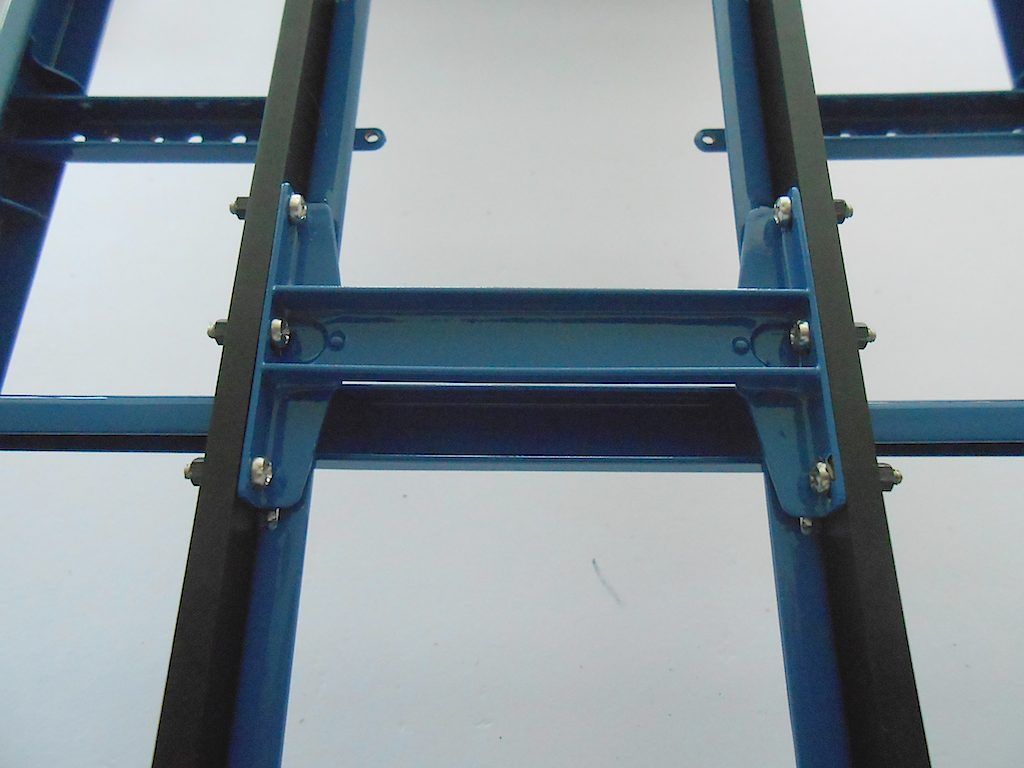 Rollers at the end. Had to file a bit at the holes in the supports to get the pins through. No big deal, but little files are recommended for this build. 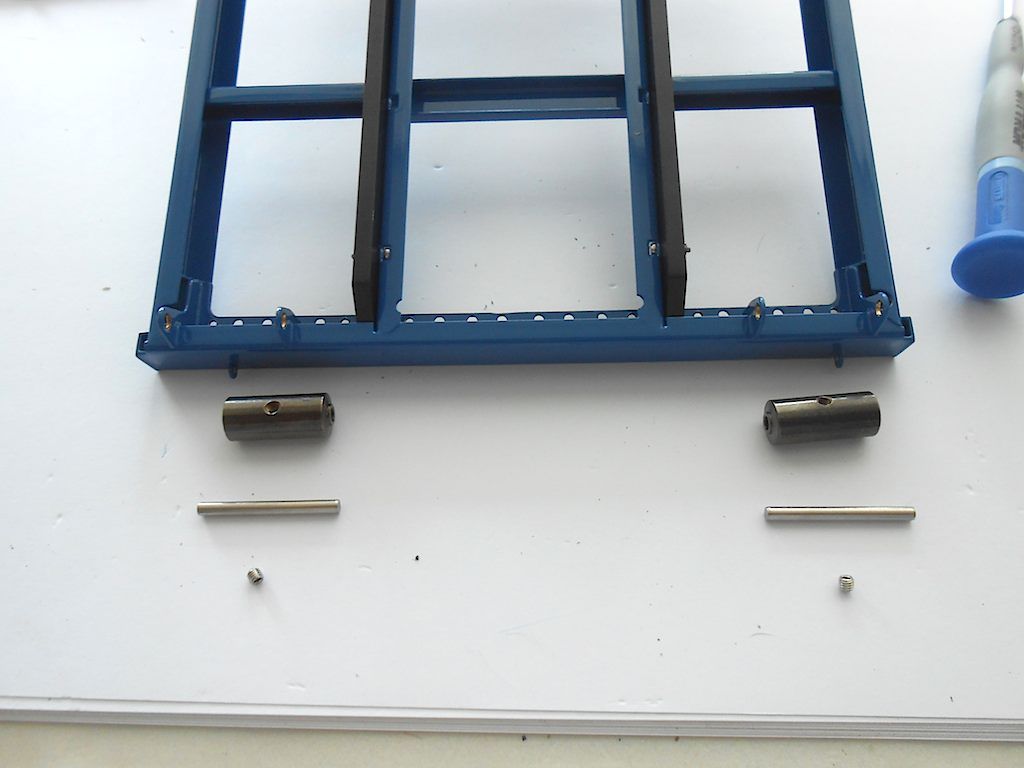 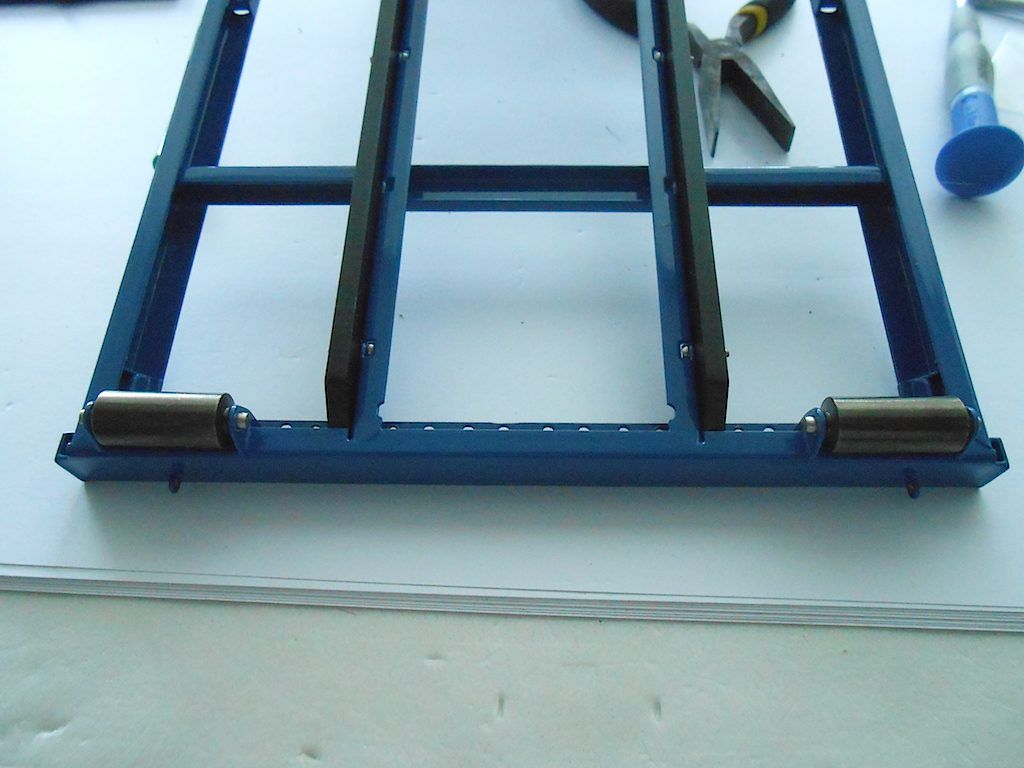 Wood flooring. Kit comes with copper nails you have to insert after drilling the holes out with a 1mm bit, then clip excess and file smooth. Someone at ScaleART had done this already. So my set came prepped like this. 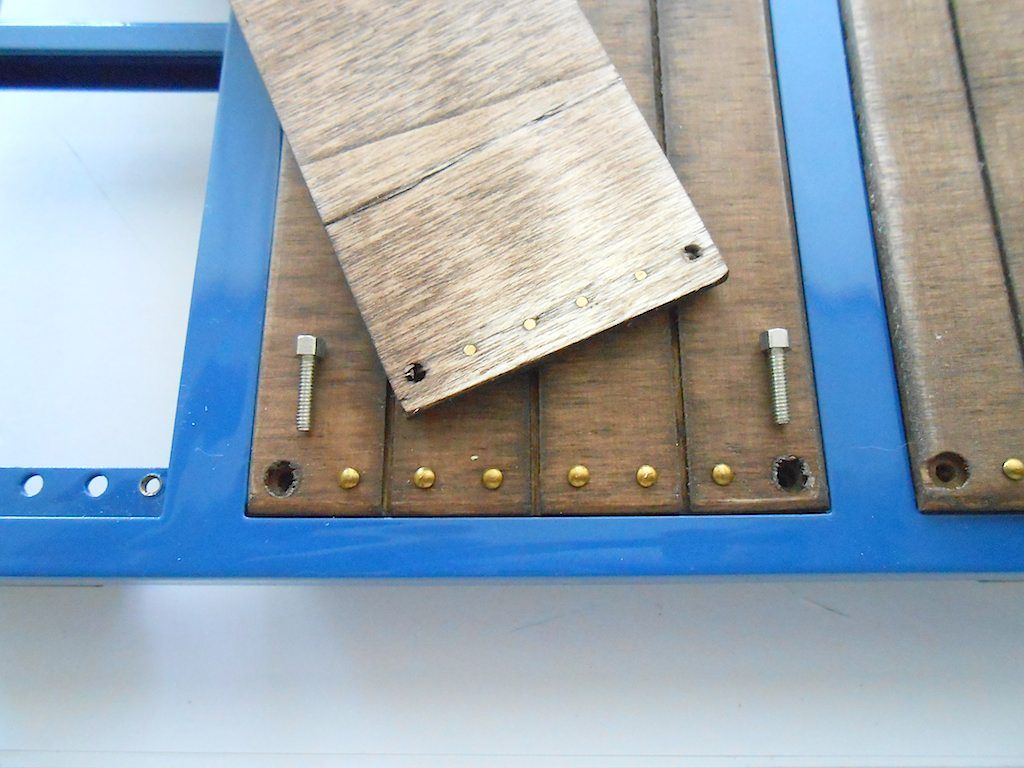 Gets fastened with M2 model bolts. The underlying frame work had threaded holes in it. (exept the middle of the 2 small pieces ... somehow the thread were in the wrong holes. Put an M2 nut on to hold it in place.) 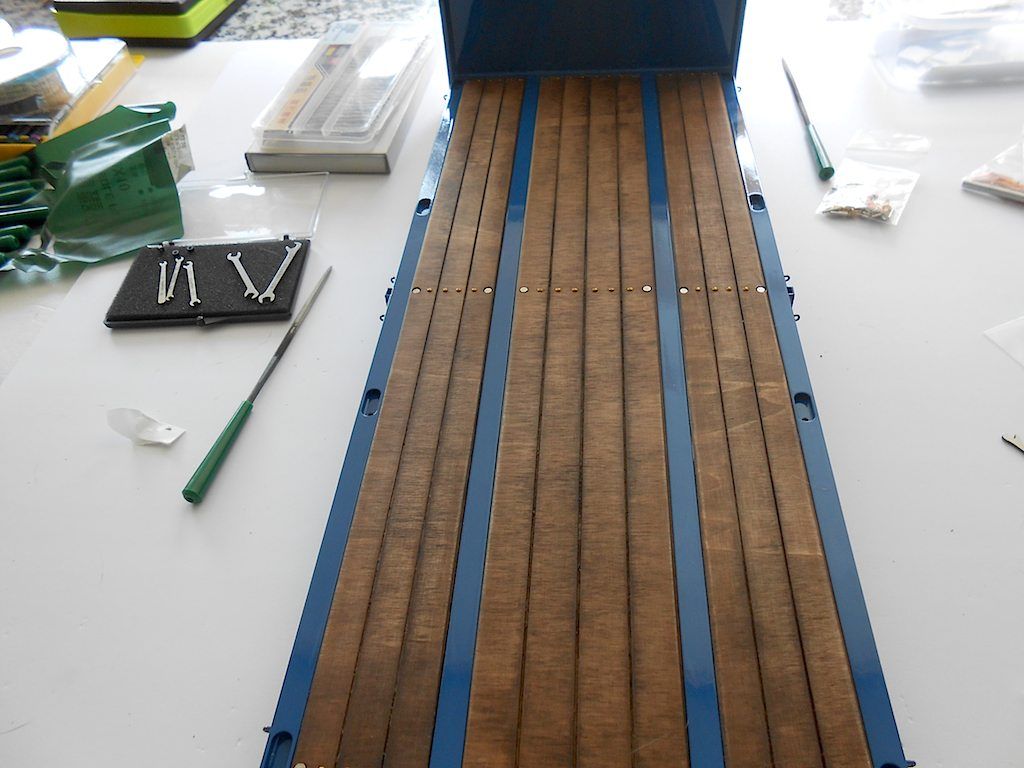 4 uprights slide in holder and bolted on with one M2 model bolt 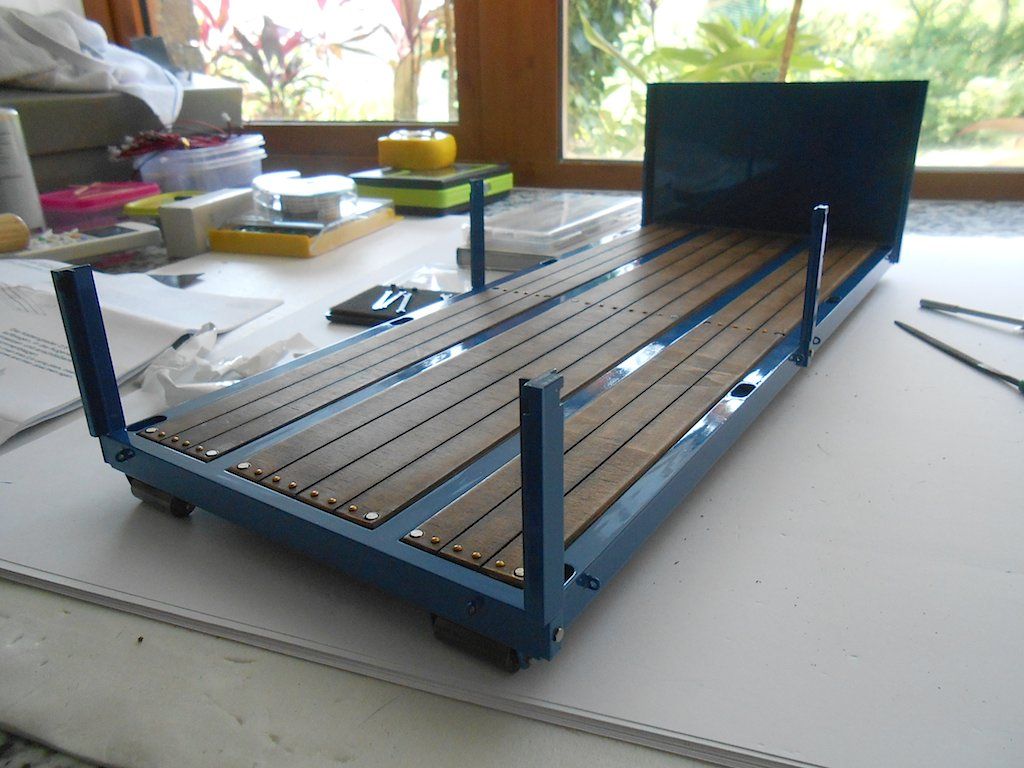 Had to file some paint off to get a good/easy fit. Also had to run the file at the bottom of the holder so get rid of some excess paint. 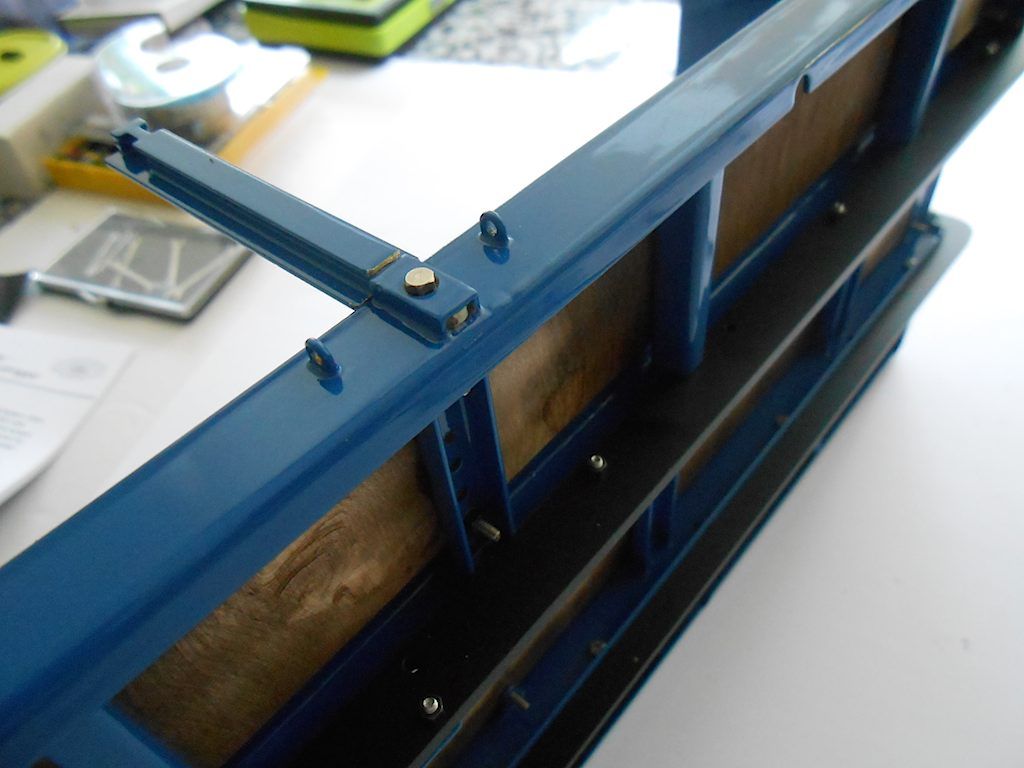 Eyebolts and chain links to tie down the load. Need 8 got 10. 2 of them extra long. Used those in the corners at the read. No way I could fasten the nut with those wheels in place there. 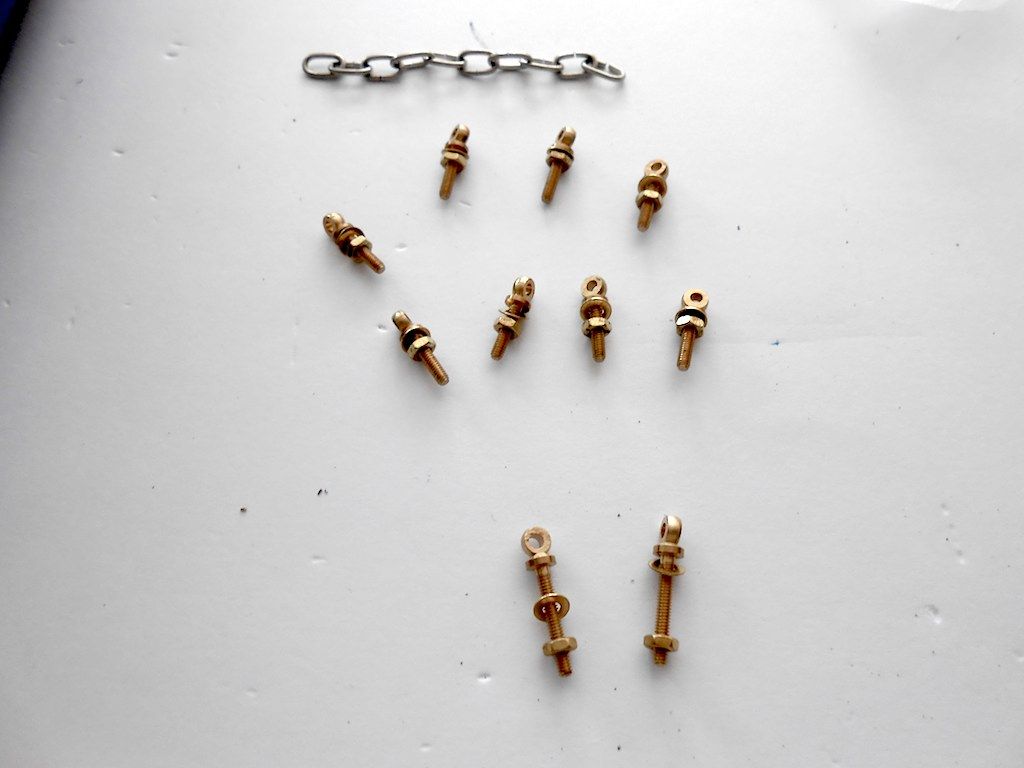 Chain links attached to the eye bolts 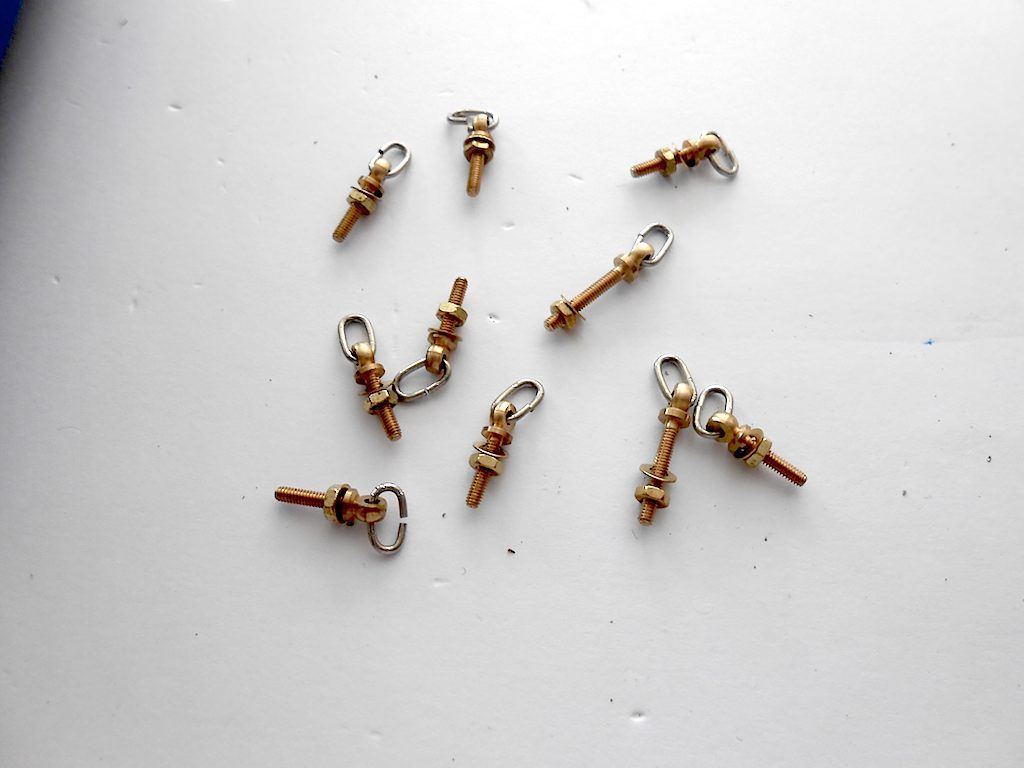 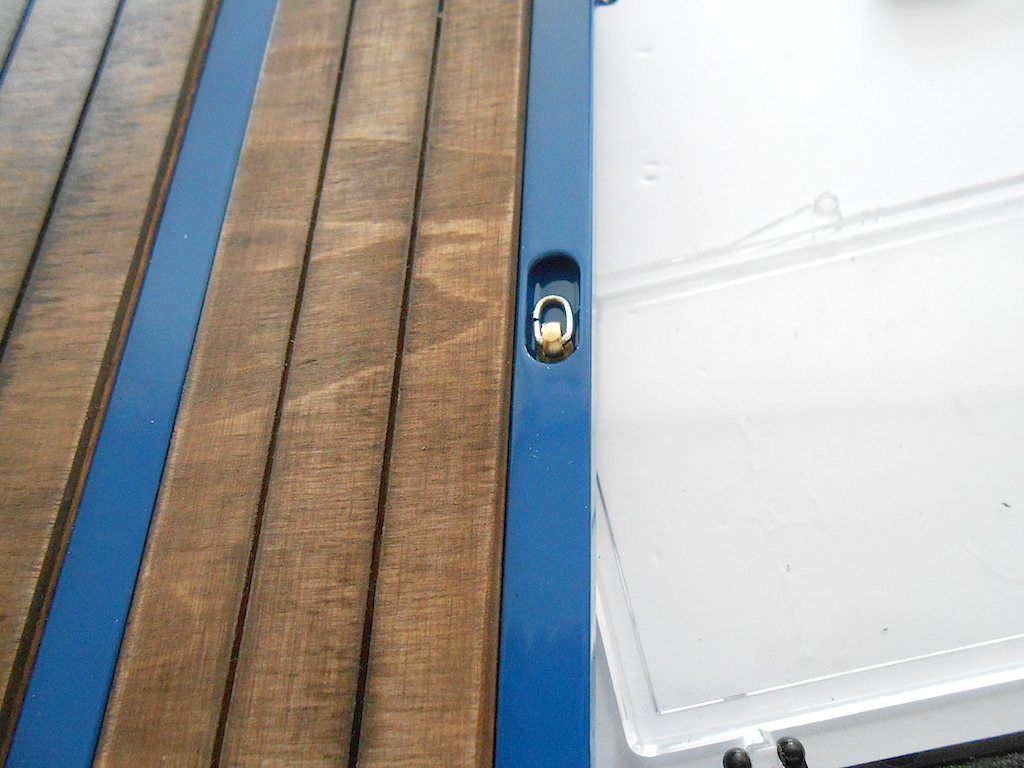
__________________
Cheers, Stephan (Rakthi is the one in the avatar) |
|
#165
|
||||
|
||||
|
Part 2
ScaleART left some indents to have access to the nuts going on the eyebolts, but even if I wanted to use M2 model nuts, I couldn't get the tool in there. So was a bit of a challenge, but after 2 you have a system. 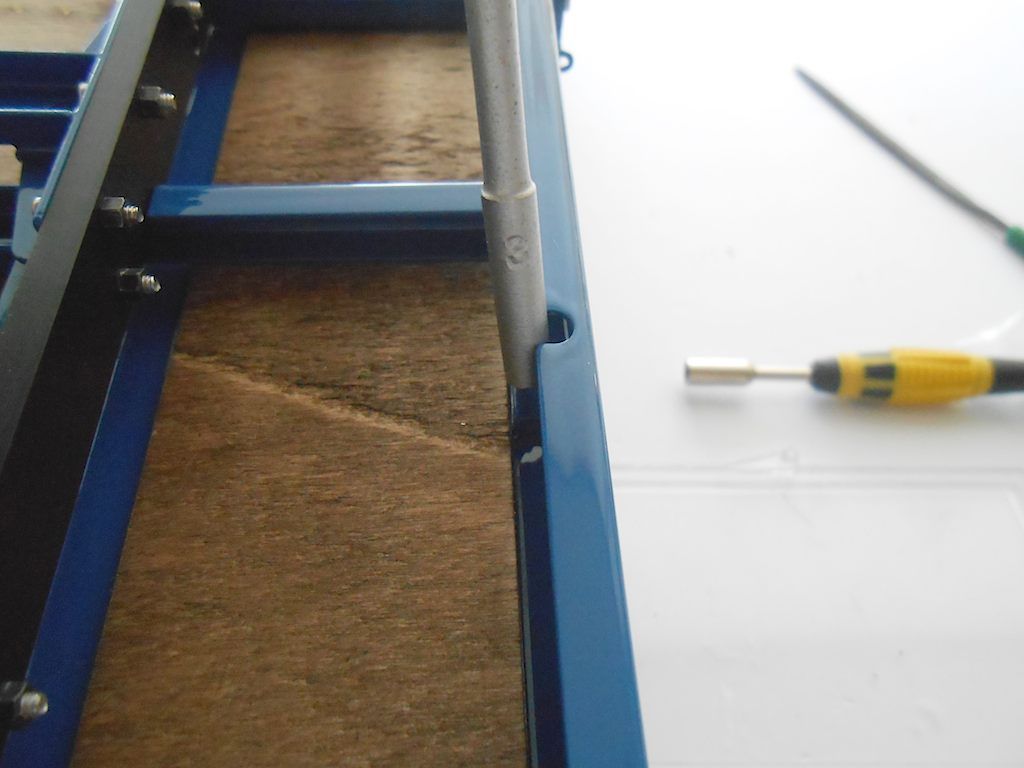 Done 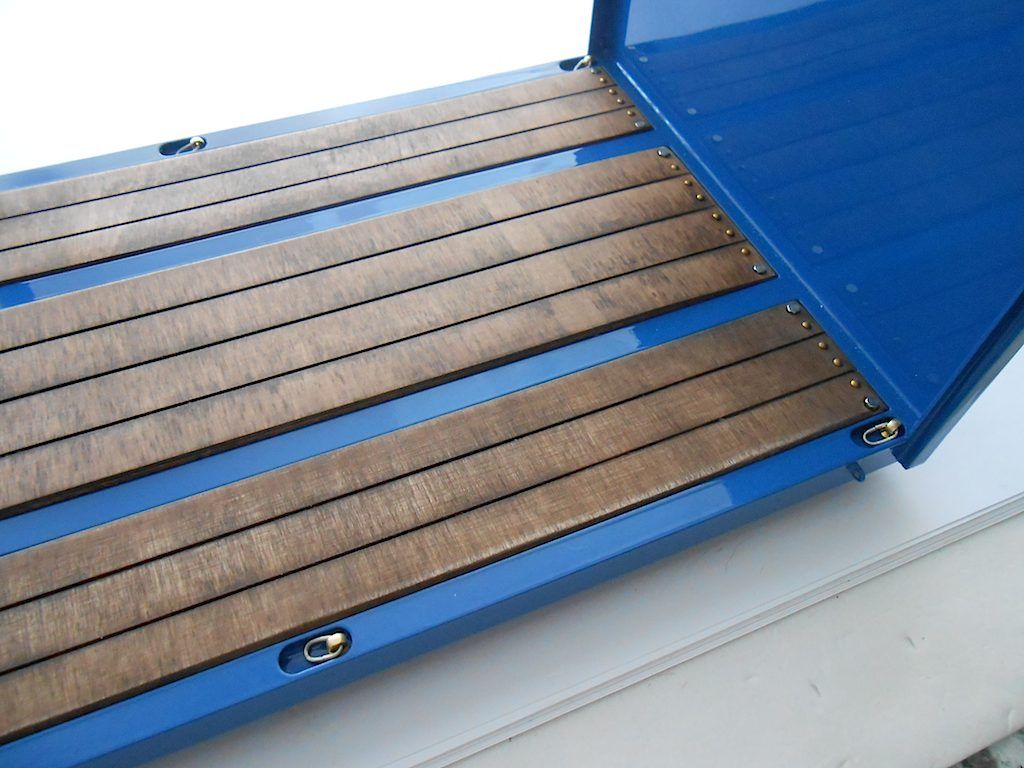 Now prepping the boards. First the rear one. Simple but effective locking mechanism. Needs some Loctite on the nut. 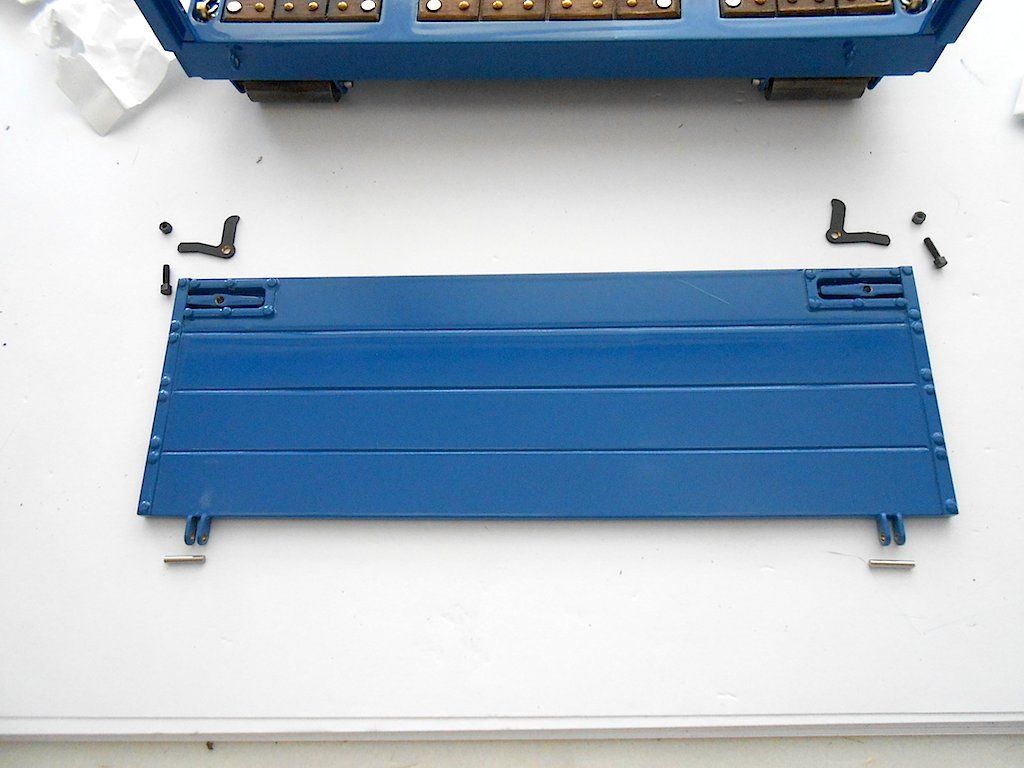 The pins gets fastened with crazy glue where they go through the holes. Manual stated to run a 1.5 mm bit through the hole before going through this procedure. On my kit this was done already. 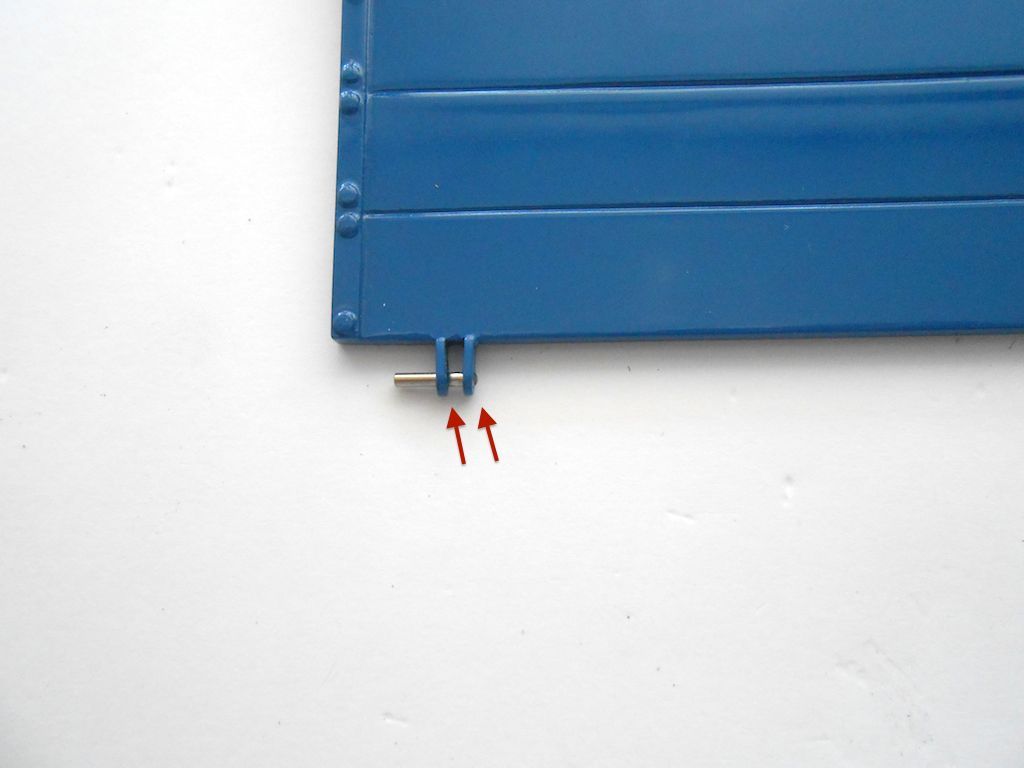 Same for the longer ones on the side. Have to be careful though, one has the pins sticking out on the right and the other on the left. 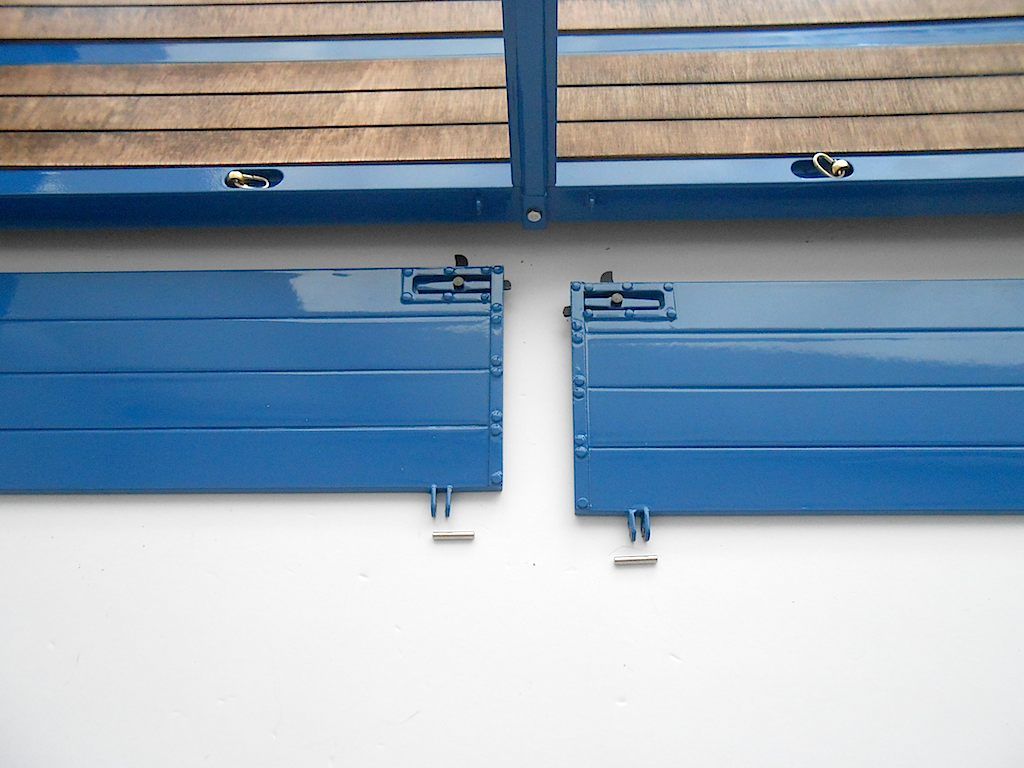 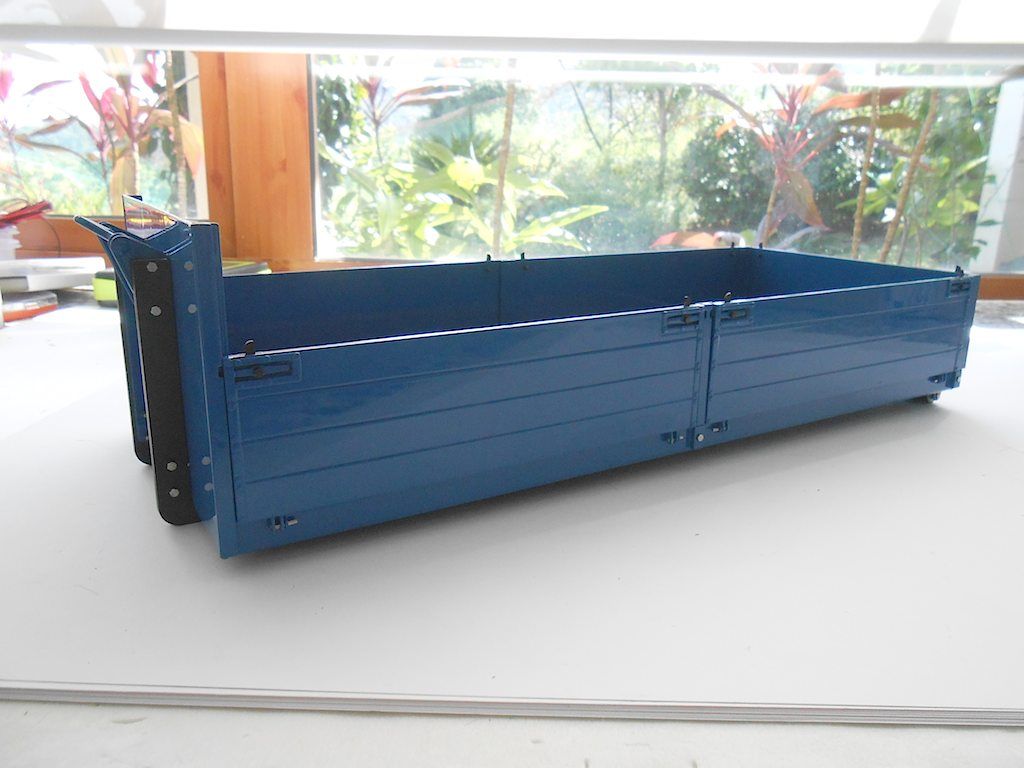 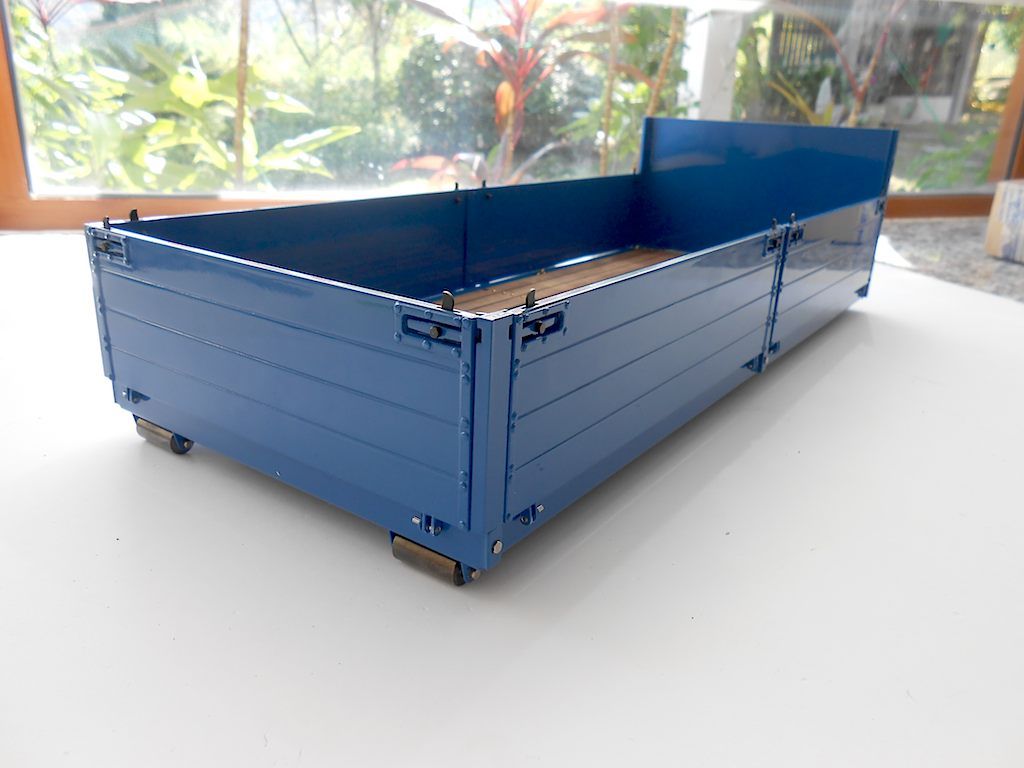 Remembered to put the protection rings on the front wheels. Used a bit of thin double side tape to hold them in place. 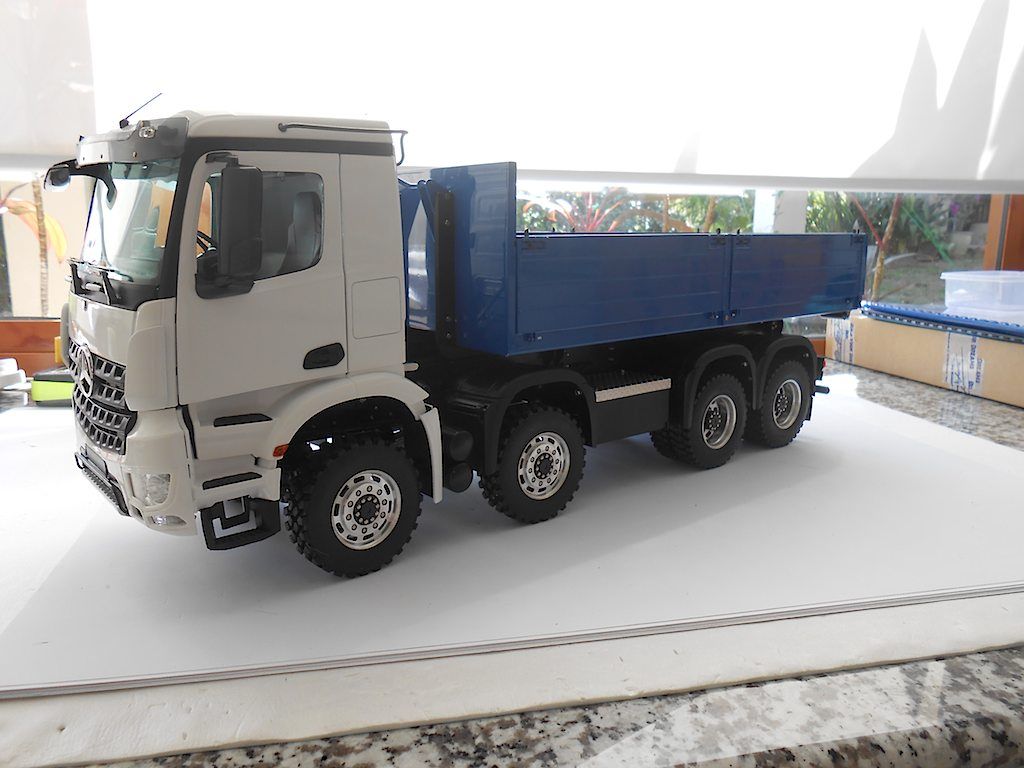 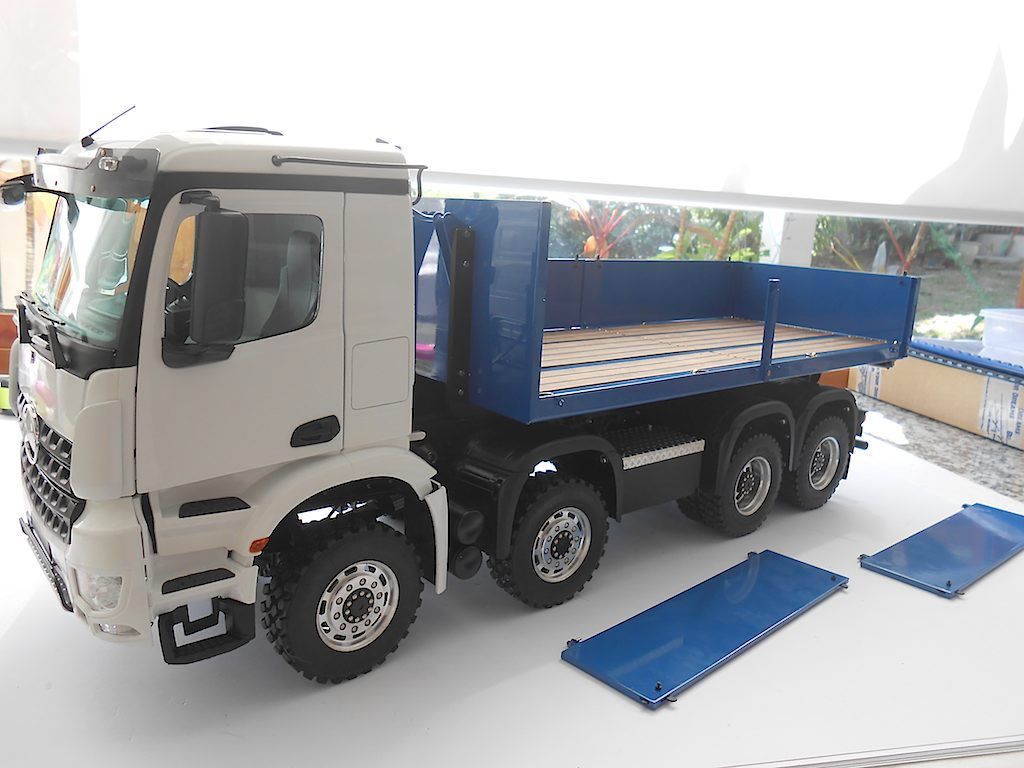 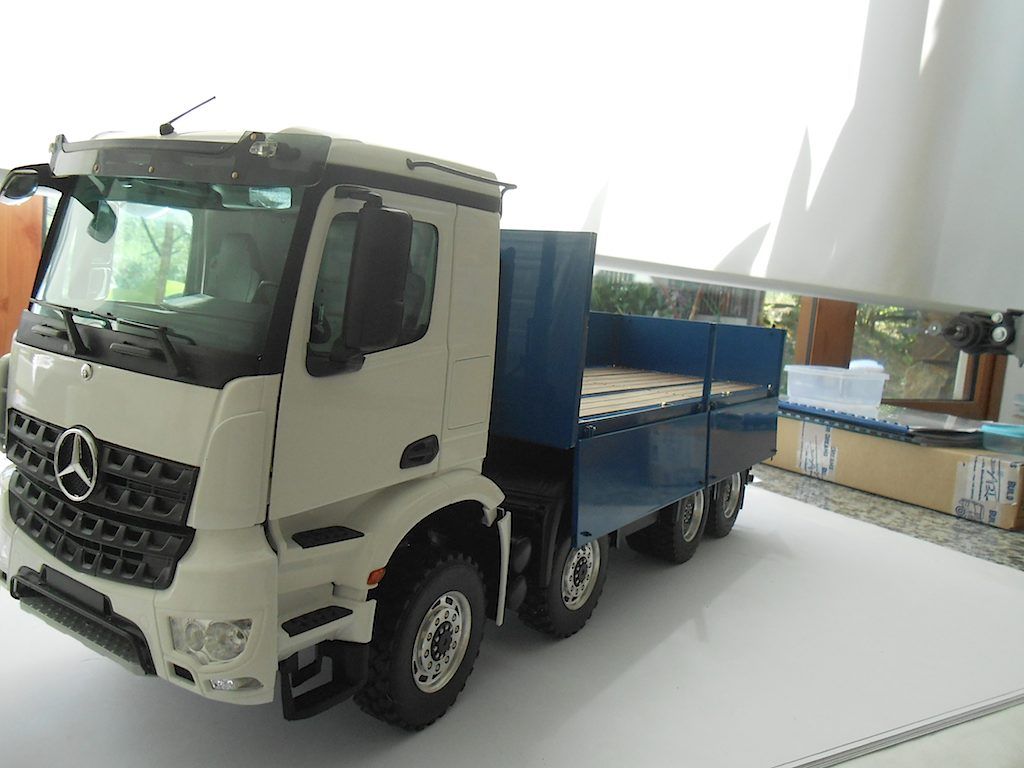 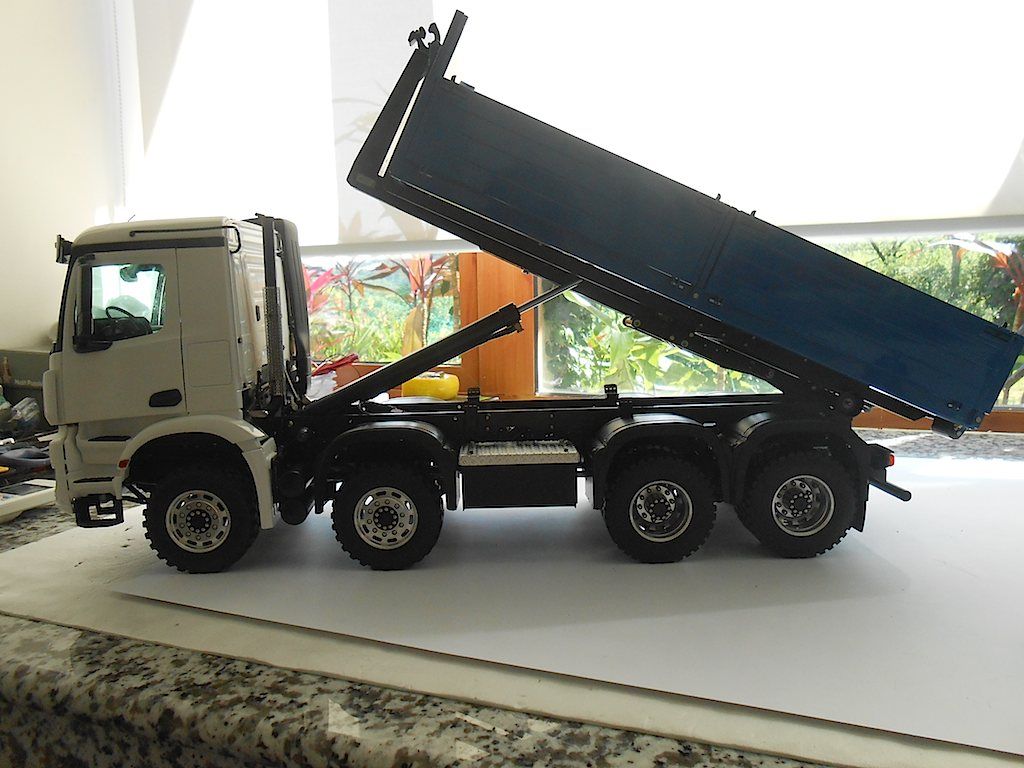 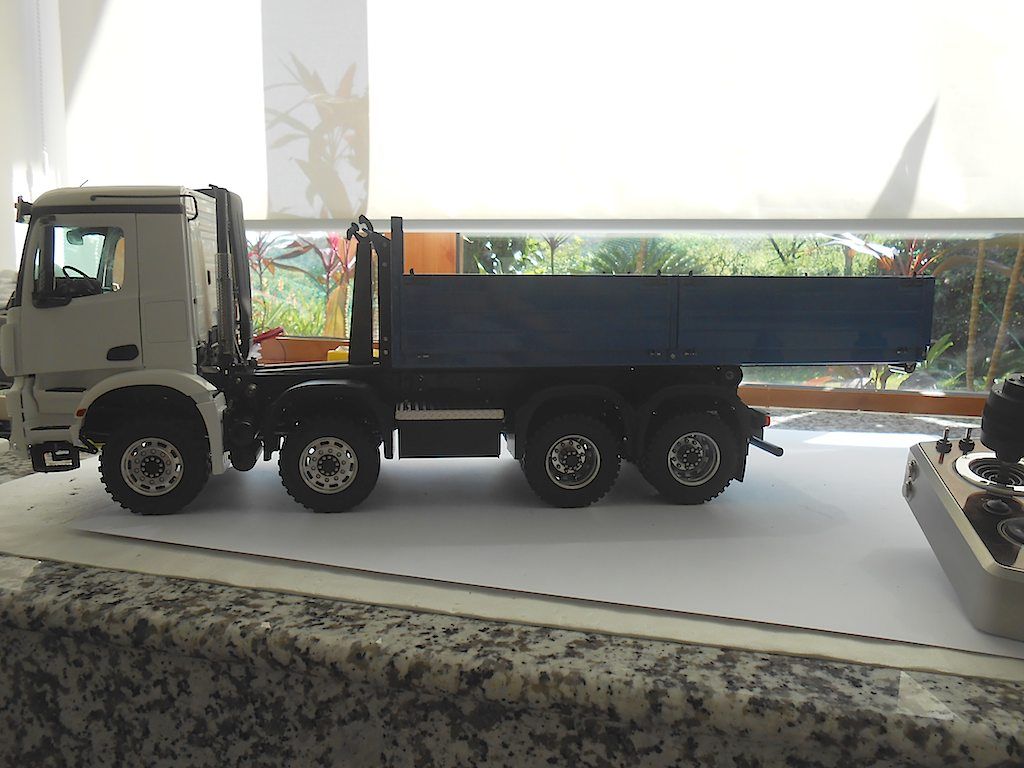 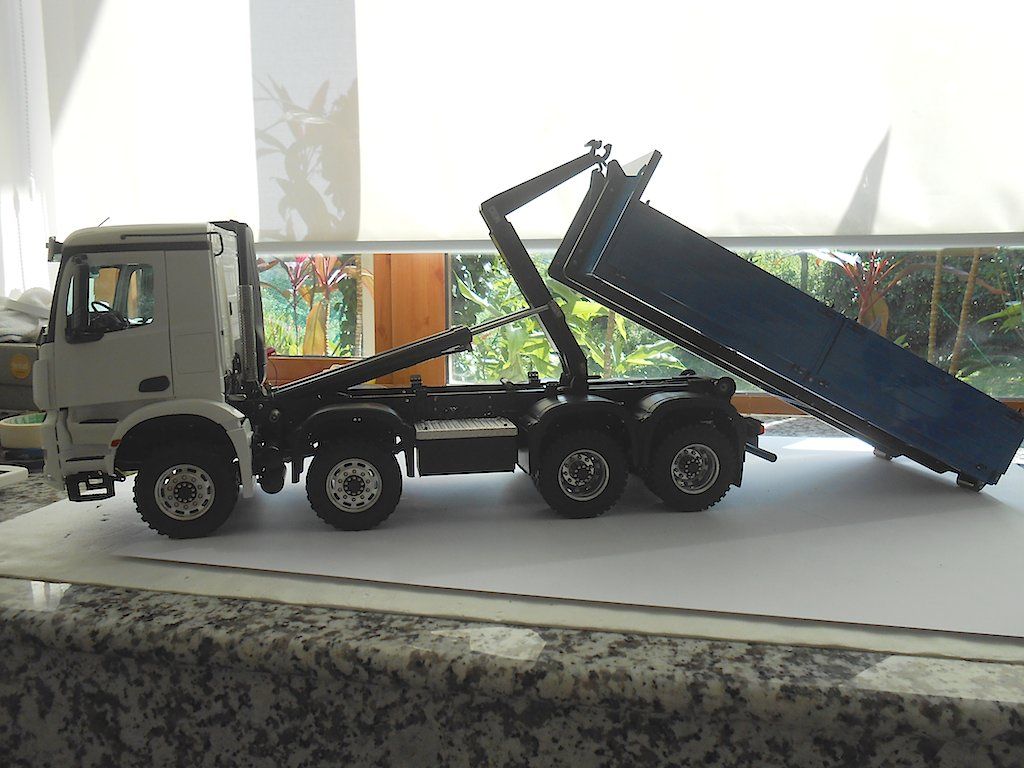 So that's it ... technically the end of this thread ... Now going to run this truck a bit trying not to hit too many things and then see how to sort out the sound and cabin lights. So an update will be in the works. One things for sure, had a great time bolting this together and I can only hope you did too indirectly then.  Cheers! Stephan
__________________
Cheers, Stephan (Rakthi is the one in the avatar) |
|
#166
|
||||
|
||||
|
Truck looks GREAT!! Wasn't sure about the white cab at first- and I have a white truck to build of my own
  - but after seeing the blue container on the truck, You have a winner!! Again, hope you find all of the gremlins in the electronics quickly and easily. - but after seeing the blue container on the truck, You have a winner!! Again, hope you find all of the gremlins in the electronics quickly and easily.GREAT TRUCK!
__________________
LYNN |
|
#167
|
||||
|
||||
|
Thank you tc1cat! And to think I almost got an orange / silver combo ...
lots of trucks here in Malaysia happen to be white and blue. Although they're not Mercs and usually old 4x2s  Mostly brands I've never heard of before from China or Korea and then some local ones. Mostly brands I've never heard of before from China or Korea and then some local ones.Now looking at the truck ... this is not something you are going to toss some muck in ... will have to get another container for the back. A good excuse for another ScaleART fix 
__________________
Cheers, Stephan (Rakthi is the one in the avatar) |
|
#168
|
||||
|
||||
|
Beautiful build Stephen !!
I really hate to see this come to an end, when you gonna built the next one (-: Alan
__________________
To view links or images in signatures your post count must be 10 or greater. You currently have 0 posts. |
|
#169
|
||||
|
||||
|
Thanks Alan ... So do I - hate it that is has come to an end - I'm a bit lost now since this build has kept me busy for about 3 months. Guess I can finally put the 3rd coat of varnish on the front door now.
 Very tempted to get another one, but €€€€ ... Stephan
__________________
Cheers, Stephan (Rakthi is the one in the avatar) |
|
#170
|
||||
|
||||
|
Hi Stephan,
you did a really good job with this build! It was very interesting for my to have a look at the latest version of the roll on-/off-tipper. By the way, I think you absolutely need two other containers ... the flat one and the high version. 
__________________
Greetings Christian You can find some of my RC-models on To view links or images in signatures your post count must be 10 or greater. You currently have 0 posts. Normally I´m speaking german, please forgive my mistakes in English. |
|
#171
|
||||
|
||||
|
Yes Christian, I see where this is going, first 2 more containers, then the trailer, then a 2nd truck ...
  Stephan
__________________
Cheers, Stephan (Rakthi is the one in the avatar) |
|
#172
|
||||
|
||||
|
Yes Stephan, I think this would be the best way to go on ...

__________________
Greetings Christian You can find some of my RC-models on To view links or images in signatures your post count must be 10 or greater. You currently have 0 posts. Normally I´m speaking german, please forgive my mistakes in English. |
|
#173
|
||||
|
||||
|
Had the truck out in the garden this afternoon. Good thing I went for 8x8. Had to use the diff locks a couple of times to get him to move. I also found out that I had never torqued the 2 nuts holding the wheels onto the first rear axle
  An interesting moment. An interesting moment.One thing for sure, third gear is way too fast for me. 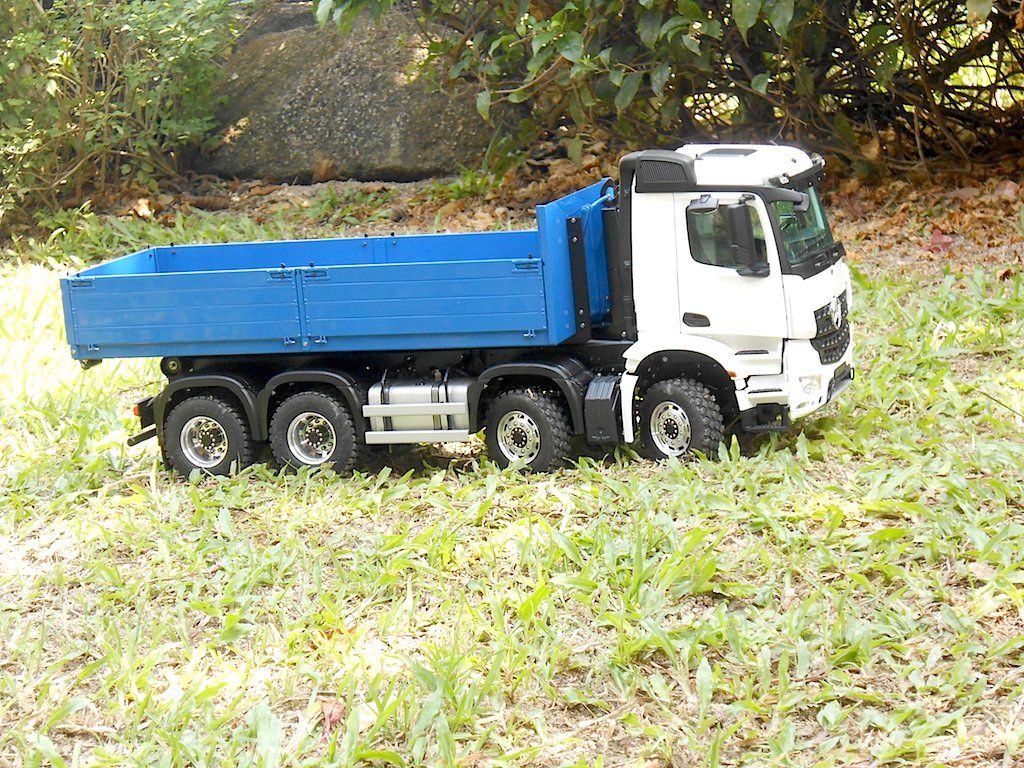 Tried unloading the container, but it got stuck in the grass. Need a smoother surface for that exercise. Meanwhile I can pretend to unload like this. 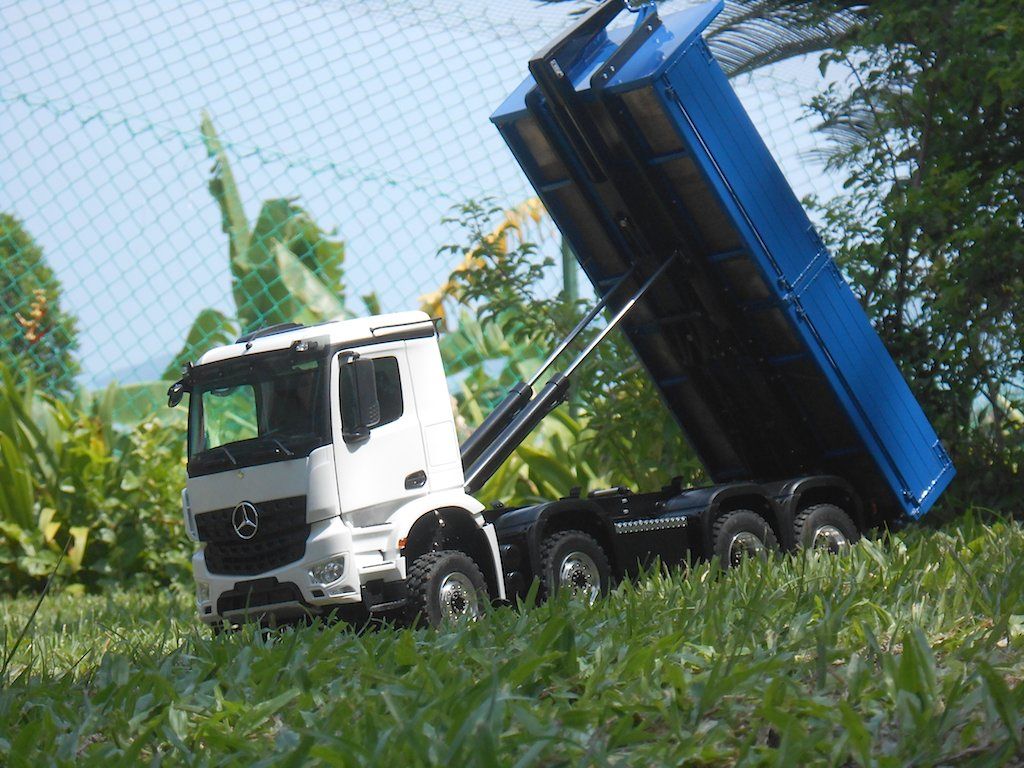 Without the side panels 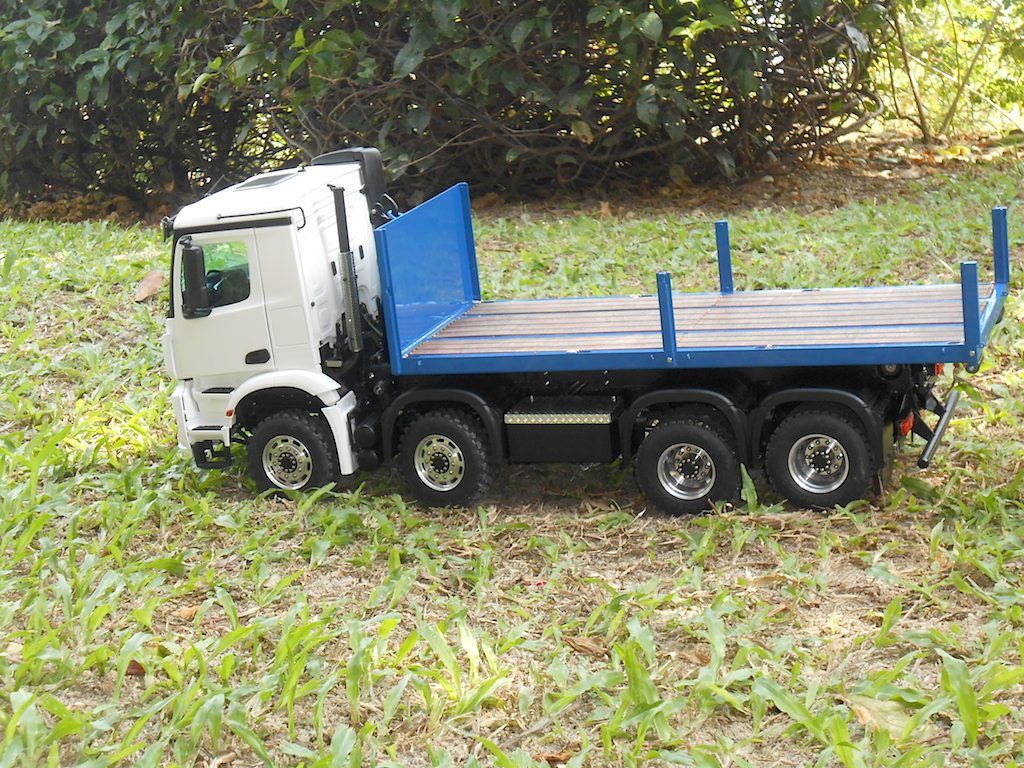 And last picture, containing all the areas that needed some filing. The supports for the rollers could be a bit bigger so there would be no need to elongate the holes in it as to get the pin through it. You can also see how the long eyebolt attaches. (and it looks like I will need a bigger washer there) 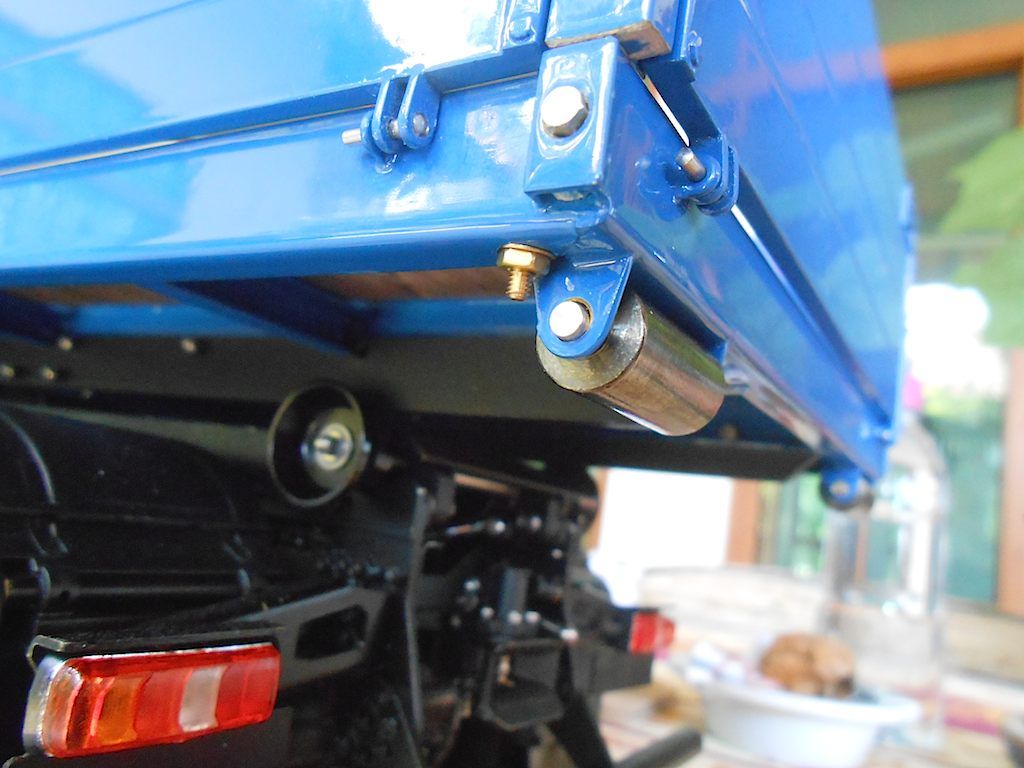 Cheers Stephan
__________________
Cheers, Stephan (Rakthi is the one in the avatar) |
|
#174
|
||||
|
||||
|
great looking truck, a great build to follow from start to finish
|
|
#175
|
|||
|
|||
|
Great model - nicely assembled !
Br, Thomas |
|
#176
|
||||
|
||||
|
I've been following since the first started. Can't wait to see the video of it running
|
|
#177
|
||||
|
||||
|
Hi Brel, Tom, chriss1210 ... Thank you for the comments.
As for a video of it running ... will be a while due to slow 3G internet and nobody around to hold the phone.  Meanwhile I finally found a supplier of decent paint. Now seriously thinking of repainting the chassis in RAL 3002 (red). Since I will have to take the truck partly apart when I replace the 2 supports of the kipping mechanism, might as well do a proper job of it then. Will not be for tomorrow although I did put in an order for the paint. Stephan
__________________
Cheers, Stephan (Rakthi is the one in the avatar) |
|
#178
|
||||
|
||||
|
Time for an update here.
Christian who has the same container in the works pointed out a problem: These hooks that hold the container during kipping are supposed to go completely over the cross piece. 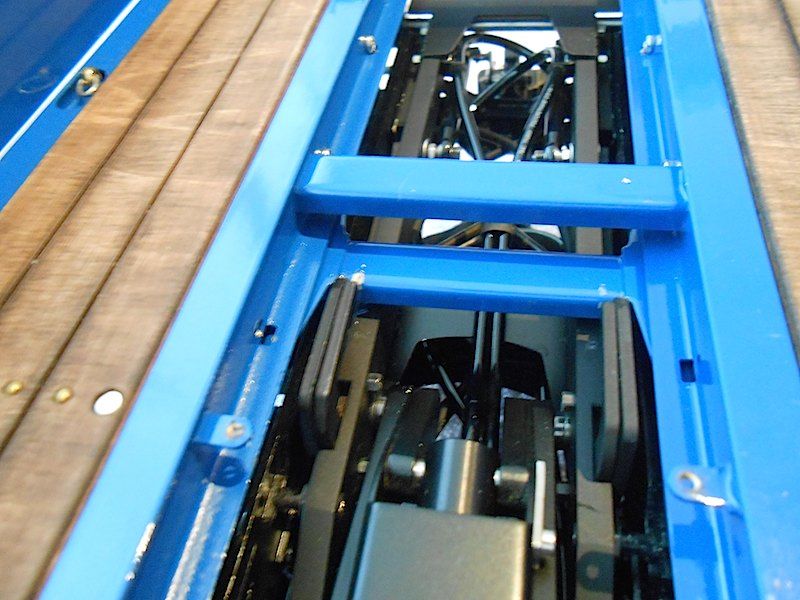 And the sliding hooks that control the locking mechanism for other containers are blocked too, 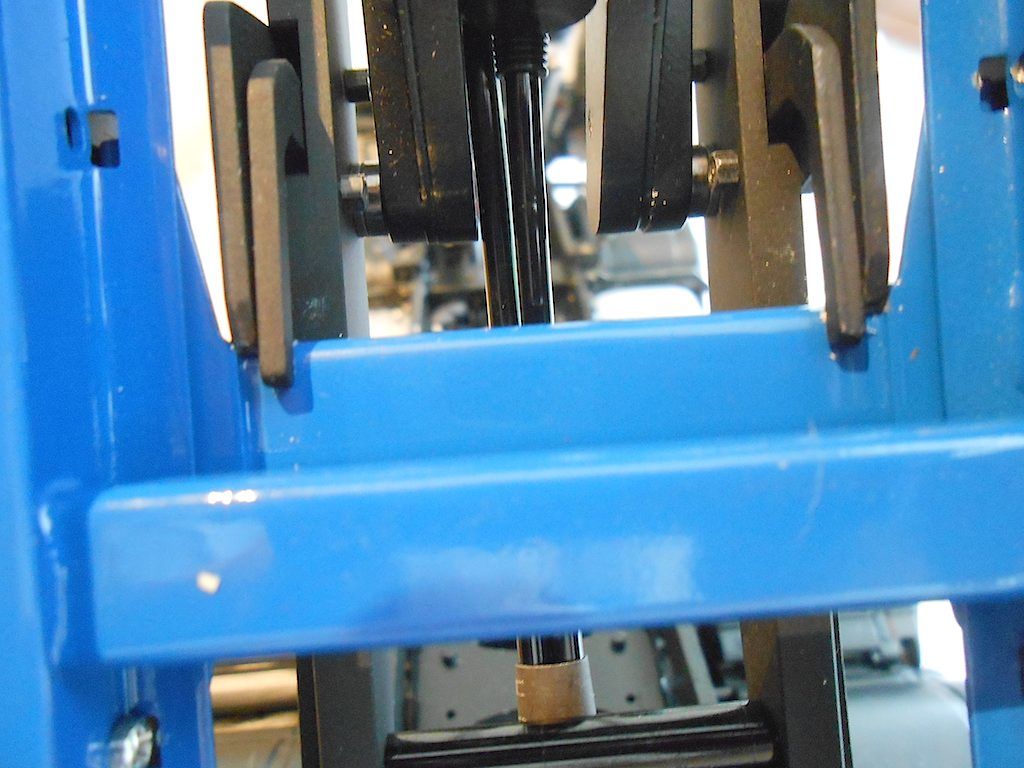 ScaleArt is aware of this problem and will come out with an update to fix this. However in the meantime I decided to see if I could come up with something that would make it work as it should. Since the cross bar is too thick to let the hooks slide over it, filing is in order: 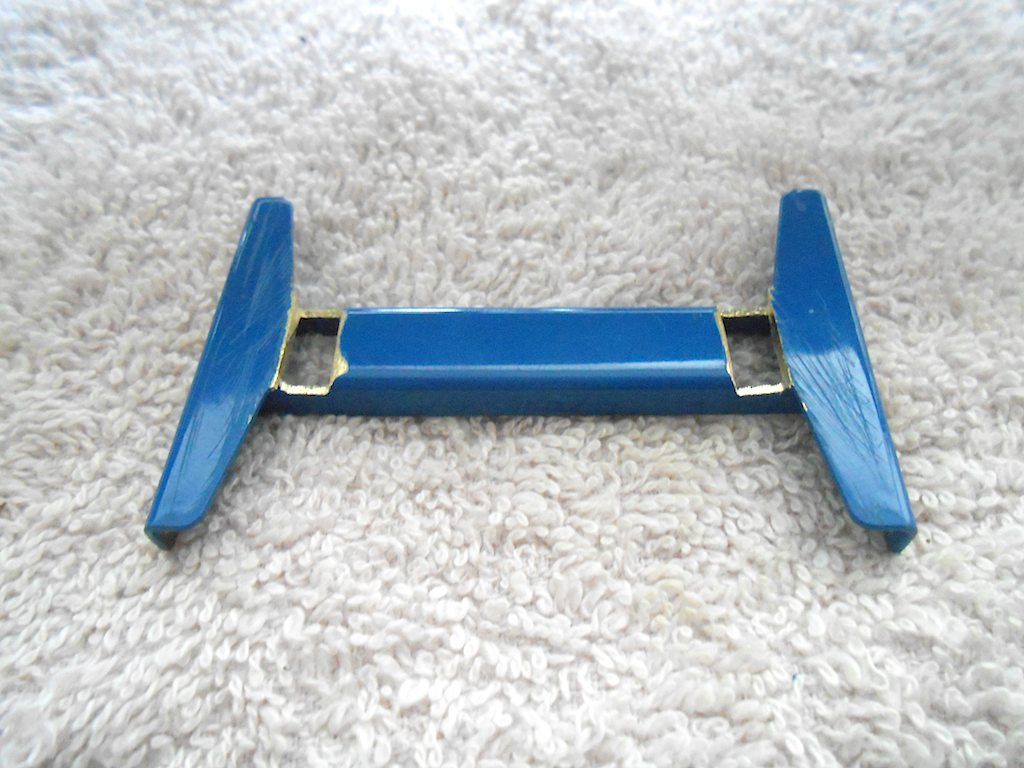 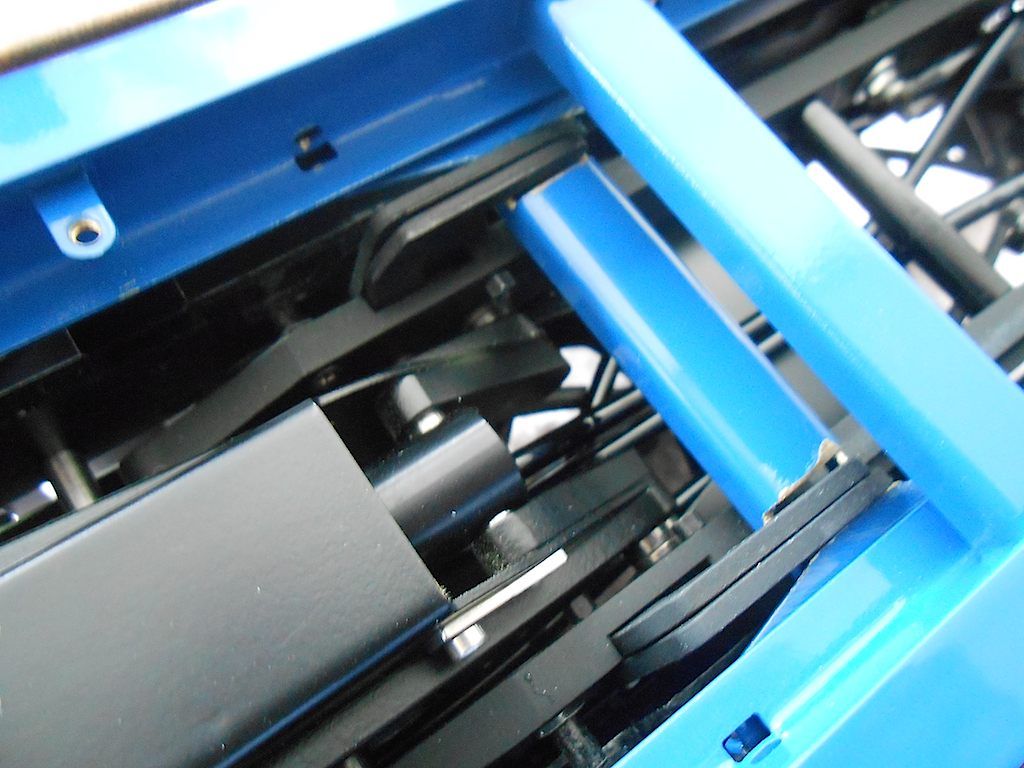 Because a decent chunk of material was removed, a little bit of bracing would be good. 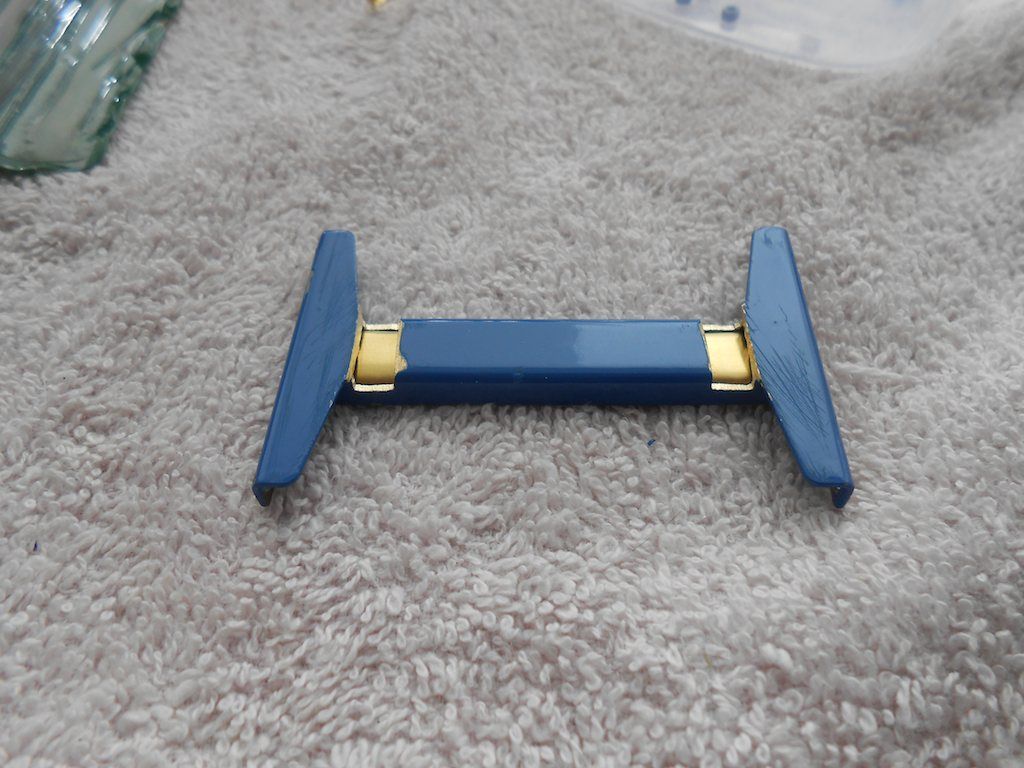 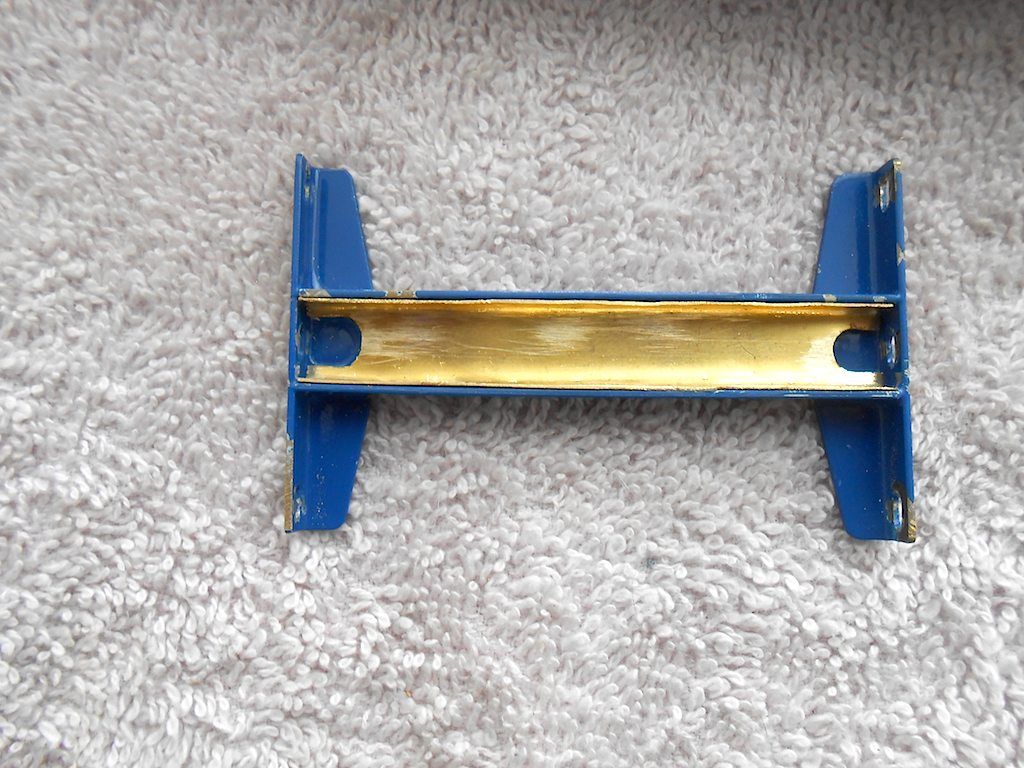 With this all taken care of noticed that now the hook mechanisme slides into the diagonal support of the exhaust - why did I have to order that piece?  - bending it. - bending it.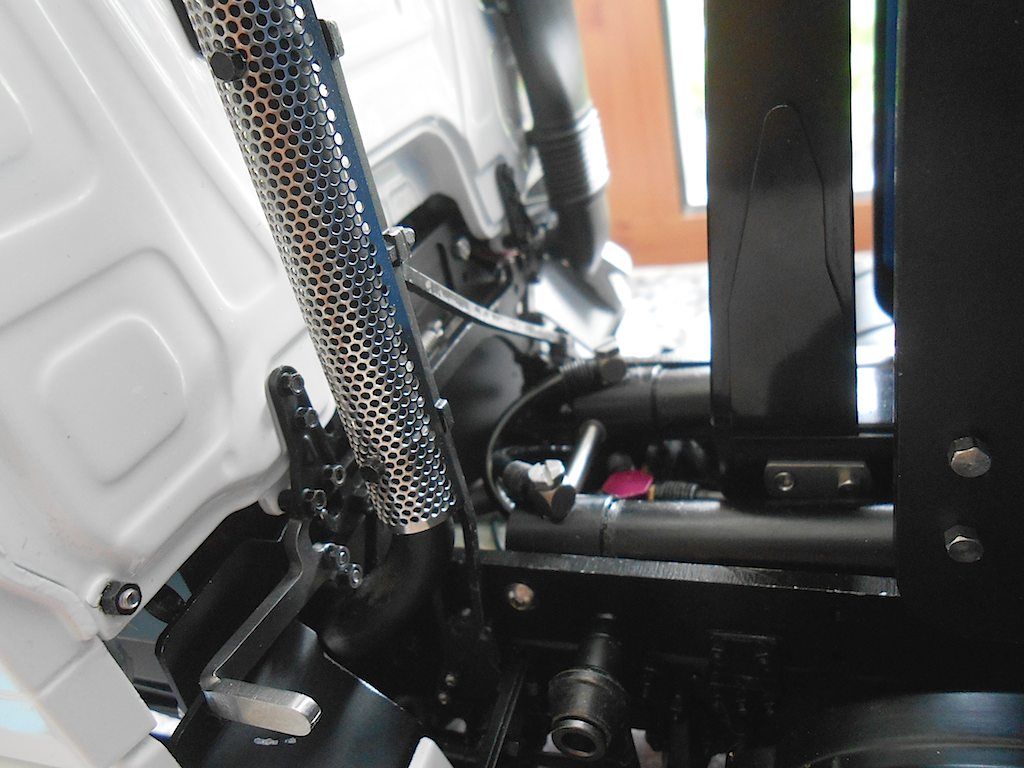 Added a small piece of aluminium to alleviate this problem. 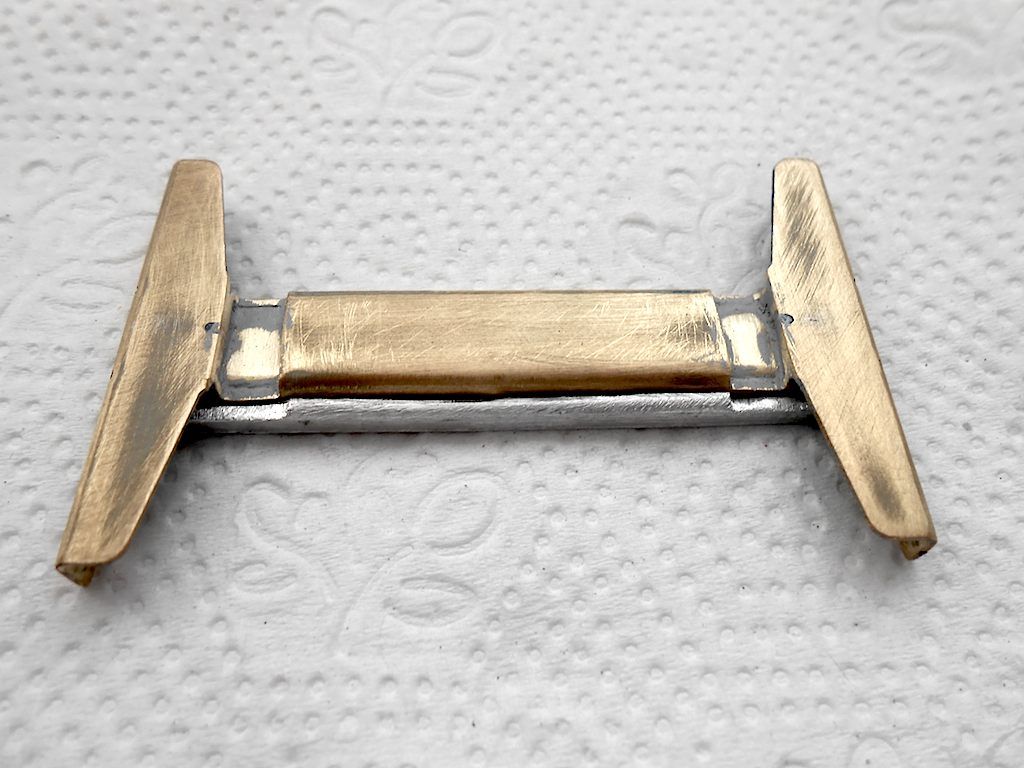 After some filler and sanding tested it. 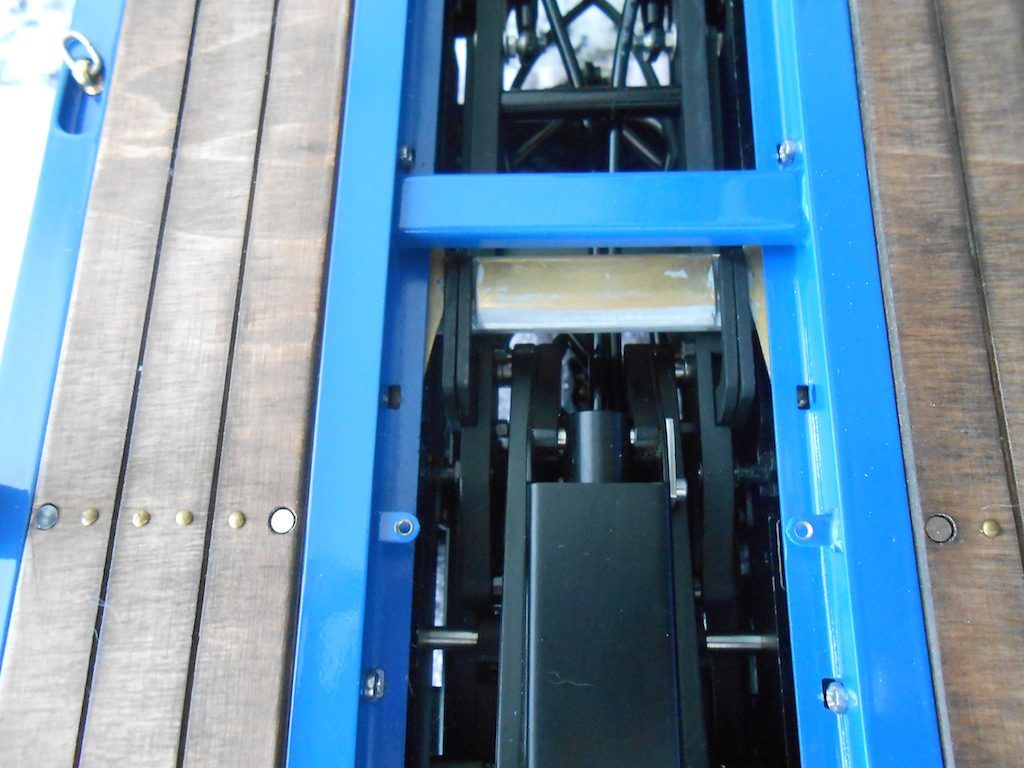 Missing the diagonal support with a hair! Will add some small bits of rubber to give a bit more distance. 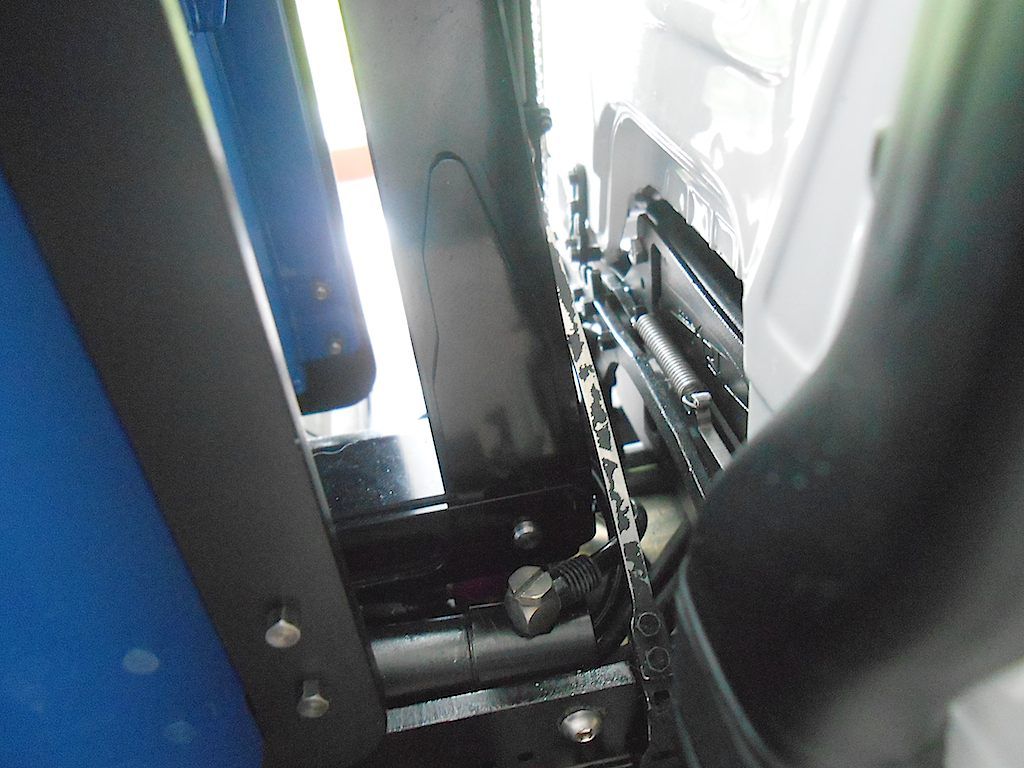 Painted the cross bit black since it is barely visible. 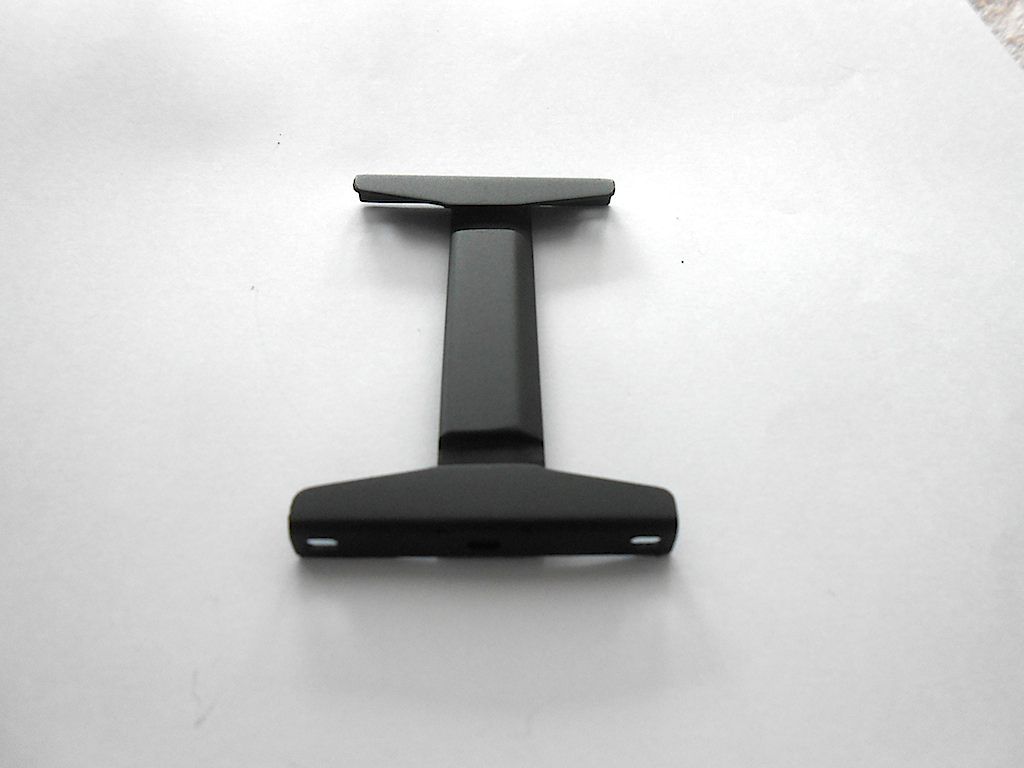 Added 2 rubber bumper stops to it to give more distance 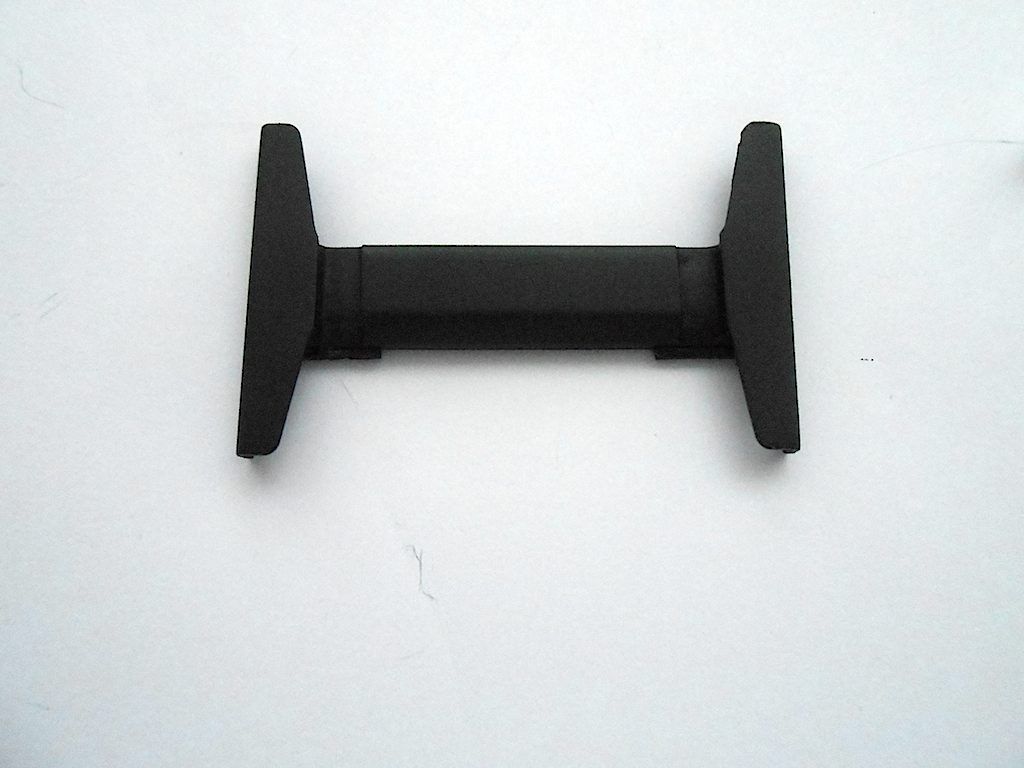 And re-installed. Everything now working in good order  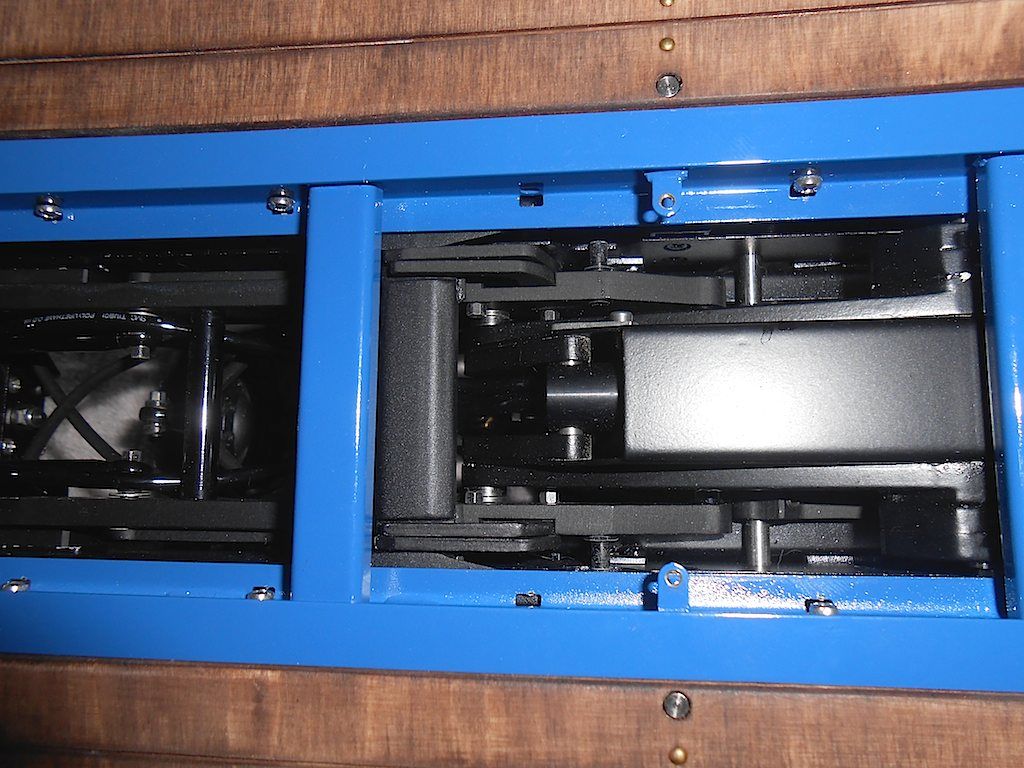 Now waiting for the replacement pieces I messed up when I drilled out the broken bolts.
__________________
Cheers, Stephan (Rakthi is the one in the avatar) |
|
#179
|
||||
|
||||
|
If the ever do a Build of the Year, this should be nominated!
Ken |
|
#180
|
||||
|
||||
|
That's absolutely right, Ken! - Stephan did a really good job!
__________________
Greetings Christian You can find some of my RC-models on To view links or images in signatures your post count must be 10 or greater. You currently have 0 posts. Normally I´m speaking german, please forgive my mistakes in English. |
 |
| Tags |
| 8x8, arocs, scaleart |
| Currently Active Users Viewing This Thread: 5 (0 members and 5 guests) | |
|
|