|
|||||||
| Construction Equipment If it digs, pushes, hauls dirt "off road" post it here. |
 |
|
|
Thread Tools | Display Modes |
|
#21
 03-12-2011, 04:52 PM
|
||||
|
||||
|
That formula is interesting. 15 to the third power, can you explain?

|
|
#22
03-12-2011, 05:05 PM
|
||||
|
||||
|
Quote:
Dimensions are in a certain scale, then areas are in this scale to the 2nd power and volume to the 3rd power. Does this make sense? Kerst
|
|
#23
03-12-2011, 05:50 PM
|
||||
|
||||
|
Quote:
Model: / 1:1 Machine: aprox wt 250# 1,030,000# bucket full 12# max load = 50,500#
|
|
#25
03-14-2011, 04:43 PM
|
||||
|
||||
|
Hello everybody
W900snowman : Why did i used steel for the boom ? It's cheap and was available at my workshop also it was as close to reality as possible. Also it can be copper welded and silver soldered and that is stronggggg. OK it might be over-constructed looking at it afterwards but i am happy with it. But using brass and using soft solder might be a good choice. ( i used brass with my jib because those sizes where easily available in brass , but i used silver solder ) There is is one major problem with copper welding or silver solder and that is the temperature. This generates so much tension in the boom , but it can be done. You have to give it a try and learn by trial and error. Here are the pic's that Steve asked for these are the best i have got. The pictures are from an P&H 5300 from a friend of mine Cees. He also made an American 5299 both in 1:16 scale. We spent a lot time together on shows. Most amazing about these models is that are controlled by one single motor. Everything is controlled with small levers on the crane and works with with clutches and brakes. He build these models long time ago and these models where my inspiration to build my model. After all those years he is done with hobby and moved on to other things in life so he selling them. Don't now if it's allowed in this section ( if not moderator please remove the link ) but here is a link to his selling page with some more pic's. http://members.home.nl/cjrotering/ Another good friend of mine is building a 5299 American in 1:10 scale can post some pics of that as well ?? next post : about the tracks. Eef 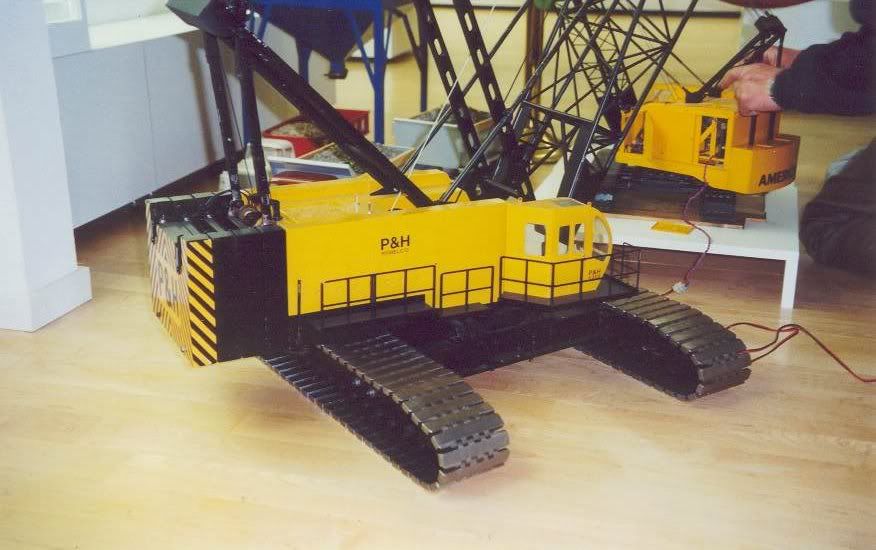 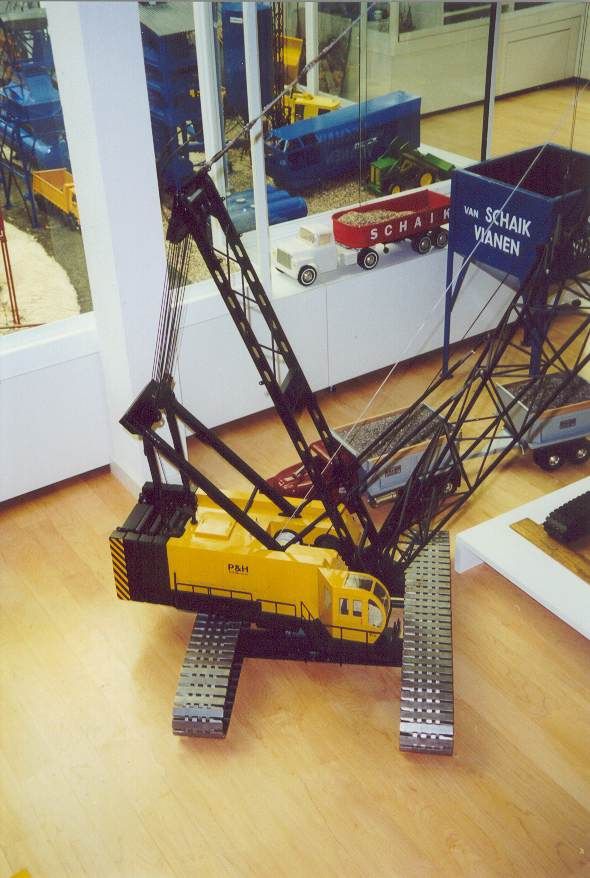 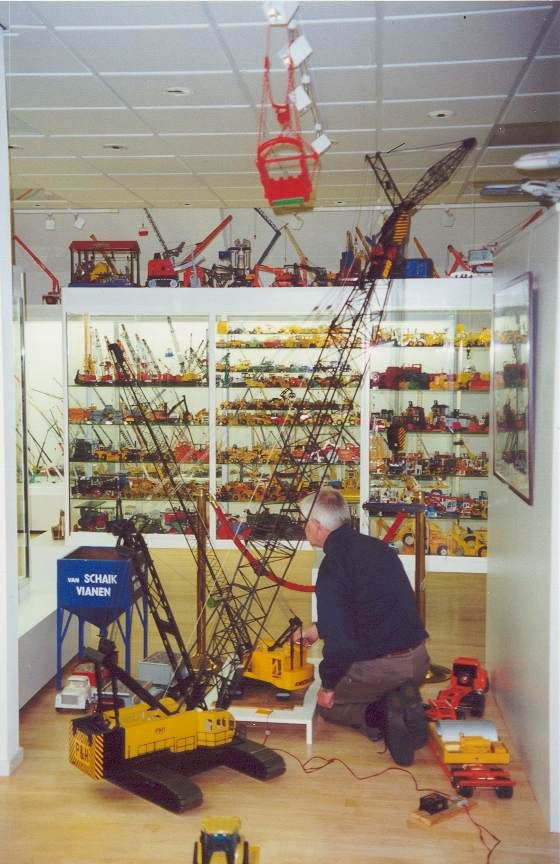 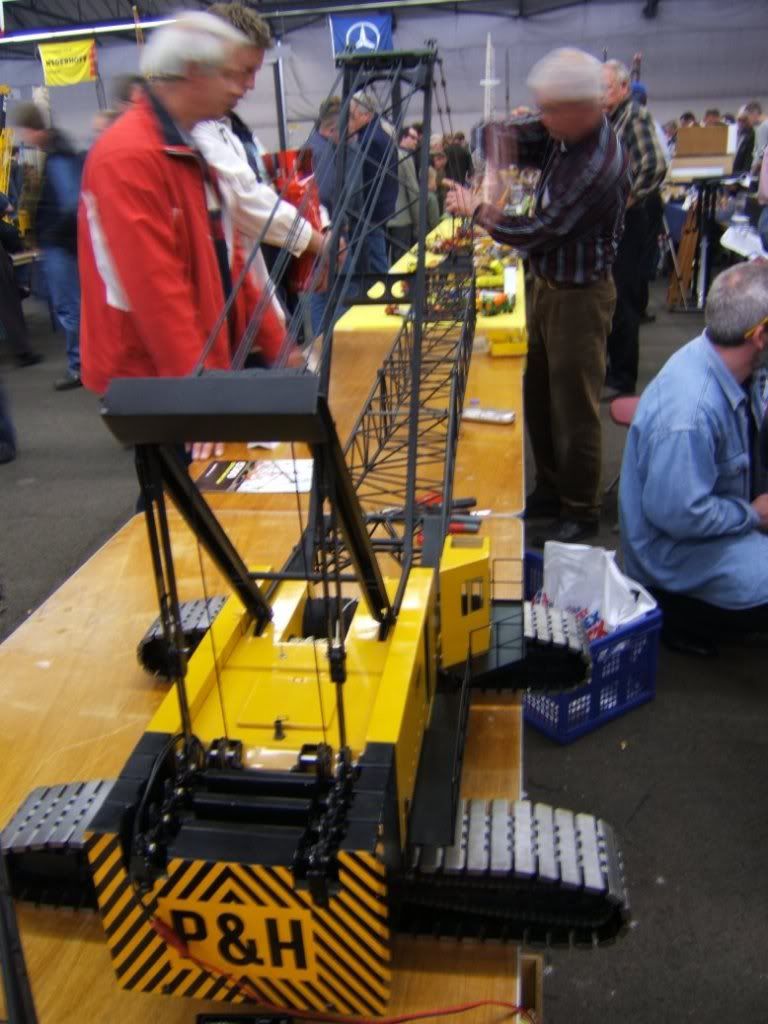 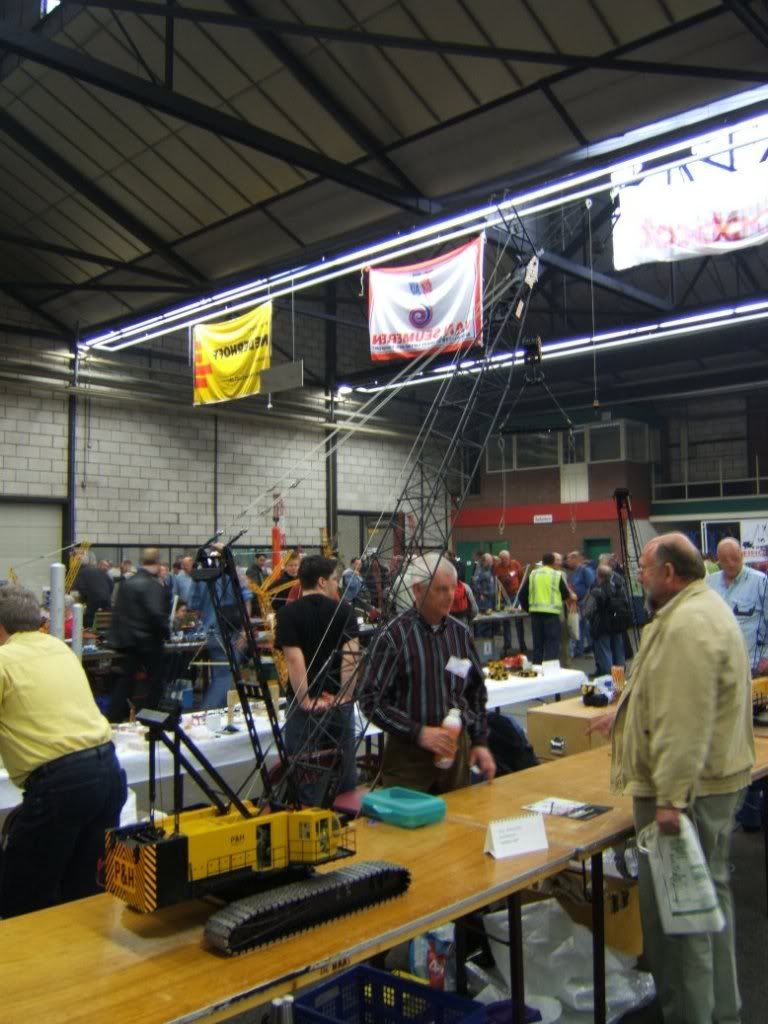 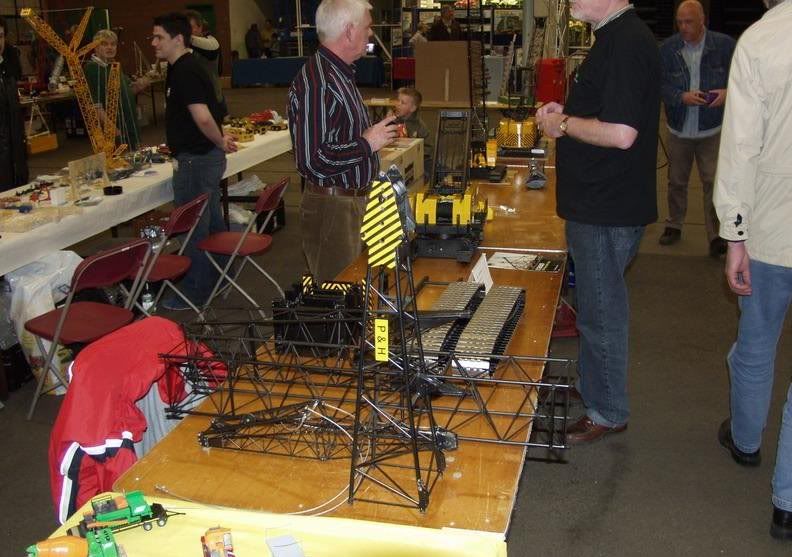 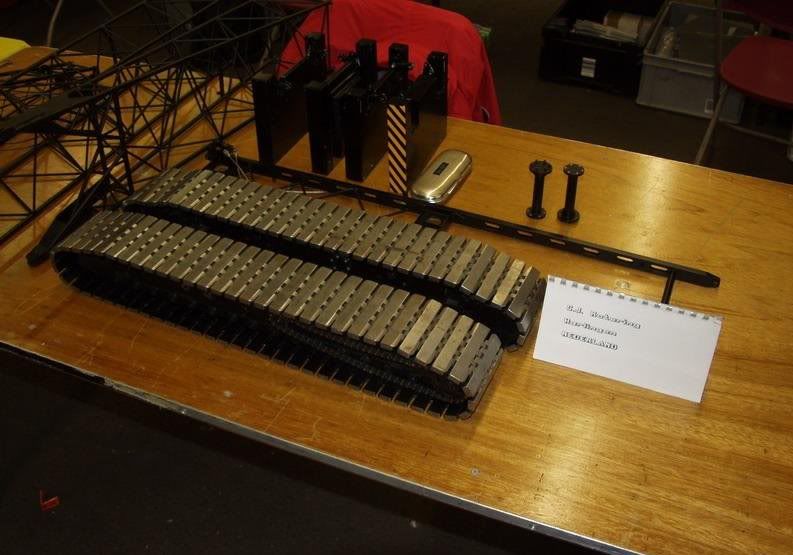 
|
|
#26
03-14-2011, 04:57 PM
|
||||
|
||||
|
I know that guy!
He was a good friend of mine when he built these two crawlers. I helped him get started on the 5299. I had just finished my 4100W then. We used to go to exhibitions together a lot, when I still lived in Holland. kerst
|
|
#27
03-14-2011, 05:55 PM
|
||||
|
||||
|
I figured you would responded Kerst
I now you had good contact , my contact with Cees started when his models where almost finished. This was about the same time that you left holland. I think i have seen only one time both of your manitowoc's and then you where gone. Not sure but have you been back some years later and went to one of the shows again with a manitowoc and a tele crane ?? Eef
|
|
#28
03-14-2011, 10:50 PM
|
||||
|
||||
|
Quote:
I came to the show in 1998 with my 2 Manitowocs and the carrier of the Krupp 180GMT. About 4 years later i came from the USA with my then finished Krupp. Was quite an operation to fly it over! Kerst
|
|
#29
03-15-2011, 07:52 AM
|
|||
|
|||
|
Thanks EEF7260, That makes sense with the boom materials. Thanks for all the pictures too. These cranes are amazing.
|
|
#30
03-16-2011, 03:51 PM
|
||||
|
||||
|
Some pictures as promised about the tracks.
Do not have much pictures from the building stage but here are some. Tracks are made of steel each track plate is made out of 12 separate parts. These were soldered together in a mold to a single track plate. Sandblasted afterwards and thats it. Each side frame has 37 track plates so thats 74 plus a few spare ones. Took me more then a year to make them , this was the start of the model. Reason for doing this first was that i figured that if i quit on this project it would be here. Eef 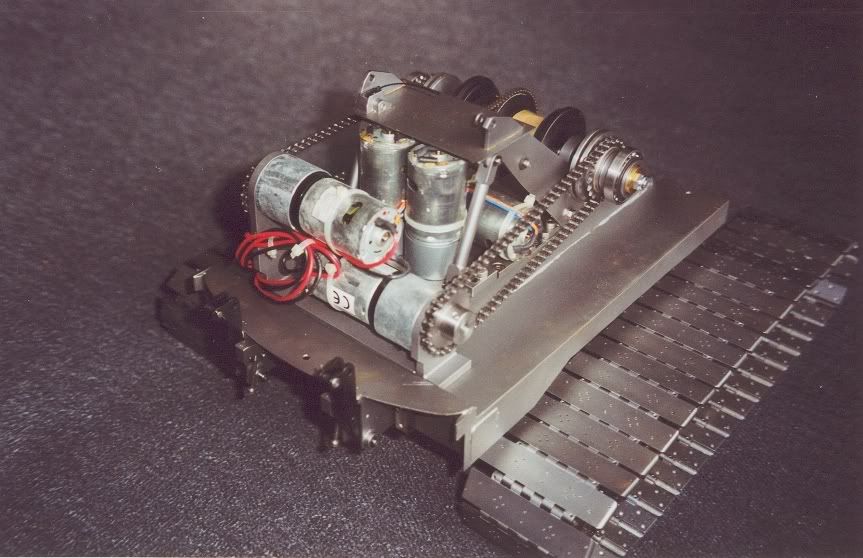 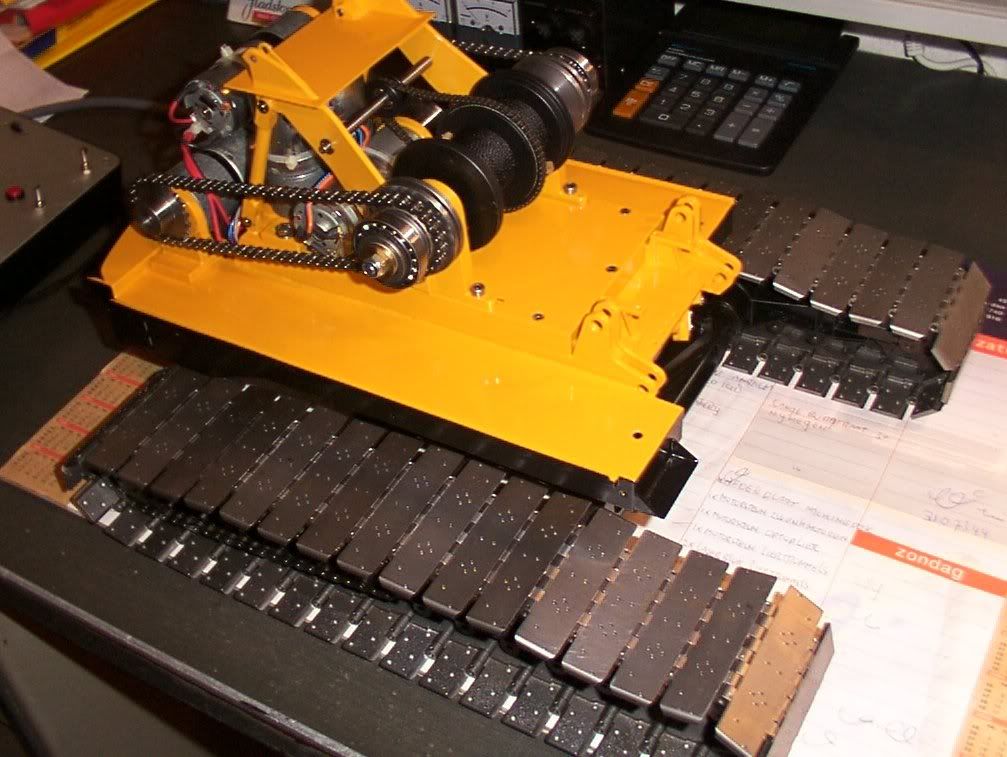 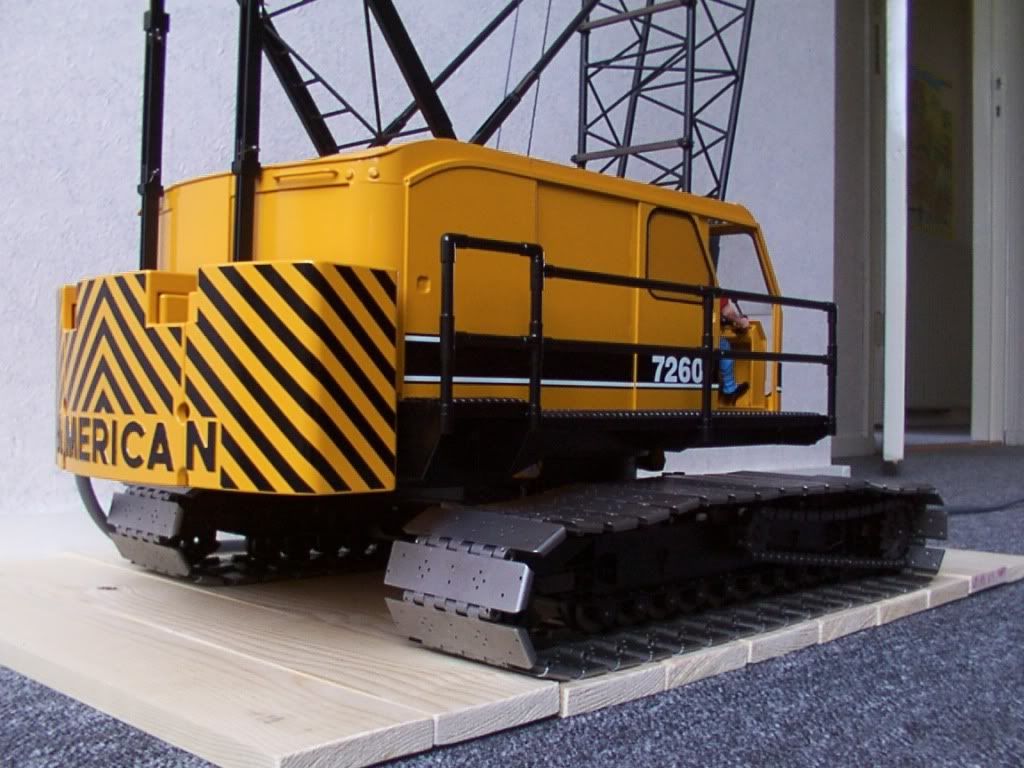 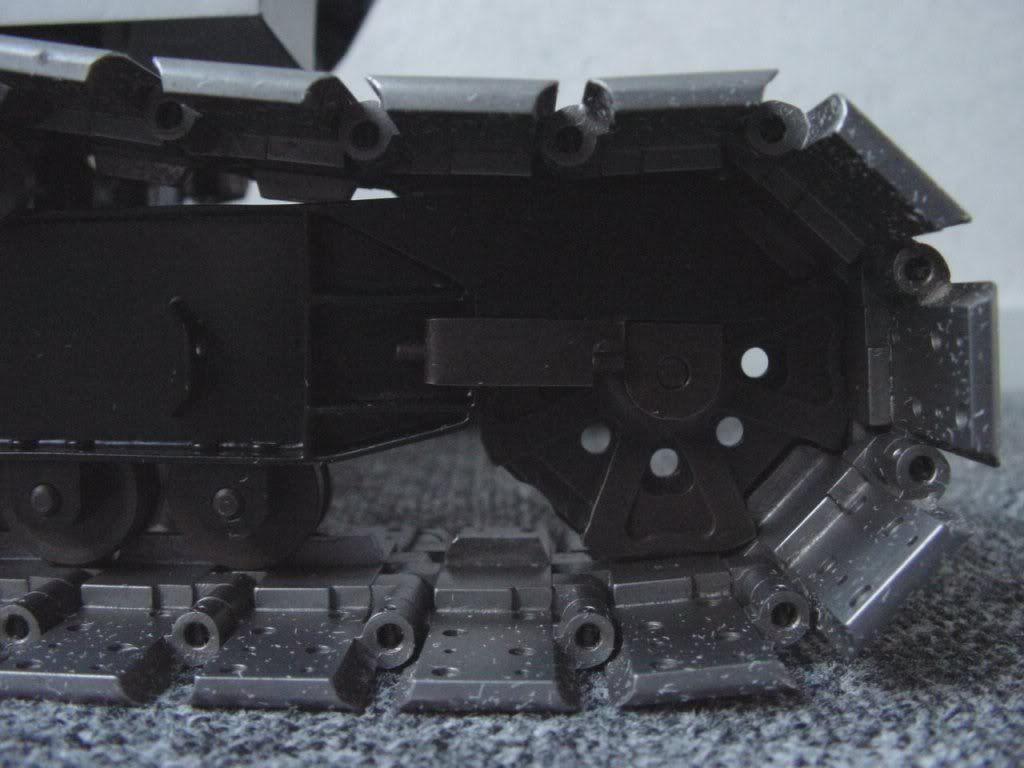    
Last edited by eef7260; 03-16-2011 at 04:33 PM.
|
|
#31
03-16-2011, 04:12 PM
|
||||
|
||||
|
Truly impressive guys these cranes are very very impressive. what will something like this lift in pounds?
__________________
Paul W. "Tamiya Cowboy" HI.. My name is Paul.. And.. I.. Have a Cabover Addiction. RIP FreddyGearDrive 2-12-59/12-19-11 "LET IT EAT" Like Us on Facebook "Corn Field Mafia" To view links or images in signatures your post count must be 10 or greater. You currently have 0 posts.
|
|
#32
03-16-2011, 04:15 PM
|
||||
|
||||
|
Now you got my wheels spinning in my head! Those tiny hinge pieces would make me go nuts. Those had to be a pain to locate,braze then have the pin align.
 If I ever build one of my next machines track links are used by the hundreds-like 304 of them.
|
|
#33
03-16-2011, 04:38 PM
|
||||
|
||||
|
Almost forgot
Also 76 connection pins ( had to be turned on size ) And 152 small locking pins ( these where bought ) I am still surprised that i did not go nuts there. Would never do it like that again. Eef
|
|
#34
03-17-2011, 08:48 AM
|
|||
|
|||
|
You're crazy, really crazy
 . That makes me feel like I should hide my models in the basement. That's just fantastic (all thumbs up). . That makes me feel like I should hide my models in the basement. That's just fantastic (all thumbs up).I think you missed it because it was the last post on the prev page but could you answer my question please? Quote:
|
|
#35
03-17-2011, 09:39 AM
|
|||
|
|||
|
Thank you for the info and the pictures. This build is more amazing every time I look at it. You had to be very patient to get all those tiny parts to line up right. Very nice work.
|
|
#36
03-17-2011, 03:20 PM
|
|||
|
|||
|
Very nice tracks, was parts laser cut? How did you manage to have all parts lined up while brazing? I had to spotweld my parts together before they where brazed in owen.
Do you have any pic from this assembly work? Very nice model! Dan
|
|
#37
03-17-2011, 03:53 PM
|
||||
|
||||
|
Hi lorenzo
Yep sorry missed that one. My English is not perfect so excuse me for that but is this the socket you are talking about. Just to make sure i am not telling you a whole story about the wrong piece. So let me know are we talking about this piece ?? Dan , no everything was was made by milling. I try to find to soldering mold and take a picture in the next few days. Spot welding sounds like a good id too. PS that is one big serious bulldozer you are building there. Looks real good and impressive so far. Tamiya Cowboy : have a look halfway the first page hope that answers your question. 100 US tons = 90 metric tons = 90000 kg divided by 15 to the third power = 26,5 kg maximum lifting capacity. With the shortest boom configuration at 83°. Thats been tested and it passed the maximum load test successfully. Eef 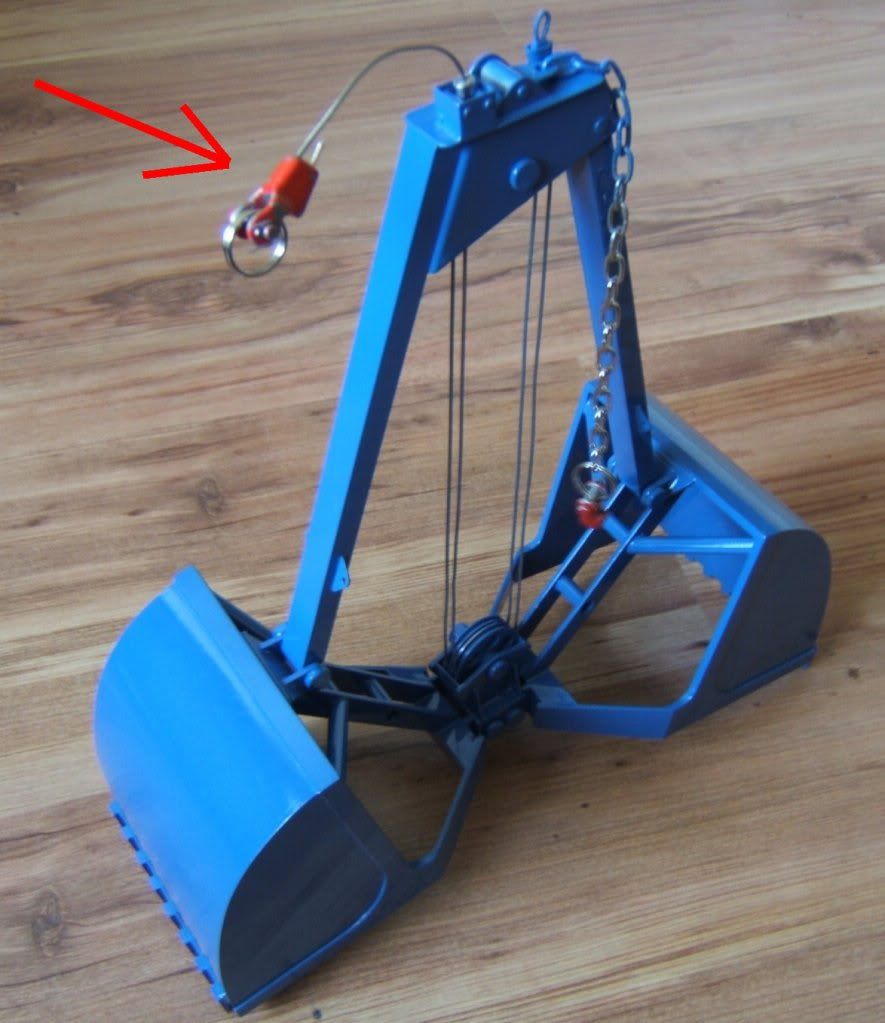
Last edited by eef7260; 03-17-2011 at 04:00 PM.
|
|
#39
03-17-2011, 05:36 PM
|
||||
|
||||
|
Hi Lorenzo
I made the basic shape by milling ( see figure 1 & 2 ) It's not an real socket with an key , sorry it's a bit fake. I made 2 holes ( see figure 3 ) I put the rope trough one hole then make a not and then stick it up again trough the other hole. After the milling i made all the round edges with a file and sand paper. It's not the most easy part to made but it can also be done with a saw and a drill and a lot patience and some skills with a file and sandpaper. Hope this made some sense. Eef 
|
|
| Currently Active Users Viewing This Thread: 1 (0 members and 1 guests) | |
|
|


 .
. Linear Mode

